09 April 2009

Snickerdoodle Muffins


Shamelessly stolen from Pea's blog (these were all the rage in the food blogging community a few years ago, so I patiently waited to post my version).

These are something I could make all the time, and for good reason - they are EXACTLY like the cookie, only in a nice muffin form. The rolling of the batter in cinnamon sugar yields a muffin that has a sugary crackled crust, exactly like the cookie. The muffin interior is so moist and soft and yummy - oh my goodness, heaven. I'm not a gigantic fan of snickerdoodle cookies (they are just *okay*), but man. I could eat these muffins every day of my life.


Just a note for first timers making these: coat your palms in the cinnamon sugar and just plop a scoop of batter on one hand, and bounce the batter quickly between the bowl of sugar and your hands before plopping in your muffin tin. You'll be a MESS, yes, but it also works like a charm.


Snickerdoodle Muffins
(from Peabody)


Ingredients:
2 sticks unsalted butter
1 c. sugar
2 tsp. vanilla
2 eggs
¾ tsp. baking soda
¾ tsp. baking powder
¾ tsp. cream of tarter
¾ tsp. freshly grated nutmeg
1 ¼ c. sour cream
2 ¼ c. all purpose flour
1 c. sugar + 2 Tbsp. cinnamon, mixed together for rolling

Cream the butter and sugar until soft about 3 to 5 minutes. Add in the vanilla. Add in the eggs one at a time and mix until each is incorporated.

In a separate, mix together the flour, baking soda, and baking powder and cream of tarter.
Add the flour mixture and the sour cream alternately to the egg-butter mixture in the additions. Start with the flour and end with the flour. Scrape the bowl occasionally.

Using an ice cream scoop, scoop out muffin batter one at a time and drop into a shallow bowl filled with the cinnamon sugar mixture. Roll the muffin around in the mixture until it is covered completely in cinnamon sugar. Place muffin into a greased muffin tin.

Depending on the size of your tins, you should get about 12 to 14 muffins. Bake them for approx. 20-22 minutes in a 350F oven or until they are golden brown.

07 April 2009

Smoked Salmon Spread


Hubs loves this stuff, and I mean loooooves this stuff. And I can't blame him - it's the best salmon spread I've ever had (and I have tried my fair share in my lifetime). So easy to make, too!

We tend to add extra horseradish (gotta love that bite). Just few things to note: First, go easy on the salt. I season it up at the end, because depending on the type of salmon used, it may not need any salt at all. Second, be sure to make this well ahead of time. This is definitely a spread that takes a few hours for the flavors to really come together.

Smoked Salmon Spread


Ingredients:
8 oz. cream cheese, at room temperature
1/2 c. sour cream
1 Tbsp. freshly squeezed lemon juice
1 Tbsp. minced fresh dill
1 tsp. prepared horseradish, drained
1/4 tsp. kosher salt (Easy on the salt!)
1/4 tsp. freshly ground black pepper
1/4 lb.(4 oz.) smoked salmon, diced

Cream the cheese in an electric mixer fitted with a paddle attachment until just smooth.

Add the sour cream, lemon juice, dill, and horseradish, and mix. Add the smoked salmon and mix well, then season with salt and pepper. Chill and serve with crudites or crackers.

04 April 2009

Blueberry Lime Angel Food Cake


I was cleaning out the freezer the other day, and realized I had 18 egg whites sitting around waiting to be used. Which means one thing in my household - we're making angel food cake.

Angel food cake is one of my favorites. History dates the origin of this cake back to the 1800s, well before rotary beaters even existed. Can you imagine the amount of arm strength it took to beat up a dozen egg whites for a measely cake?? Well, if nothing else that bit of information should the uninitiated that the making of angel food cake even by hand is, indeed, worth the effort.


I, of course, did not make mine by hand (thank goodness for that KitchenAid mixer, which makes whipping up this cake mind-numbingly easy). Now usually I love this cake plain - to me, regular-old angel food cake with maybe some fruit topping is just sublime. Angel food cake is like a baked version of cotton candy - sticky and sweet and light as can be. It doesn't need a lot of decoration to be fantastic. However, I had not only a great berry sauce to use up, but also some limes and blueberries that were getting near their end.

So I did dress up the cake a wee bit with the blueberries and lime, and then figured 'what the heck' and buried all of that in berry sauce. It was all very good! The blueberries didn't really weigh down the cake as I was worried they might do, and the limes gave things and extra zing that you don't get from any other flavoring (much more assertive than lemon). All in all very good! Take advantage of that lovely spring weather folks, and make this cake....

Blueberry Lime Angel Food Cake
(Adapted from CDKitchen)


Ingredients:
1 1/2 c. sugar, divided
1 c. sifted cake flour
12 large egg whites
1 1/4 tsp. cream of tartar
1/2 tsp. salt
1 tsp. vanilla extract
1 1/2 c. fresh or frozen blueberries
2 Tbsp. sifted cake flour
1 Tbsp. lime zest

Preheat oven to 375 F.

Sift together 1/2 cup sugar and 1 cup flour. In a large bowl, beat egg whites with a mixer at high speed until foamy. Add cream of tartar and salt; beat until soft peaks form.

Add 1 cup sugar, 2 tablespoons at a time, beating until stiff peaks form. Sift flour mixture over egg white mixture, 1/4 cup at a time; fold in. Fold in vanilla and blueberries. Combine 2 tablespoons flour and lime rind; toss to coat. Sprinkle over egg white mixture; fold in.

Spoon the batter into an ungreased 10-inch tube pan, spreading evenly. Break air pockets by cutting through batter with a knife.

Bake at 375 F for 40 minutes or until cake springs back when lightly touched. Invert pan; cool completely. Loosen the cake from sides of pan using a narrow metal spatula. Invert cake onto plate.

01 April 2009

Ribollita


We got a late winter (well technically early spring) storm this past weekend, sleet and ice and some snow - lotsa sleet and ice, little snow. Kinda annoying, when we've had a few blissful days in the sunny 70s, but hey. I think I can celebrate nature's last homage to winter weather for awhile. Plus it means one last pot of ribollita.


This is one of my favorite soups to make when it's cold out. In fact, check out those pictures - that is not bad lighting, that is steam whitening out my shots. I love love love ribollita in the wintertime - an Italian dish with a charming history, ribollita originated as a soup where all the leftovers went, including the cheese rind and stale bread. It's a great way to use leftover veggies, and at the rate Hubs and I make pasta dishes there are always extra Parmesan rinds saved up in the freezer. And stale bread? Yes, that is usually not a problem to find at our house as well (I do my best to make bread crumbs out of leftover bread when I can, but that doesn't always happen).

It's hot and comforting, and nice and thick thanks to the toasted bready bottom of your bowl. So rich, it's hard to believe you didn't spend all day in the kitchen whipping this up. That is indeed one of the best things about this dish! Takes 45 minutes to an hour, and most of that is simmer time.

Ribollita


Ingredients:
1/4 c. extra-virgin olive oil, plus some for drizzling on bread
1 onion, chopped
1 carrot, chopped
4 oz. pancetta or bacon, chopped
2 cloves garlic: 1 minced and 1 whole
1 tsp. salt
1 tsp. freshly ground black pepper
1 Tbsp. tomato paste
1 (15-oz.) can diced tomatoes
1 lb. frozen spinach, thawed and squeezed dry
1 (15-oz.) can cannelloni beans, drained
1 Tbsp. herbs de Provence
3 c. chicken stock
1 bay leaf
1 or 2 (3-in.) pieces Parmesan rind
4 to 6 ciabatta rolls, halved lengthwise or 1 loaf, sliced
Grated Parmesan, for serving

Heat the oil in a heavy large pot over medium heat. Add the onion, carrot, pancetta, minced garlic, salt, and pepper. Cook until the onion is golden brown and the pancetta is crisp, about 7 minutes. Add tomato paste and stir until dissolved. Add tomatoes and stir, scraping the bottom of the pan with a wooden spoon to release all the brown bits. Add the spinach, beans, herbs, stock, bay leaf, and Parmesan rinds. Bring the soup to a boil, reduce heat and simmer for 30 minutes.

Meanwhile, preheat the oven to 350 F.

Drizzle the ciabatta halves with olive oil. Toast until golden brown, about 5 minutes. Remove from the oven and rub the top of the toasts with the whole garlic clove. Place the toasts in the serving bowls and ladle the soup over the toasts. Sprinkle with Parmesan and serve immediately.

30 March 2009

Banana Crunch Muffins


I have been on a muffin kick lately - we are usually cereal or toast eaters for breakfast, but lately I've just wanted a nice bakery good instead. And muffins are much healthier than fried and iced donuts ;)

Now, these aren't the healthiest muffins but my GOSH -they are good! The chunks of bananas in the muffin help to keep it moist and ensure you really get that banana flavor. The granola, nuts, and coconut help to give a great texture as well. And that crunchy topping is genius. I just made sure that I bought extra coconut/almonds/granola to make the recipe, and mixed them all together to top the muffins. Worked perfectly.


Um, this recipe makes a TON of muffins too, by the way. I halved it and still got 15 muffins out of it (!). Enough for lunches and snacks for the Hubster. And believe me, these still didn't stick around for long.


Banana Crunch Muffins
(from Ina Garten)


Ingredients:
3 c. all-purpose flour
2 c.sugar
2 tsp. baking powder
1 tsp.baking soda
1/2 tsp. salt
1/2 lb. unsalted butter, melted and cooled
2 extra-large eggs
3/4 c. whole milk
2 tsp. pure vanilla extract
1 c. mashed ripe bananas (2 bananas)
1 c. medium-diced ripe bananas (1 banana)
1 c. small-diced almonds
1 c. granola
1 c. sweetened shredded coconut
Additional granola, almonds, or shredded coconut for topping

Preheat the oven to 350 F.

Line 18 large muffin cups with paper liners. Sift the flour, sugar, baking powder, baking soda, and salt into the bowl of an electric mixer fitted with a paddle attachment. Add the melted butter and blend. Combine the eggs, milk, vanilla, and mashed bananas, and add them to the flour-and-butter mixture. Scrape the bowl and blend well. Don't overmix.

Fold the diced bananas, walnuts, granola, and coconut into the batter. Spoon the batter into the paper liners, filling each 1 to the top. Top each muffin with dried banana chips, granola, or coconut, if desired.

Bake for 25 to 30 minutes, or until the tops are brown and a toothpick comes out clean. Cool slightly, remove from the pan, and serve.

28 March 2009

Cherry Chocolate Ice Cream


Mmmm. Cherries. Chocolate. Thank goodness, my sister Anne keeps me in the good chocolate and the Trader Joe's dried cherries :) One of her packages included a dark chocolate cherry bar, and I put it to good use in this ice cream!

I went with a basic vanilla base, then added the juice from some frozen (thawed) cherries. Threw in the chopped chocolate bar and cherries at the and, and voila - cherry chocolate heaven.

PS: Nobody wants to hear about my hurried days, yes? That's okay, I don't really want to complain about them. But! Today we are supposed to be snowed in, so a weekend trip has been cancelled last minute. My house is clean and we have no plans, so I'm making freezer meals and preparing posts for the blog. So look out! No more long spans with no posts, I promise!


Cherry Chocolate Ice Cream
(Adapted from Alice Q. Foodie)


Ingredients:
2 1/4 c. whole milk
1 c. sugar
6 egg yolks
2/3 c. cherry juice or syrup from a can or jar (I used the juice from my bag of frozen cherries)
2/3 c. half and half
1 1/2 c. (thawed) frozen cherries, roughly chopped
1 c. bittersweet chocolate, roughly chopped

Heat the milk and pinch of salt in a 2 qt. saucepan over medium-high heat until scalded (bubbles will begin to form at the edge and it will smell "cooked"). In a separate bowl, beat the sugar and egg yolks together until thick and smooth.

Whisk a little of the hot milk into the sugar and yolk mixture, and then very slowly add the rest, whisking continuously. Pour the egg, milk and sugar mixture back into the pan, and cook over medium- high heat, stirring continuously with a wooden spoon, until the custard thickens and coats the back of a spoon (about 6-8 minutes).

Pour the custard mixture into a shallow metal bowl. Set in an ice water bath and stir to cool - or simply allow to cool at room temperature for a few minutes and place in the refrigerator (use a towel if you have glass shelves). When the custard is thoroughly chilled, stir in the half and half and the cherry juice, reserving the cherries. Refrigerate overnight.

Freeze custard in an ice cream maker according to manufacturer’s instructions. Add the cherries and chocolate pieces when the ice cream is frozen to a soft consistency. Transfer to a container and ripen in the freezer for 3-4 hours before serving.

21 March 2009

Homemade Oreos


Sorry for all those delays! The Hubs now works from home (thank you, Hub's employer! You are saving us lots of commuting $$$ a year...). But: our home computer is kinda therefore busy when he's working, which means I can't get online at home until 7pm or so. And lately, it tends to crap out when I log on. The Internet provider is promising no more problems so: for now, the blog is back!

I made these a few weeks ago, and they were a HIT - tastes just like the real thing. My cookies were a little poofier than necessary (I didn't use Dutch process cocoa, probably the culprit), but they were still great. Crunchy, slightly salty, deep-chocolate cookies with a creamy (lard-filled!) cream center. Mmmm. Thankfully I took these to a potluck, so we didn't have them hanging around the house. That could have been dangerous. For my already-expanding waistline.

Homemade Oreos


For the chocolate wafers:
1 1/4 cups all-purpose flour
1/2 cup unsweetened Dutch process cocoa
1 teaspoon baking soda
1/4 teaspoon baking powder
1/4 teaspoon salt
1 to 1 1/2 cups sugar [see recipe note]
1/2 cup plus 2 tablespoons (1 1/4 sticks) room-temperature, unsalted butter
1 large egg

For the filling:
1/4 cup (1/2 stick) room-temperature, unsalted butter
1/4 cup vegetable shortening
2 cups sifted confectioners’ sugar
2 teaspoons vanilla extract

Set two racks in the middle of the oven. Preheat to 375 F.

In a food processor, or bowl of an electric mixer, thoroughly mix the flour, cocoa, baking soda and powder, salt, and sugar. While pulsing, or on low speed, add the butter, and then the egg. Continue processing or mixing until dough comes together in a mass.

Take rounded teaspoons of batter and place on a parchment paper-lined baking sheet approximately two inches apart. With moistened hands, slightly flatten the dough. Bake for 9 minutes, rotating once for even baking. Set baking sheets on a rack to cool.

To make the cream, place butter and shortening in a mixing bowl, and at low speed, gradually beat in the sugar and vanilla. Turn the mixer on high and beat for 2 to 3 minutes until filling is light and fluffy.

To assemble the cookies, in a pastry bag with a 1/2 inch, round tip, pipe teaspoon-size blobs of cream into the center of one cookie. Place another cookie, equal in size to the first, on top of the cream. Lightly press, to work the filling evenly to the outsides of the cookie. Continue this process until all the cookies have been sandwiched with cream. Dunk generously in a large glass of milk.

18 March 2009

Hi hi


Hi there!

We're currently experiencing a few... ah... "technical difficulties" on the blog, but rest assured - new posts to be up no later than the weekend time.

Until then: happy week to you! Miss Sous Chef Mahni also sends her love, and a quick pictorial to tide you over.


Mahni Presents: Things I Love To Do With My Second-Favorite Auntie (Miss Tinnie):


We love to paint our toes while we trade celebrity gossip!


We love to go to Crayola Land and play!


We also love to dance in front of the mirror!


And we love to read magazines in bed (while eating snacks)!


We love to do The Bump dance!


And order food over the phone at Fritz's Restaurant!


But most of all, we love to dance with our bikini tops on over our clothing while in hotel rooms!


The End!


13 March 2009

Huevos Rancheros


It's Lent. That means not only a time of reflection and penance, but also for some of us: it also means meatless Fridays. Now, I love a good Fish Fry as much as the next person, and my church in particular does a fantastic version that we enjoy most Fridays in Lent. But sometimes, I'm in more of a "let's just eat at home" mood. And I don't want to pull out the batter and frying pan and make cole slaw, I just want a quick dinner and some quality time snuggling on the couch with a good book or movie on the TV.

Enter: Huevos Rancheros. Or more specifically: Smitten Kitchen's version of Huevos Rancheros.


I looooove these things. They are mad-easy to make, are healthy, and come together in no time at all. I usually make the salsa and beans ahead of time, and they both keep in the fridge forever if you want to make these on the fly during the week. Because to be honest: these are awesome any day of the week, not just Fridays during Lent.

These also rock because they are simple to do to order! Hubs likes to pile his Huevos Rancheros high with the beans, salsa, and topped with some meat (this time some leftover on top of the salsa and beans combo. So if you have picky eaters at home that expect a short-order cook, you can indulge them for an evening. Huevos Rancheros For Dinner = Total Win.

Huevos Rancheros
(adapted from Smitten Kitchen)


Ingredients:
6-inch corn tortillas
Shredded cheddar cheese (I used a pre-shredded Mexican cheese blend)
Eggs
Salt and pepper to taste
Black beans (see recipe below)
Salsa fresca (see recipe below)
Cilantro, sour cream, Tabasco, etc. Whatever you want to use to top them...


First, make your black beans and salsa fresca. If you are not feeling up to it: Jen @ SmittenKitchen recommends Goya Black Bean Soup, and I think that a good jarred salsa works just fine instead of the salsa fresca. Prep any other toppings you want to use: shred the cheese, chop the cilantro, get out the sour cream...

Now it's time to cook the egg and tortilla. NOTE: Take Jen's advice to heart: this is not going to win any "prettiest dish" awards, it's gonna be sloppy and untidy. Don't worry about that, it's gonna taste fantastic.

First, heat a medium pan (I used a nonstick, that works the best) over a medium-low or low heat (whatever works best on your stovetop for regular fried/cooked eggs). Get a little spray Pam or oil in that pan, just enough for a slight coat of oil.

Toss a corn tortilla in the heated pan. When it is golden brown underneath, flip it over. Sprinkle the browned side with a small amount of shredded cheese (2-3 tablespoons let's say), and let it melt a bit.

Once the cheese gets melty: break a single egg over the cheese, directly on the tortilla. NOTE: the whites will ooze off the tortilla and it's going to look messy. This is perfectly fine! I tidy mine up and push the whites around the tortilla, but it's not necessary. Salt and pepper to taste.

Cook the egg/tortilla until the whites around the sides are set and the middle whites just start to set. Now, flip the tortilla/egg. This is where it's going to be totally and completely messy. That's okay! Cook for a few more minutes to cook the egg through, then flip onto a plate.

Yay, all done! Now you just need to top it. Pile on the black beans, the salsa, and anything else that strikes your fancy (hot sauce, jalapeno slices, sour cream, more cheese...). The Hubster loves meat, so he chopped some breakfast steak and added it to his, as you can see from the photo. I think this is filling enough without any meat substance included...


For the black beans:
1 can black beans, drained and rinsed
1/4 c. chopped onion
1 tsp. chili powder
1 tsp. ground cumin
Salt and pepper to taste

In a medium saucepan, heat a splash of canola oil over medium-low heat. Add the onion, and cook until softened, about 10 minutes. Add the remaining ingredients and stir well, don't worry about smashing some of the beans (it will help with the texture). Cook until heated through, then keep warm until serving.


For the salsa fresca:
2 large fresh ripe tomatoes, chopped
1/2 large white onion, peeled and minced
1/4 teaspoon minced raw garlic, or to taste
1 habanero or jalapeƱo pepper, stemmed, seeded and minced, or to taste
1/4 cup chopped cilantro leaves
1 tablespoon fresh lime juice or 1 teaspoon red-wine vinegar
Salt and freshly ground pepper

Combine all ingredients, taste and adjust seasoning as necessary.

Let the flavors marry for 15 minutes or so before serving, but serve within a couple of hours. Note: I think this keeps well for at least a few days in the fridge.

05 March 2009

Peanut Butter Cup Cookies


You know how the best part of a chocolate chip cookie is the texture? That whole crisp-yet-soft combo they have going on? Well, I was totally in the mood for that kind of cookie, but didn't want it from a chocolate chip cookie. I wanted a peanut-butter cookie with that sort of texture instead.

Problem is: most peanut butter cookies are either soft throughout, or crunchy. At least those I've encountered. Hmm. So I did what any girl would do - I went to see what Queen Dorie would say. Wouldn't you know it, she gives a variation of her chocolate chip to do just such a thing. Sah-weet.


These cookies turned out exactly as I wanted: a nice crispy outside with a soft, gooey interior. These are best warm, just like that perfect chocolate chip cookie (a few seconds in the microwave will help for those past the out-of-the-oven point). I was smart enough to send these away as a hostess gift and office offerings, otherwise I could have easily porked out on the entire 4 dozen of them...

Peanut Butter Cup Cookies


Ingredients:
2 c. all purpose flour
1 tsp. salt
3/4 tsp. baking soda
1 1/2 sticks unsalted butter, at room temperature
1/2 c. peanut butter
1 c. granulated sugar
2/3 c. packed light brown sugar
2 tsp. vanilla extract
2 large eggs

Center a rack in the oven and preheat the oven to 375 F. Line 2 baking sheets with parchment or silicone mats.

Sift together the flour, salt, and baking soda. Set aside.

Working with a stand mixer, preferably fitted with a paddle attachment, or with a hand mixer in a large bowl, beat the butter and peanut butter together on medium speed for about 1 minute, until smooth.

Add the sugars and beat for another 2 minutes or so, until well blended and fluffy. Beat in the vanilla. Add the eggs one at a time, beating for 1 minute after each egg goes in.

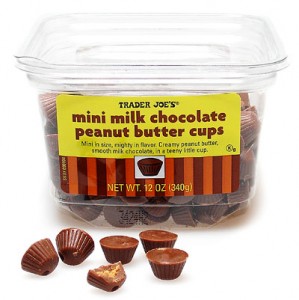
Reduce the mixer speed to low and add the dry ingredients in 3 portions, mixing only until each addition is incorporated. On low speed, or by hand with a rubber spatula, mix in the mini cups.

Spoon out rounded tablespoons of dough and roll between your palms, to make a ball. Roll in sugar and place onto the baking sheets, leaving about 2 inches between spoonfuls. Flatten balls slightly with a fork or decorative press.

Bake the cookies – one sheet at a time and rotating the sheets at the midway point – for 10 to 12 minutes, or until they are brown at the edges and golden in the center; they may be still a little soft in the middle, and that’s just fine.

Pull the sheet from the oven and allow the cookies to rest for 1 minute, then carefully using a wide metal spatula, transfer them to racks to cool to room temperature.

03 March 2009

Blueberry Crumb Bars


I've been a bit of a late bloomer in life, it's true. It took me a little while to get into things, take fashion for example. But! When I did, I did so with a vengeance, I assure you. Hence the Prada and Jimmy Choo dust bags littering my closet along with about 70 back issues of Vogue and a catalog of models' stats in my noodly little brain.

Well, there is sadly still a bit of this in me today. Like, can you believe I had never really read Smitten Kitchen until just a few weeks ago? Oh, yeah. Like, for real. I mean, I had heard of the blog and a few people spoke of the gorgeous photography on the blog, but I just never made my way over there. I even made a recipe from the site once, but I must have been in a hurry and didn't look up at all.

Well, whew! That was a mistake. I was just bee-bopping around on the Internet the other day and fell into one of Jen's posts, and my goodness - sucked right in. And as per my usual personality, I gobbled up her posts with a vengeance, like sat there oogling the photos and reading posts for at least a good few hours. And I copied like a million recipes. So be forewarned, there will be lots of Smitten Kitchen goodies probably posted on here in the future. I'll try to contain myself and spread them out a bit if that helps.


And on to the first of many I'm sure :) First up: Blueberry Bars. I wanted to make a bar recipe to take to my last book club meeting, but couldn't decide what to make. I didn't want anything too chocolatey, I had had my fill of peanut butter treats for awhile... And then, these screamed up at me to make them. Perfect! Especially in the winter, when you're starting to crave some fruit again. They were tart-ish but sweet, definitely buttery, and that crumbly topping is just to die for. Great recipe!

These bars will be my go-to fruit bar recipe from here on out, as I can see them in a million different incarnations, with peaches or cherries or strawberries or cranberries...

Blueberry Crumb Bars
(from allrecipes.com, by way of Smitten Kitchen)


Ingredients:
1 c. white sugar
1 tsp. baking powder
3 c. all-purpose flour
1 c. cold butter (2 sticks)
1 egg
1/4 tsp. salt
Zest and juice of one lemon
4 c. fresh blueberries
1/2 c. white sugar
4 tsp. cornstarch
Preheat the oven to 375 F. Grease a 9×13 inch pan.

In a medium bowl, stir together 1 cup sugar, 3 cups flour, and baking powder. Mix in salt and lemon zest. Use a fork or pastry cutter to blend in the butter and egg. Dough will be crumbly. Pat half of dough into the prepared pan.

In another bowl, stir together the sugar, cornstarch and lemon juice. Gently mix in the blueberries. Sprinkle the blueberry mixture evenly over the crust. Crumble remaining dough.

Bake in preheated oven for 45 minutes, or until top is slightly brown. Cool completely before cutting into squares.

28 February 2009

Chocolate Valentino and Chubby Hubs Ice Cream


The February 2009 challenge is hosted by Wendy of WMPE's blog and Dharm of Dad ~ Baker & Chef. We have chosen a Chocolate Valentino cake by Chef Wan; a Vanilla Ice Cream recipe from Dharm and a Vanilla Ice Cream recipe from Wendy as the challenge. Although I didn't use either ice cream recipe, as we were allowed to make any kind we wanted...

Okey dokey, the official wording is out of the way, so now I can do my real write up :)

Like probably half of the Daring Baker community, I made my cake for Valentine's Day. I mean really - what could be more romantic than a dense brownie-like cake and some homemade ice cream for dessert? I ran into a bit of a snag, but I was no worse for the wear.

This cake only has 3 ingredients. Now, at first reading I thought, Piece of cake! I'll have this one finished and done in no time. True, very true, but when I actually settled in to make it, I realized that if I mess up any part of this recipe, it'll be an expensive thing to re-do (especially since I was using my precious stash of Valrhona chocolate for this). But not to be easily intimidated, I forged ahead.


Things were a little hairy right off the bat, when I freaked for a second thinking I had overheated my butter/chocolate (therefore burning the chocolate to worthlessness), but thankfully that was fine. Whew! I whipped my whites and carefully folded them in. No screwing around. I carefully poured my batters into my cake pan and mini Le Creuset heart pan (perfect for pictures, thanks Anne!). I bake, and watch that lovely rise and slight fall of the cake, the characteristic dimpling of the top. I pulled the cakes out and set them too cool. Ten minutes later, faithful to the recipe, I picked up the round cake pan to unmold my cake.

Um. Well, here's where I had a problem: I went to gracefully (but quickly) flip it onto the cooling rack to finish cooling. Only I kinda moved too quick, and my pregnant butter-fingers started to lose grip on the pan. I fumbled with it, flipped it (very impressively, I might add) in the air, and then popped it with my palm when I went to desperately grasp it. Well, that was it. Up! it went and then Down! it landed. With a splat. Chocolate Valentino, shredded and smooshed and not looking too good:


Yeah.

It wasn't a total loss - I just let the darn thing cool in the state you see above, then chunked up the surviving parts to make a lovely ice cream parfait for our dinners. The Le Creuset heart, fortunately, was just fine so I used that the next morning to take pictures.

So: on to the cake. If you try this, keep in mind that there is no messing around with this Valentino recipe! Use good chocolate, as the cake will taste exactly like the chocolate you use. It gets a bit expensive (as you need to use a pound of chocolate), but that won't stop me from making this again. The cake ends up very dense, reminiscent of a brownie. Oooooh, so good.

We were asked to make homemade ice cream to accompany the cake. Initially I was going to make something plain, as I didn't want to overtake the glorious cake. Then at the last minute I changed my mind, when I thought about just how good Chubby Hubby is (and how much I didn't want to buy ice cream when I needed to also make ice cream...). I came up with my own version thanks in part to this recipe, and I must say: it tastes remarkably like the original. Awesome.

For those not in the know: Chubby Hubby is only the BEST flavor ever made by Ben & Jerry's. It's a malted vanilla ice cream with chunks of chocolate-covered, peanut-butter-filled pretzel nubs, and ribbons of peanut butter and fudge. It is salty and sweet and creamy and crunchy and just all-around perfect. Go buy a pint and see for yourself, or make my version below...


Chocolate Valentino
(from Sweet Treats by Chef Wan)


Ingredients:
16 oz. of roughly chopped chocolate (I used half Ghirardelli milk chocolate, half Valrhona bittersweet)
1/2 c. + 2 Tbsp. unsalted butter
5 large eggs, separated

Put chocolate and butter in a heatproof bowl and set over a pan of simmering water (the bottom of the bowl should not touch the water) and melt, stirring often.

While your chocolate butter mixture is cooling. Butter your pan and line with a parchment circle then butter the parchment.

Separate the egg yolks from the egg whites and put into two medium/large bowls.

Whip the egg whites in a medium/large grease free bowl until stiff peaks are formed (do not over-whip or the cake will be dry).

With the same beater beat the egg yolks together. Add the egg yolks to the cooled chocolate.

Fold in 1/3 of the egg whites into the chocolate mixture and follow with remaining 2/3rds. Fold until no white remains without deflating the batter.

Pour batter into prepared pan, the batter should fill the pan 3/4 of the way full, and bake at 375 F. Bake for 25 minutes until an instant read thermometer reads 140 F. Note – If you do not have an instant read thermometer, the top of the cake will look similar to a brownie and a cake tester will appear wet.

Cool cake on a rack for 10 minutes, then unmold.


(Not Actually) Chubby Hubs Ice Cream
(my shameless adaption of B&J's Chubby Hubby, and no my Hubs is not actually chubby)


Ingredients:
2 c. half and half (or 1 c. heavy cream + 1 c. whole milk)
4 egg yolks
1/2 c. sugar, divided
A dash of salt
1 c. heavy cream
2/3 c. malt powder
1/2 recipe of Peanut Butter Swirl (follows)
Hot fudge (I just used jarred)
1 c. chocolate-covered, peanut-butter filled pretzel nuggets (World Market has them!)

Whisk yolks and 1/4 c. sugar until ribbon-like in a medium bowl.

Heat half and half and 1/4 c. sugar and the salt over medium heat until barely boiling, stirring constantly. Add the half and half mixture to the egg yolk mixture, slowly so as not to curdle the eggs, and return everything to the pan. Bring the mixture to a boil over medium-low heat and cook for about 10 minutes or so or until the mixture coats the back of a wooden spoon (you're going to have to stir it the entire time and probably will be using a wooden spoon, so at some point, take the spoon out, run your finger down the back and if the track stays 'clear', the mixture is done).

Turn off the heat, and add the heavy cream to cool the mix and then strain into the medium bowl.

Put the bowl over a larger bowl filled with ice water and stir in order to speed up the cooling process, whisk in the malt and vanilla, and then chill in the refrigerator overnight to make the following day.

Mix the malted custard in your ice cream maker as directed. Once the ice cream has finished churning (after 20-40 minutes): place in your freezable container. Add a few blobs of Peanut Butter Swirl and hot fudge, and fold a few times into the soft ice cream mixure. Add the pretzels, and fold 2-3 more times to fully incorporate. Freeze for at least a few hours before serving.

Peanut Butter Swirl

Ingredients:
1 c. creamy peanut butter
1 (14 oz.) can sweetened condensed milk
3-4 Tbsp. heavy cream, to thin

Whip peanut butter until fluffy. Slowly add the sweetened condensed milk. Once incorporated, use the heavy cream to thin the mixure a bit.