24 August 2008

Strawberry and Cream Bars


Usually I don't like to start a recipe from a mix, but I make an exception sometimes. This was one of those times. It was a late evening. I had a few glasses of wine and a very filling dinner. A movie was in the DVD player and Hubs was sprawled across our club chair. We were absolutely in for the evening. And I found this most interesting strawberry bar recipe, plus had (just by coincidence!) sugar cookie mix and a quart of strawberries begging to be used.

I am never one to sit still for a movie, not ever. Even if I have been dying to see it. We rarely go to the theater to see a movie, and that's because I can't just sit and watch. I need to be doing SOMETHING, whether self-pedicure-ing or idly flipping a magazine or reorganizing my closet (a favorite of mine, by the way).


Baking is my favorite movie activity, so baking I did. I couldn't resist. Plus: we were doing some Royals Gaming and tailgating the next day, with a great group of friends. Who would be happy to have some dessert to munch, right?

Yes, there was a pre-packaged mix involved. And these bars were fabulous, I loved them. Sweet and sturdy and bright red, a great way to highlight those summer strawberries. Hubs and I ate them (much hung over) the next day for breakfast as well as lunch. They travel well, and come together quickly. What more can you ask for??

Strawberry and Cream Bars


Ingredients:
1 pouch Betty Crocker® sugar cookie mix
1/2 c. butter, softened
1 egg
1 c. white vanilla baking chips (6 oz)
1 pkg. (8 oz) cream cheese, softened
4 c. sliced fresh strawberries
1/2 c. sugar
2 Tbsp. cornstarch
1/3 c. water
10 to 12 drops red food color, if desired

Heat oven to 350 F. Spray bottom only of 15x10x1- or 13x9-inch pan with cooking spray. In large bowl, stir cookie mix, butter and egg until soft dough forms. Press evenly in bottom of pan. Bake 20 to 25 minutes or until light golden brown. Cool completely, about 30 minutes.

In small microwavable bowl, microwave baking chips uncovered on High 45 to 60 seconds or until chips are melted and can be stirred smooth. In medium bowl, beat cream cheese with electric mixer on medium speed until smooth. Stir in melted chips until blended. Spread mixture over crust. Refrigerate while making topping.

In small bowl, crush 1 cup of the strawberries. In 2-quart saucepan, mix sugar and cornstarch. Stir in crushed strawberries and 1/3 cup water. Cook over medium heat, stirring constantly, until mixture boils and thickens. Stir in food color. Cool 10 minutes. Gently stir in remaining 3 cups strawberries. Spoon topping over filling. Refrigerate 1 hour or until set; serve within 4 hours. Store covered in refrigerator.

22 August 2008

Italian White Bean, Pancetta, and Tortellini Soup


I have been kicking this post around for awhile. There have been so many other lovely little sweets and treats I've made, that the soup just seemed too boring. There this post sat, started but not finished, a recipe and a few pictures just waiting for me to finally describe it and get it up. So guess what, soup - today is your lucky day.

It was nice and brothy (so not too filling), but the cheese tortellinis made it hefty enough to satisfy. The Swiss chard ROCKED, not usually a fan but it's a great flavor in this soup. Not to mention, this recipe is terribly easy, and for being a soup recipe - it really didn't heat up the kitchen like I thought it would on a sticky, humid August day. So delicious too, it's almost a shame it's so easy to throw together!

Yay, soup post done! I have many more treats in store in the coming days, they are a bit more easy to blog about ;)


Italian White Bean, Pancetta, and Tortellini Soup
(from Everyday Pasta, 2007)


Ingredients:
3 Tbsp. olive oil
1/4 lb. pancetta, chopped (thick-cut bacon also works)
3 shallots (or, 1 small yellow onion), chopped
1 carrot, peeled and chopped
3 garlic cloves, chopped
1 (15 oz) can cannellini beans, rinsed and drained
1 bunch of Swiss chard, chopped
8 c. chicken broth
4 c. water
1/2 lb. fresh or frozen cheese tortellini
Salt and pepper

In a large soup pot, heat the olive oil over medium-high heat. Add the pancetta, shallots/onion, and carrot and cook until the vegetables are soft and the pancetta is crisp, about 15 minutes. Add the garlic, beans, chicken broth and water and bring up to a boil over high heat. Toss in the Swiss chard and let it wilt, about 3 minutes.

Add the tortellini and reduce the heat to a simmer. Cook until the tortellini are tender (about 4 minutes for fresh, 8 minutes for frozen). Taste for seasoning and add salt and pepper if needed.

20 August 2008

Bittersweet Cupcakes with Cocoa Cream Cheese Frosting


When I was a little girl, all I wanted was a pet. A bunny, to be exact. Only, my mother had 11 kids and 5 fish in a tank so that was more than enough to care for, thank you very much. I wanted more, though.

Then when I was 10 years old, I discovered a family a few blocks down had bunnies. I stopped every day to visit these bunny rabbits, all fluffy and white and A TON of them all living in the same pen. One day, the lady of the house came outside to talk to me while I was stooped down in their front yard, admiring the bunnies. She told me I could have one if I wanted (and now I look back and laugh; she probably started with 2 cute rabbits who quickly multiplied). It was at that moment that I decided come hell or high water: I was getting a pet bunny. So I devised a plan to make a rabbit hutch myself, using some odd pieces of wood and chicken wire I found in our garage, then secretly keep a pet bunny, all my own.

It took my mom One Measly Day to discover the raggedy hutch I built behind the garage. She was very angry with me, oh definitely, but she couldn't turn the sweet defenseless rabbit away. And so Patty the Rabbit became a member of the family and lived in our house. She was the best pet ever, would hop around and willingly let me dress her up; she loved fresh parsley, and would sit on our feet, to keep our tootsies warm. Even my mom loved that bunny to bits.

The sad thing about rabbits is that they get nervous easily. When we moved to Kansas, the change was too much for my dear little rabbit, and one day she was gone. To this day, even though my family has had several more cats (even a dog!) as pets, my mom and I still have a deep love for those darn bunnies. Of course I have tons of bunny things, including these cute chocolate transfers that I used to make small bittersweet squares.

Er, where were we again? Oh, yeah. The food blog. So. The cupcakes were really good, not sweet but nice and rich. The frosting is plenty sweet, and added just what was needed (thanks Natalie for the cupcake recipe!). The bunny chocolates made the cupcakes spectacular though, obviously.

And Hubs said I can totally get a pet rabbit now that we have a house. Only on one condition, that I name him Stuart (that would be Stu for short, or rabbit stu/stew, to be exact). Smart ass.

Bittersweet Cupcakes
(adapted from Food & Wine)


Ingredients:
4 Tbsp. unsalted butter, at room temperature
1/4 c. vegetable oil
1/4 c. water
4 oz. bittersweet chocolate
1 c. all-purpose flour
1 c. granulated sugar
3/4 tsp. baking soda
1/8 tsp. salt
1 large egg
1/4 c. buttermilk
1 tsp. pure vanilla extract

Preheat the oven to 350 F. Line a 12-cup muffin tin with paper or foil liners.

In a medium saucepan, melt the butter with the vegetable oil, water, and bittersweet chocolate over low heat.

In a large bowl, sift the flour with the sugar, baking soda, and salt. Add the melted butter mixture and beat with a handheld mixer at low speed until smooth. Add the egg and beat until incorporated, then add the buttermilk and vanilla and beat until smooth, scraping the bottom and side of the bowl. Pour the batter into the lined muffin tins, filling them about three-fourths full.

Bake the cupcakes in the center of the oven for about 25 minutes, until springy and a toothpick inserted in the center comes out clean. Let the cupcakes cool slightly, then transfer them to a rack to cool completely. Frost and top the cupcakes as desired.

Cocoa Cream Cheese Frosting
(adapted from Ina Garten)

Ingredients:
16 oz. cream cheese (room temperature)
2 1/2 sticks unsalted butter (room temperature)
2/3 lb. confectioners' sugar, sifted
1/3 c. cocoa powder (unsweetened, not Dutch processed)
1 tsp. pure vanilla extract

Combine the butter, cream cheese, sugar, cocoa, and vanilla in the bowl of an electric mixer fitted with the paddle attachment, mixing just until smooth.

17 August 2008

Strawberry Cupcakes with Cream Cheese Frosting


If you haven't already guessed, I made these sweet little cupcakes for a baby shower. It is mind-boggling how many pregnant women I know at this moment, but sadly the only time I've been invited to provide the dessert for any of the lucky ladies would be for my two darling coworkers, A. and D. I didn't want to let them down, so searched the Interweb far and wide for a recipe that would be just like them: understated, elegant, and sweet as can be. Enter: Martha (and aren't we all just on a first name basis with the old gal, honestly?).

I changed Martha's recipe a bit, doubling the strawberries and adding a touch of honey to sweeten them up before adding to the batter. While the cupcakes still only had the faintest hint of a pink color, the flavor was sublime. I loved these little cupcakes, not too coyingly sweet and yet the strawberry flavor really came through. Plus, they were super moist. I can only imagine how good they would also be if you substituted the strawberries for fresh peaches, or raspberries, or blueberries, or lime...

Strawberry Cupcakes
(adapted from Martha Stewart)


Ingredients:
1 1/3 c. whole fresh or frozen strawberries, thawed
1 Tbsp. honey
1 1/2 c. all-purpose flour, sifted
1 tsp. baking powder
1/4 tsp. coarse salt
1/4 c. whole milk, room temperature
1 tsp. pure vanilla extract
1/2 c. (1 stick) unsalted butter, room temperature
1 c.sugar
1 large egg, room temperature
2 large egg whites, room temperature

Preheat oven to 350 F. Line a 12-cup muffin tin with cupcake liners; set aside.

Place strawberries and honey in a small food processor; process until pureed. You should have about 2/3 cup of puree, add a few more strawberries if necessary or save any extra puree for frosting; set aside.

In a medium bowl, whisk together flour, baking powder, and salt; set aside. In a small bowl, mix together milk, vanilla, and strawberry puree; set aside.

In the bowl of an electric mixer fitted with the paddle attachment, cream butter on medium-high speed, until light and fluffy. Gradually add sugar and continue to beat until well combined and fluffy. Reduce the mixer speed to medium and slowly add egg and egg whites until just blended.

With the mixer on low, slowly add half the flour mixture; mix until just blended. Add the milk mixture; mix until just blended. Slowly add remaining flour mixture, scraping down sides of the bowl with a spatula, as necessary, until just blended.

Divide batter evenly among prepared muffin cups. Transfer muffin tin to oven and bake until tops are just dry to the touch, 22 to 25 minutes. Transfer muffin tin to a wire rack and let cupcakes cool completely in tin before icing.

Cream Cheese Frosting
(from Ina Garten)

Ingredients:
2 pkgs. (16 oz. total) cream cheese, at room temperature
2 1/2 sticks unsalted butter, at room temperature
2/3 lb. powdered sugar, sifted
1 tsp. vanilla

Combine cream cheese and butter thoroughly. Add sifted powdered sugar, and beat until combined. Beat in vanilla.

13 August 2008

Deep Chocolate and Peanut Butter Ice Cream


I met my husband at an ice cream store.


To be more exact, I met my husband during college, when we both worked at a local ice cream store. While I am more than happy to keep the husband I found while working there, I am sad to admit I lost any craving for ice cream. When you drag your tired body home to your teeny college apartment late every night, covered up to the elbows in dried ice cream and smelling slightly of sour milk, you kinda lose your taste for the stuff.

Even though it has been several years since my time spent scooping ice cream for a living, I still can only eat it a few times a year (my addiction to Sylas and Maddy's notwithstanding). My dear husband, though? He could eat it all the live long day. And his absolute favorite is "anything with chocolate and peanut butter".


I decided this summer, after experiencing the first of probably many long hot, sweltering summers in my kitchen, that ice cream is something that might be worth making at home (love ya, kitchen, but man between the stove and skylight it gets mad-hot). The first recipe I gave a shot, in honor of that dear man of mine, is this rich chocolate and peanut butter concoction.

I mixed things up a bit with David Lebovitz' original recipe, and really like how it turned out. Deeply rich chocolate and peanut butter, studded with bits of nuts from the peanut butter. Mmmm. While I'm not a huge fan, if all homemade ice cream is this creamy and rich, I might just come back around to the stuff.

Deep Chocolate and Peanut Butter Ice Cream
(adapted from The Perfect Scoop, 2007)


Ingredients:
2 c. heavy cream
3 Tbsp. unsweetened Dutch-process cocoa powder
5 oz. bittersweet chocolate
1/3 c. creamy peanut butter
1 c. whole milk
3/4 c. sugar
Pinch of salt
5 large egg yolks
1/2 tsp. vanilla extract
1/3 c. chunky peanut butter (for end of freezing)

Warm 1 c. of the cream with the cocoa powder in a medium saucepan, whisking to thoroughly blend the cocoa. Bring to a boil, then reduce the heat and simmer at a very low boil for 30 seconds, whisking constantly. Remove from the heat and add the chopped chocolate and peanut butter, stirring until smooth. Then stir in the remaining 1 c. of cream. Pour the mixture into a large bowl, scraping the saucepan as thoroughly as possible, and set a mesh strainer on top of the bowl.

Warm the milk, sugar, and salt int he same saucepan. In a separate medium bowl, whisk together the egg yolks. Slowly pour the warm milk into the egg yolks, whisking constantly, then scrape the warmed egg yolks back into the saucepan.

Stir the mixture constantly over medium heat with a heatproof spatula, scraping the bottom as you stir, until the mixture thickens and coats the spatula. Pour the custard through the strainer and stir it into the chocolate mixture until smooth, then stir in the vanilla. Stir until cool over an ice bath.

Chill the mixture thoroughly in the refrigerator, then freeze it in your ice cream maker according to instructions. During the final few minutes of churning in the ice cream maker, add the remaining chunky peanut butter.

11 August 2008

Saffron Orzo with Shrimp


This dish seems a bit decedent, given the sheer amount of saffron in it. But: I had a small container of the stuff that was getting a bit long in the tooth, so using it up all at once wasn't an issue. It sounded so good, and I was on an orzo kick, so it was a perfect choice for a weekday meal.


My orzo was thick, for some reason the liquid I boiled the orzo in boiled down quickly, so that when the actual orzo was cooked there was a risotto-like texture to it. I loved the way it came out, though.

To me, the taste of saffron is one that is hard to describe; instead I'll try to just say how this overall dish came out: thick and creamy, slightly tart, fresh-tasting from the parsley, with a very heavy essence of saffron. Helpful, yeah. How would you describe that saffron flavor, anyway? Almost like licorice, sorta like rosewater, but musky. Maybe I should just say it tastes like the 70s, but in a good way ;) At any rate, this is a great little dish. Give it a shot.


Saffron Orzo with Shrimp

(from Everyday Pasta, 2007)


Ingredients:
4 c. reduced-sodium chicken broth
1 tsp. saffron threads
1 lb. orzo
6 Tbsp. olive oil
1/4 c. chopped fresh flat-leaf parsley
Juice of 1 lemon
3 tsp. salt
2 tsp. black pepper
1 lb. large shrimp, peeled and deveined

In a large pot, bring the chicken broth to a boil over high heat. Reduce the heat to low, bringing the broth to a simmer. Add the saffron, stir, and simmer until the saffron has bloomed, about 5 minutes.

Return the heat to medium and bring the stock to a boil, then add the orzo and cook until tender but still firm to the bite, stirring occasionally, 8 to 10 minutes. Drain the orzo and transfer to a large bowl. Add 3 Tbsp. olive oil, the parsley, half the lemon juice, 2 tsp. salt, and 1 tsp. pepper. Combine thoroughly.

In a bowl, toss the shrimp with 1 tsp. salt, 1 tsp. pepper, and the remaining lemon juice. Heat the 3 Tbsp. olive oil in a medium skillet over medium-high heat. Add the shrimp in a single layer and cook until the shrimp are just turning pink, about 2 minutes per side. Add the shrimp to the bowl with the orzo. Toss to combine and serve.

09 August 2008

Southwestern Quiche


I have a soft spot for the Southwest, that food in New Mexico is just fabulous. Chiles so abundant that the entire upper third of your body feels on fire, and your eyes start watering. And yet, the dishes still have so much flavor. Every once in awhile, I just crave something chock-full of chiles.

When this craving hits, I tend to turn to a cookbook my parents bought for me on their last trip to Albuquerque. This time, I wanted to try something a bit different, rather than the usual tamales and rellenos. This cookbook has a TON of breakfast dishes that sound good, so I finally settled on the Southwestern Quiche.


I made a few slight changes to the recipe (why waste good sirloin when I have some lovely chorizo sitting around?), it still turned out great. Heat comes from the spices and green chile, and the chorizo. But the egg mixture, cheeses, and a healthy dollop of sour cream help to mellow things out quite a bit (so this recipe is still great for small kids). So, no “nose running” this time, but still a lovely dish.

Cravings finally subdued for another day. Next time perhaps I’ll try the carne adovada…

Southwestern Quiche
(from Simply Simpatico)


Ingredients:
1 unbaked 9" pie shell
1 egg white, lightly beaten
1 Tbsp. oil
8 oz. chorizo
1 1/2 tsp. paprika
1/4 tsp. chili powder
1 larg onion, chopped
1 large garlic clove, crushed
1 1/2 c. grated Monterey Jack cheese
1 c. sour cream
3/4 c. chopped green onion
1 (4-oz) can chopped green chiles
3 eggs, beaten
1 tsp. salt
1/4 tsp. pepper
Sour cream, sliced avocado, salsa (for garnish)

Preheat oven to 400 F. Brush pastry shell with egg white and bake 5 minutes. Cool. Turn oven down to 325 F.

Heat oil in large skillet over medium-high heat. Add chorizo, paprika, chili powder, onion, and garlic to skillet and brown well. Remove from heat and cool down slightly.

Combine meat mixture, cheese, sour cream, green onion, chiles, eggs, salt, and pepper and mix well. Turn into pastry shell and spread evenly. Bake 60 minutes or until filling is set and crust is nicely browned.

Cool slightly, then slice and serve. Top with a dollop of sour cream and salsa, and avocado slices.

07 August 2008

Blueberry Snickerdoodles

I have a confession to make. While I think snickerdoodles are a very pretty cookie, I rarely make them. First off, cinnamon is fine but I am not IN LOVE with it. Fine for Christmas things and with raisins and all of that, but otherwise I don’t feel the need to add it to things.

Secondly, snickerdoodles always seem so… well, for lack of a better term, plain. Sure the cookie dough base is a classic, allowing the vanilla and butter flavors to really come through, but still. Snickerdoodles are not what I immediately think of when I want a cookie. In fact, they are usually at the bottom of the list. I need a little more pizzazz, something interesting.


One weekend, I decided to finally make snickerdoodles, but also wanted to change things up a bit. What to do, what to do. I idly poked through the cabinets trying to find the answer… Then I came upon the package of Trader Joes dried blueberries that my sis Anne had sent me. I had been saving them for something special (we don’t have a Trader Joes here, sadly). Well, if spicing up a boring cookie isn’t special enough, I don’t know what is.
It was such a simple change, and yet it made such a huge difference. The soft, chewy little blueberries burst in your mouth, and work so well with the cinnamon. It’s like your favorite blueberry cobbler in cookie form! I gave most of the cookies away (as per my usual procedure), but kept about half a dozen at the house. They are perfect for a quick breakfast in the mornings. : )


Blueberry Snickerdoodles
(adapted from Capree's recipe)


Ingredients:
1 c. butter, softened
1 1/2 c. white sugar
2 eggs
2 tsp. vanilla extract
2 3/4 c. all-purpose flour
2 tsp. cream of tartar
1 tsp. baking soda
1/4 tsp. salt
1/4 tsp. cinnamon
2 c. dried blueberries
2 Tbsp. white sugar
2 tsp. ground cinnamon

Preheat oven to 400 F.

Cream together butter and 1 1/2 c. sugar until pale and fluffly. Add the eggs, one at a time, until well mixed, then add the vanilla. Sift together the flour, cream of tartar, soda, salt, and 1/4 tsp. cinnamon. Add to dry ingredients, then stir in dried blueberries. Shape dough by rounded spoonfuls into balls.

Mix the 2 Tbsp. sugar and 2 tsp. cinnamon. Roll balls of dough in mixture. Place 2 inches apart on ungreased baking sheets.

Bake 8 to 10 minutes, or until set but not too hard. Remove immediately from baking sheets.

03 August 2008

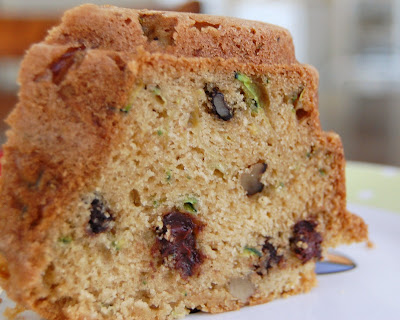
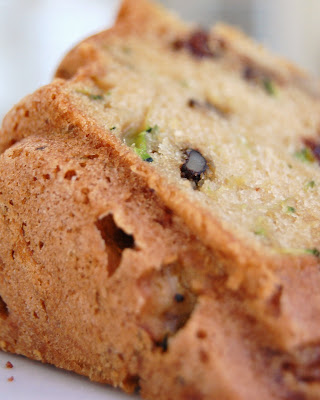
Chocolate Chip Zucchini Cake


This is my sister Beah’s zucchini cake recipe, and it’s the best. She gave the recipe to me once, years ago, but of course like the moronic little sister that I am, I lost it. She was nice enough to offer me a new copy, though, so I was able to whip this up just in time for her birthday.


Beah is one year older than me. From the time I could toddle around with her, we played, ate, and schemed together. She talked me into eating green strawberries until I made myself sick. We were partners in crime, and got ourselves in trouble constantly - like the time we were little and stripped down naked, doused ourselves in baby oil, and went outside to “sun bathe”. Yeah, in the front yard. And then our mother came sprinting out to get us and spank us. And we ran around the yard, my mom grabbing at our limbs, and us slipping away like greased pigs.

We also carefully planned and then ran away from home together, to live under the neighbor’s willow tree, because it was always dry under there. Beah was the one who taught me how to write my name, and broke the news that Santa wasn't real, and hid in the bathroom with me when our new little siblings cried too loud and freaked us out.

When I had to stay in the hospital when I was 3 or 4 years old, my parents (one at the hospital with me, one at home with the other kids) put Beah and I on the phone with one another, and all we did was sob and wail out each others’ name every once in awhile. For us, it was no picnic to be away from our sister.


Of course, it wasn’t all blissful sisterly love. We did the other usual sister things: argued, called each other names, pulled each others hair. We always shared a room and found plenty of ways to constantly invade each others personal space. I especially liked to rile her up by borrowing her clothes (without asking, of course). What can I say though? The girl had good taste.

There were a few Big Fights that will go down in family history, including one incident moments before she walked out the door for her high school graduation ceremony. Little did anyone know, she sat through her graduation with head held high and gigantic holes torn in her panty hose, while I sat with my parents with a raging headache from all the hair pulling. But when it was over we sat in the family room and inspected the very sad state of her panty hose, snickering. All hard feelings forgotten. That’s how it usually went.


Once past that painful high school age, we fell right back into being friends again. In college we discussed boyfriends and cleaning techniques, favorite TV shows, complained about roommates, whatever. Got each other through our ex-boyfriends, our wedding days; I stayed with her for awhile when she had her babies. And even though I spend my time sipping cocktails with my husband at swanky restaurants while her life is all sippy cups and potty training, we are closer than ever. We have too much shared life between us to be otherwise.


So for Beah: I baked your own cake for you. Which, you know, you can obviously make yourself and in fact tastes better when you make it. But anyways. Happy Birthday, and see you soon. Love you bunches you butt face.

Chocolate Chip Zucchini Cake
(from Beah)


Ingredients:
2 1/2 c. all-purpose flour plus additional for dusting
1 tsp. baking soda
1/2 tsp. baking powder
1/2 tsp. salt
2 sticks unsalted butter, softened
1 c. packed light brown sugar
1 tsp. vanilla
3 large eggs at room temperature
2 c. coarsely grated zucchini (8 oz)
1 c. semisweet chocolate chips
1/2 c. walnuts, toasted and chopped

Preheat oven to 350 F. Butter bundt pan well and dust with some flour, knocking out excess.
Sift together 2 1/2 cups flour, baking soda, baking powder, and salt into a bowl. Beat together butter and brown sugar in a large bowl with an electric mixer at high speed until pale and fluffy, about 3 minutes, then beat in vanilla. Reduce speed to medium and add eggs 1 at a time, beating well after each addition and scraping down side of bowl occasionally, then beat until very smooth and fluffy, about 2 minutes more.

Reduce speed to low and add all but 1/2 cup flour mixture, mixing until just combined.
Toss zucchini, chocolate chips, and walnuts with remaining 1/2 cup flour mixture and add to batter, then mix batter with a rubber spatula (batter will be thick).

Spoon batter into bundt pan, smoothing top. Bake in middle of oven, rotating pan halfway through baking, until side begins to pull away from pan and a tester comes out clean, 45 to 50 minutes total.

Cool cake in pan on a rack 30 minutes, then run a thin knife around outer and inner edges. Invert rack over pan, then invert cake onto rack. Cool completely.

01 August 2008

Mixed Berry Pavlova


Happy Birthday to my Muzzy! This pavlova is in her honor. I thought of her often when I was making it, because I was watching all the bunnies in my yard hop around (and that always makes me think of my mom, we have a shared love for bunnies).


This dessert is one of my favorites You can do the components over a series of days, making it much easier to pull off than you would think (best to do sauce one day, meringue the next, and whipped cream right before serving). I love the crispy meringue's outer shell, with a nice soft, almost gooey center. Then the light whipped cream and amazing berry sauce (and berries) on top, mmm. Must have dessert, and great for those hot August days.

Mixed Berry Pavlova
(from Ina Garten)

Ingredients:
4 large egg whites, at room temperature
Pinch kosher salt
1 c. sugar
2 tsp. cornstarch
1 tsp. white wine vinegar
1/2 tsp. pure vanilla extract
Sweetened whipped cream (recipe follows)
1 pint fresh raspberries
1/2 pint fresh blackberries
Triple raspberry sauce (recipe follows)

Preheat the oven to 250 F.

Place a sheet of parchment paper on a sheet pan. Draw an 8-inch circle on the paper, using a plate as a guide, then turn the paper over so the circle is on the reverse side. (This way you won't get a pencil mark on the meringue.)

Place the egg whites and salt in the bowl of an electric mixer fitted with a whisk attachment. Beat the egg whites on high speed until firm, about 1 minute. With the mixer still on high, slowly add the sugar and beat until it makes firm, shiny peaks, about 2 minutes.

Remove the bowl from the mixer, sift the cornstarch onto the beaten egg whites, add the vinegar and vanilla, and fold in lightly with a rubber spatula. Pile the meringue into the middle of the circle on the parchment paper and smooth it within the circle, making a rough disk. Bake for 2 hours. Turn off the oven, keep the door closed, and allow the meringue to cool completely in the oven, about 1 hour. It will be crisp on the outside and soft on the inside.

Invert the meringue disk onto a plate and spread the top completely with sweetened whipped cream. Put blackberries and raspberries in a bowl and toss with about 1/2 cup of the mixed berry sauce, or enough to coat the berries lightly. Spoon the berries carefully into the middle of the Pavlova, leaving a border of cream and meringue. Serve immediately in large scoops with extra mixed berry sauce.

Sweetened Whipped Cream:
1 c. cold heavy cream
1 Tbsp. sugar
1 tsp. pure vanilla extract

Whip the cream in the bowl of an electric mixer fitted with a whisk attachment (you can also use a hand mixer). When it starts to thicken, add the sugar and vanilla and continue to beat until firm. Don't overbeat!

Mixed Berry Sauce:
1 half-pint fresh strawberries, hulled and sliced
1/2 c. sugar
1 c. seedless raspberry jam (12-ounce jar)
1 Tbsp. framboise liqueur

Place the strawberries, sugar, and 1/4 cup water in a small saucepan. Bring to a boil, lower the heat, and simmer for 4 minutes. Pour the cooked strawberries, the jam, and framboise into the bowl of a food processor fitted with a steel blade and process until smooth. Chill.

30 July 2008

Filbert Gateau with Praline Buttercream


I am in the process of reading Julie and Julia, a great book where a lovely blogger named Julie takes on a personal challenge to make and blog about every recipe in Julia Child's Mastering the Art of French Cooking in the span of 1 year. This is a must read, by the way (thanks Sarah for the recommendation!). Anyway, yesterday I was reading the chapter where Julie finally finishes the Oeufs en Gelée (Eggs in Aspic). She has been toiling over these darn things for more than a day, and finally finishes them after getting up at 6am Thanksgiving morning to work on them some more. Even though they looked rather unappetizing and blobby, and probably wouldn't be eaten further than an obligatory bite, she writes:

"It was 8 a.m., and though I still had a whole Thanksgiving meal left to cook, roast goose and cabbage and onions and green beans and souflée, I felt giddy with relief."

Yeah, that's kinda how I felt when I finally finished this challenge. Not like it was the hardest challenge I've done, more like the most frustrating, and not working into my schedule too well.


Working on the house seems to be my main priority these days, but I am also determined to work on my baking/blogging. And I missed the last challenge, something I am not too proud of. The Daring Bakers Rule is that you cannot miss two challenges in a row. So even though I had a million house things on my To Do list as well as friend obligations and tons of work, I was NOT going to miss another challenge and get kicked off.

I was terribly excited to make this lovely cake. So pretty! So many components! But it wasn't going to be easy, or cheap. I went out to the grocery store hopeful, though, and spent my hard-earned money on lots of eggs and hazelnuts. Then set to work. I had a whole 10 days to finish this sucker, after all.

First try: everything seemed fine. I toasted and skinned my hazelnuts. I measured, poured, carefully separated eggs. I mixed and whipped and ground my hazelnut meal. I lovingly toiled in a rather-warm kitchen for over an hour, and finally finished my batter. I poured it into my round cake pan and gently placed it in my preheated oven.

Then it got kinda bad.

I started my simple syrup while the cake baked. I hear sizzling and smell burning coming from the oven, and take a peek: oh, hurrah. Batter bubbling over everywhere, all over the inside of my oven, the thick batter coating the oven rack. Ack! I threw a sheet pan in underneath in a vain attempt to curb the overflow, but that seemed to only let out most of my heat and added a new level of cleaning to my batter-coated rack. But everything else seemed okay, so I finished up my simple syrup. The cake was supposed to be finished in 30-35 minutes, but it was still pale and wiggly at that point. I let it go to 40 minutes, then 50 minutes. Finally it started to brown and pull away from the sides of the pan. Looks done! I pulled it out and let it cool. Then I went to remove it from the pan: the sides of the cake slid out like a dream, and the center poured a sticky mess all over my counters.

*Sigh*

Well, at that point I was out some dough and a good chunk of a Sunday morning. I was... well, not happy. I pouted around the house and angrily did the laundry (which I'm sure was hilariously entertaining for my Hubs to watch). That's it, I'm done. I give up. Let them kick me out, I figured. I didn't want to see another hazelnut as long as I lived.


But, by the next weekend (and a mere 3-4 days before posting the dreaded challenge), I had come around again. I love being a Daring Baker, and my blog is the best little hobby I've ever had. I wasn't giving up. But: I was not spending a ton of money on new supplies, and I wasn't making a damn round cake again. So I bought the generic bags of chopped hazelnuts, cheap eggs, and broke out my big jelly roll pan. It was just going to have to do.

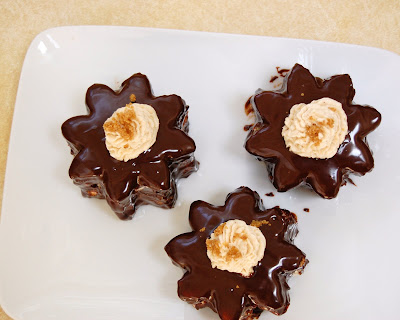
On Attempt 2, I am pleased to say I had no problems. Glad, in fact, that I gave it another shot. I didn't want to do any sort of boring square cake, so I cut my thin jelly roll genoise into flower shapes with a cookie cutter, then assembled. Frosting was a bit trickier to say the least, but still I am proud of my slightly-ugly results. Oh, and of course then I read in the Daring Baker instructions that our cakes MUST remain round. Oopie. Well, my flower shapes are round-ish. Take it or leave it.

And I gotta say: when I finally finished photographing those suckers, even though I still had a weekend's worth of painting/drapery sewing/picture hanging to do, I felt giddy with relief :)

*~*~*~*~*~*~*~*~*~*~*~*~*~*~*~*~*~*~*~*~*~*~*~*~*~*~*~*~*~*~*~*~*~*

This one cake kinda took a header, leaving a lovely Rorschach-like blob on the plate.

Again: don't forget to check out the other lovely cakes put out by our ever-growing cult! And a big thanks to Chris for the fabulous, yummy cake recipe :)

Filbert Gateau with Praline Buttercream
(From Great Cakes by Carol Walter)


Cake Components:
1 Filbert Genoise
1 recipe sugar syrup, flavored with dark rum
1 recipe Praline Buttercream
½ cup heavy cream, whipped to soft peaks
1 recipe Apricot Glaze
1 recipe Ganache Glaze, prepared just before using
3 tablespoons filberts, toasted and coarsely chopped

Filbert Genoise
Ingredients:
1 ½ c. hazelnuts, toasted/skinned
2/3 c. cake flour, unsifted
2 Tbsp. cornstarch
7 large egg yolks
1 c. sugar, divided ¼ & ¾ cups
1 tsp. vanilla extract
½ tsp. grated lemon rind
5 large. egg whites
¼ c. warm, clarified butter (100 – 110 degrees)

Position rack in the lower 3rd of the oven and preheat to 350 F. Grease and flour a 10” X 2” inch round cake pan.

Using a food processor, process nuts, cake flour, and cornstarch for about 30 seconds. Then, pulse the mixture about 10 times to get a fine, powdery mixture. You’ll know the nuts are ready when they begin to gather together around the sides of the bowl. While you want to make sure there aren’t any large pieces, don’t over-process. Set aside.

Put the yolks in the bowl of an electric mixer, with the whisk attachment, and beat until thick and light in color, about 3-4 minutes on med-high speed. Slowly, add ¾ cup of sugar. It is best to do so by adding a tablespoon at a time, taking about 3 minutes for this step. When finished, the mixture should be ribbony. Blend in the vanilla and grated lemon rind. Remove and set aside.

Place egg whites in a large, clean bowl of the electric mixer with the whisk attachment and beat on medium speed, until soft peaks. Increase to med-high speed and slowly add the remaining ¼ cup of sugar, over 15-20 seconds or so. Continue to beat for another ½ minute. Add the yolk mixture to the whites and whisk for 1 minute. Pour the warm butter in a liquid measure cup (or a spouted container). * It must be a deep bottom bowl and work must be fast.*

Put the nut meal in a mesh strainer (or use your hand – working quickly) and sprinkle it in about 2 tablespoons at a time – folding it carefully for about 40 folds. Be sure to exclude any large chunks/pieces of nuts. Again, work quickly and carefully as to not deflate the mixture. When all but about 2 Tbsp. of nut meal remain, quickly and steadily pour the warm butter over the batter. Then, with the remaining nut meal, fold the batter to incorporate, about 13 or so folds.

With a rubber spatula, transfer the batter into the prepared pan, smoothing the surface with the spatula or back of a spoon. **If collected butter remains at the bottom of the bowl, do not add it to the batter! It will impede the cake rising while baking.Tap the pan on the counter to remove air bubbles and bake in the preheated oven for 30-35 minutes. You’ll know the cake is done when it is springy to the touch and it separates itself from the side of the pan. Remove from oven and allow to stand for 5 minutes. Invert onto a cake rack sprayed with nonstick coating, removing the pan. Cool the cake completely.*

Sugar Syrup
Ingredients:
1 c. water
¼ c. sugar
2 Tbsp. dark rum or orange flavored liqueur

In a small, yet heavy saucepan, bring the water and sugar to a boil and simmer for 5 minutes. Remove from heat, add the liqueur. Cool slightly before using on the cake.

Praline Buttercream
Ingredients:
1 recipe Swiss Buttercream
1/3 c. praline paste1
½ - 2 Tbsp. Jamaican rum (optional)

Blend ½ cup buttercream into the paste, then add to the remaining buttercream. Whip briefly on med-low speed to combine. Blend in rum.

Swiss Buttercream
Ingredients:
4 large egg whites
¾ c. sugar
1 ½ c. (3 sticks) unsalted butter, slightly firm
1 ½ -2 Tbsp. Grand Marnier or liqueur of your choice
1 tsp. vanilla

Place the egg whites in a lg/ bowl of a elevtric mixer and beat with the whisk attachment until the whites are foamy and they begin to thicken (just before the soft peak stage). Set the bowl over a saucepan filled with about 2 inches of simmering water, making sure the bowl is not touching the water. Then, whisk in the sugar by adding 1-2 tablespoon of sugar at a time over a minutes time. Continue beating 2-3 minutes or until the whites are warm (about 120 degrees) and the sugar is dissolved. The mixture should look thick and like whipped marshmallows.

Remove from pan and with either the paddle or whisk attachment, beat the egg whites and sugar on med-high until its a thick, cool meringue – about 5-7 minutes. *Do not overbeat*. Set aside.

Place the butter in a separate clean mixing bowl and, using the paddle attachment, cream the butter at medium speed for 40-60 seconds, or until smooth and creamy. *Do not overbeat or the butter will become toooooo soft.*On med-low speed, blend the meringue into the butter, about 1-2 Tbsp. at a time, over 1 minute. Add the liqueur and vanilla and mix for 30-45 seconds longer, until thick and creamy.Refrigerate 10-15 minutes before using.

Praline Paste
Ingredients:
1 c. hazelnuts, toasted/skinless
2/3 c. Sugar

Line a jelly roll pan with parchment and lightly butter. Put the sugar in a heavy 10-inch skillet. Heat on low flame for about 10-20 min until the sugar melts around the edges. Do not stir the sugar. Swirl the pan if necessary to prevent the melted sugar from burning. Brush the sides of the pan with water to remove sugar crystals. If the sugar in the center does not melt, stir briefly. When the sugar is completely melted and caramel in color, remove from heat. Stir in the nuts with a wooden spoon and separate the clusters. Return to low heat and stir to coat the nuts on all sides. Cook until the mixture starts to bubble. **Remember – extremely hot mixture.** Then onto the parchment lined sheet and spread as evenly as possible. As it cools, it will harden into brittle.

Break the candied nuts into pieces and place them in the food processor. Pulse into a medium-fine crunch or process until the brittle turns into a powder. To make paste, process for several minutes. Store in an airtight container and store in a cook dry place. Do not refrigerate.

Apricot Glaze
Ingredients:
2/3 c. thick apricot preserves
1 Tbsp. water

In a small, yet heavy saucepan, bring the water and preserves to a slow boil and simmer for 2-3 minutes. If the mixture begins to stick to the bottom of the saucepan, add water as needed.

Remove from heat and, using a strainer, press the mixture through the mesh and discard any remnants. With a pastry brush, apply the glaze onto the cake while the cake is still warm. If the glaze is too thick, thin to a preferred consistency with drops of water.

Ganache Glaze
Ingredients:
6 oz. (good) semisweet or bittersweet chocolate, like Lindt
¾ c. heavy cream
1 Tbsp. light corn syrup
1 Tbsp. Grand Marnier, Cointreau, or dark Jamaican rum (optional)
¾ tsp. vanilla
½ - 1 tsp. hot water, if needed

Blend vanilla and liqueur/rum together and set aside. Break the chocolate into 1-inch pieces and place in the basket of a food processor and pulse until finely chopped. Transfer into a medium sized bowl and set aside.

Heat the cream and corn syrup in a saucepan, on low, until it reached a gentle boil. Once to the gently boil, immediately and carefully pour over the chocolate. Leave it alone for one minute, then slowly stir and mix the chocolate and cream together until the chocolate is melted and incorporated into the cream. Carefully blend in vanilla mixture. If the surface seems oily, add ½ - 1 tsp hot water.

Assembling Cake:

Cut a cardboard disk slightly smaller than the cake. Divide the cake into 3 layers and place the first layer top-side down on the disk. Using a pastry brush, moisten the layer with 3-4 Tbsp. of warm sugar syrup. Measure out 1 cup of praline buttercream and set aside.

Spread the bottom layer with a ¼-inch thickness of the remaining buttercream. Cover with ½ of the whipped cream, leaving ¼-inch border around the edge of the cake. Place the middle layer over the first, brush with sugar syrup, spreading with buttercream. Cover with the remaining whipped cream. Moisten the cut side of the third layer with additional sugar syrup and place cut side down on the cake. Gently, press the sides of the cake to align the layers.

Refrigerate to chill for at least 30 minutes. Lift the cake by sliding your palm under the cardboard. Holding a serrated or very sharp night with an 8-ich blade held parallel to the sides of the cake, trim the sides so that they are perfectly straight. Cut a slight bevel at the top to help the glaze drip over the edge. Brush the top and sides of the cake with warm apricot glaze, sealing the cut areas completely. Chill while you prepare the ganache.

Place a rack over a large shallow pan to catch the ganache drippings. Remove the gateau from the refrigerator and put it the rack. With a metal spatula in hand, and holding the saucepan about 10 inches above the cake, pour the ganache onto the cake’s center. Move the spatula over the top of the ganache about 4 times to get a smooth and mirror-like appearance. The ganache should cover the top and run down the sides of the cake. When the ganache has been poured and is coating the cake, lift one side of the rack and bang it once on the counter to help spread the ganache evenly and break any air bubbles. (Work fast before setting starts.) Patch any bare spots on the sides with a smaller spatula, but do not touch the top after the “bang”. Let the cake stand at least 15 minutes to set after glazing.

To garnish the cake, fit a 12 – 14-inch pastry bag with a #114 large leaf tip. Fill the bag with the reserved praline cream. Stating ½ inch from the outer edge of the cake, position the pastry tube at a 90 degree angle with the top almost touching the top of the cake. Apply pressure to the pastry bag, moving it slightly toward the center of the cake. As the buttercream flows on the cake, reverse the movement backward toward the edge of the cake and finish by pulling the bag again to the center. Stop applying pressure and press the bag downward, then quickly pull the tip up to break the flow of frosting. Repeat, making 12 leaves evenly spaced around the surface of the cake. Make a second row of leaves on the top of the first row, moving the pastry bag about ¾ inch closer to the center. The leaves should overlap. Make a 3rd row, moving closer and closer to the center. Add a 4th row if you have the room. But, leave a 2-inch space in the center for a chopped filbert garnish.

Refrigerate uncovered for 3-4 hours to allow the cake to set. Remove the cake from the refrigerator at least 3 hours before serving.Leftover cake can be covered with foil and kept in the refrigerator for up to 5 days.

28 July 2008

Garlic Shrimp


This was a recipe I originally tried while hosting a tapas-themed Cooking Club. It was so good, I decided it was worthy of center stage at dinnertime :)

The garlicky, spicy shrimp is just amazing, and all-in-all this is a very healthy version of shrimp (as long as you go easy on that red chile oil). I served it with wild rice and steamed veggies, it was pretty darn good if I do say so myself :)

Garlic Shrimp with Red Chile Oil
(from Bobby Flay)


Ingredients:
24 large shrimp, shelled and deveined
Salt and freshly ground pepper
Extra-virgin olive oil
2 cloves garlic, crushed
Red Chile Oil (recipe follows)
1 Tbsp. fresh thyme leaves

Preheat oven to 500 degrees F.

Place the shrimp in a cazuela or an ovenproof casserole and season with salt and pepper, to taste. Drizzle olive oil over shrimp, add crushed garlic, and toss to coat. Roast in the oven until pink and cooked through, about 4 to 5 minutes. Drizzle generously with Red Chile Oil and sprinkle with thyme. Serve with crusty bread.

Red Chile Oil:
1 c. olive oil
6 dried chiles de arbol, lightly toasted and crushed
6 cloves garlic, finely chopped
Pinch salt
3 sprigs fresh thyme, leaves removed

Blend all ingredients including the thyme leaves in a blender until smooth.. Strain through a fine mesh strainer into a bowl.