29 February 2008

French Bread


“The only real stumbling block is fear of failure. In cooking you've got to have a 'What the hell?' attitude”

--Julia Child


This one's for my dad.

I remember where I was when the news hit that Julia Child had passed away. I was with my parents and brother in the middle of a road trip to Wisconsin, we had stopped for lunch at this truly-wonderful roadside diner in the middle of Iowa. There was a small TV in the corner, although most of us were hardly gave it a passing glance while busy making small talk and waiting for our lunch plates to make their appearance.

Suddenly my dad said, “Julia Child died! Oh no!”. And there it was, up on the TV screen. I didn't know a whole lot about her at the time, but my dad seemed truly saddened. Turns out, he really loved the old gal. He'd watch her shows, he adored the way she cooked and that spunky attitude of hers. And my dad, he somewhat embodies her – my fondest memories from my childhood of my father would be watching him bustle around a steamy kitchen while trying out some new gourmet dish, playing around with seasonings or a different roasting method. Glass of wine at his elbow, cheerfully whisking things together. Always a new cooking adventure with him.


I was not the same kind of cook when I moved out on my own, not by a long shot. I was kinda sorta maybe (okay, a lot) afraid of cooking and baking. In college I made lots of Hamburger Helper and Duncan Hines cake mixes, just like my fellow roommates. After college, I branched out a bit, but mostly with family recipes that I knew well and could handle easily: meatloaf, tuna noodle casserole, my mom's banana bread and her amazing Christmas treats. Those other recipes? Ethnic foods and fancy meringue and yeast breads from scratch? No, oh no no no. Too intimidating. I'd screw it up, I just knew it. So I left them alone.

That is, until I heard of Julia Child's passing. After getting home from that Wisconsin trip, I was curious and did some research on her life. Turns out, she didn't learn to cook until she was 32 years old! And she trained at the Cordon Bleu! She brought French cooking to the masses! She was vivacious and charming and loved life so much that she didn't let anything get her down. So what if her omelet stuck to the pan on live TV, she'd say? Get over it, move on, and try again. What a great philosophy on cooking, such a remarkable woman.

So, from that day forward, I decided to give it a shot. Started with some easy from-scratch recipes I found in books, and worked my way up to where I am today. I am a recent addition to the Daring Bakers group, but a long-time fan. I remember telling my dad excitedly on the phone when I joined, and also letting him in on the Challenges as soon as I heard about them (sorry fellow DBs, but hey he's not telling anyone). I am now officially a cook and baker, and proud of it. And that would be my dad and Julia Child's doing.


So anyhoo, when the Daring Bakers Challenge was posted for February, believe me: I almost fell out of my chair. Julia Child! Julia Child's French Bread! I could hardly believe it, I was so excited. Then again, it was 4 ingredients with 18 printed pages of instruction, but hey. Gotta get over the fear, right? Isn't that Julia's (as well as the Daring Bakers') mantra? So away I went, off to buy some unglazed quarry tiles and make some dough. Of course, I didn't share this one with my dad, to surprise him.


French Bread
(from Julia Child, Mastering the Art of French Cooking, Vol. II)

I should probably get on and talk about the bread, eh? It was actually really really fun, and I plan on making this again and again. I need to give massive props to Mary and Sara: this was one very cool, very memorable challenge. The kneading and rising took awhile, sure, but it was all oh-so worth the wait: the crumb was tight but the inside soft, with a nice, crusty, crunchy crust. Ahhhhhhh. I made 2 boules and an epi (“sheaf of wheat”), and Hubs and I gobbled up 2 loaves by the next morning. Nothing better, my friends, than fresh-baked French bread, some butter, and brie for dinner and breakfast the next day! Even my Muzzy would be proud (that would be because of the butter, my mom loves some butter on everything).

If you wanna give this a shot: Breadchick herself graciously made a post with the full, 16-page, instruction-filled recipe, if you so desire; just clicky-click here (if for no other reason, do it to find out how to simulate a European stone oven in your own kitchen). Please try this. Julia would be proud. It's amazing and you'll be glad you did, I promise.

One last thing: please check out the other dear Daring Bakers posts! These girls rock, and deserve some reading of their awesome outcomes as well.

27 February 2008

Mememememememe!

I was tagged for a meme by the fabulous Gretchen at Canela & Comino. And I must admit, I'm terribly excited about it. I've never been tagged for a meme before! I always saw it as some sort of blogger right-of-passage, and I gotta say – it's refreshing to write a post without using the words "sweet", "rich", or "crumb". Here's some incentive for my dear readers, too: if you stick around and read to the end, you get a treat. Woooo! Yay! Treats!

So, without further ado: Ten Somewhat Interesting Facts About Nemmie:

1) I have an unhealthy and irrational fear of tornadoes. And I live in Kansas. So essentially the springtime is a 3- to 4-month-long anxiety attack for me.

2) When I was 21, I broke my collarbone in a freak spelunking accident (okay okay – I was actually goofing around doing acrobatics in my friend Nikki's yard). Anyhoo, my collarbone broke clean in half, the doctors couldn't get the two pieces back together, so it healed with one chunk of bone in front of the other. So when you look at my shoulders, one collarbone sticks out abnormally and then just ends abruptly. I have to have all my spaghetti-strapped tops and tanks and bras altered about an inch so that the strap doesn't fall down on my left side. It's nice.

3) I am No. 6 out of 11 kids in my family. I am the Definitive Middle Child. All of us from the same 47-year union, too. Yes, indeed, we are Catholic. I should also point out that it gets mighty chilly up in Wisconsin.

4) During the first 2 years of dating my husband, I pretended I didn't know how to cook. That way, if he came over during a mealtime and we didn't want to go out, he had to do the cooking. Hee. It's really easy to fake a lack of cooking skills – burn a few things in the oven, over-salt something on the stovetop. So dear Hubs did everything in the kitchen while I blissfully lounged on the couch, reading fashion magazines and sipping a cool cocktail. That is - until I got tired of not cooking and wanted to show off my mad baking skillz. So I miraculously learned to cook/bake overnight. If he was on to me, he never let on. Quite the gentleman, that husband of mine.

5) I'm super-duper clumsy (see number 2 above, a perfect example of this fact). I can't get through a morning without spilling coffee on myself. I trip over nothing more than my own two feet. I drop things. I knock things over. Essentially: don't ever put something important to you in my presence, because I'll find a way to fall on top of it. Sometimes I marvel at the fact that I'm still in one piece.

And for a bonus (since I definitely couldn't hit Ten Things):

6) I never leave the house without a lavender marshmallow Peep in my purse. Because you never know when you're going to need one.

That's it, ladies and gents – Ten... er, Six Interesting Facts About Me. Thanks for tagging me Gretchen! And now, I tag my glamourous KC foodies to post this meme:

Amanda
Danielle
Julia
Julie
Leslie
Sarah
Stacey

"5 Things" Meme Rules:
1. Link to your tagger and post these rules.
2. Share 5 facts about yourself
3. Tag 5 people at the end of your post and list their names (linking to them).
4. Let them know they've been tagged by leaving a comment at their Blogs.

Okay guys, you made it. Here's your treat: Mahni made you some chocolate-covered pretzels! Marvel in the wonder of it all...

First, eat some pretzels while someone else carefully lays the rest on a sheet of parchment, and drizzles them with chocolate (what a diva, that Mahni expects everybody to do the dirty work for her).


Next, apply sprinkles liberally.


And voila! They are ready for eating!


Hope you enjoyed the stories and pretzels! Another fun post coming up on Friday :)

25 February 2008

Stilton and Bacon Cheesecakes


I am a clutter-hater at heart, so rather than hold on to the tons of food magazines I receive, I usually just tear out the interesting recipes and recycle the rest (yes, I know many of you hold on to them forever, and consider it terrible to just rip stuff randomly out of my periodicals, but what can I say: this is my OCD coming out).

Anyhoo, because of this I own a folder stuffed to the gills with torn-out recipes, just sitting on my cookbook shelf. I flip through it occasionally, although I've received/bought so many new cookbooks lately that it's gotten quite neglected. This weekend I pulled it back out, dusted it off, and found the perfect little appetizer for my Oscar party: mini stilton cheesecakes. Very easy to pull together, no baking involved so it freed up my oven, and they can be made far ahead of time. Perfect!


I didn't have the 2X2-in. ring molds, so I used cookie cutters instead. Still, they were amazing – the cream cheese mellowed the flavor of the stilton just enough, and the bacon and walnuts are perfect with the stilton. I served mine with salad greens and a nice drizzle of honey. Mmm. One warning though: these are very, very rich. I couldn't even finish one on my own, so I'm very glad I decided to halve the recipe.

Stilton and Bacon Cheesecakes
(from Saveur magazine, recipe by Linda Ellerbee)


Ingredients:
4 Tbsp. butter
1 c. finely crushed digestive biscuits or graham crackers
6 strips bacon, finely diced
8 oz. cream cheese, softened
4 oz. stilton, softened
1⁄2 c. shelled walnuts, finely chopped (optional)
2 strips cooked bacon, broken into thirds

For the crusts: Grease six 2" × 2" ring molds with 1 Tbsp. of the butter; set molds on a cookie sheet. Melt remaining 3 Tbsp. butter and transfer to a small bowl. Add biscuit crumbs and mix well. Put equal amounts of the crumb mixture into prepared molds, firmly pressing on crumbs to form an even crust at base of molds. Chill crusts in the refrigerator for 1 hour.

For the filling: Cook bacon in a large skillet over medium heat until crisp, about 10 minutes. Drain bacon on paper towels. Using a fork, mix cheeses together in a medium bowl. Add bacon and walnuts (if using) and stir well. Pack equal amounts of the filling into molds, smoothing tops with the back of a small warm metal spoon. Cover cheesecakes with plastic wrap and chill in the refrigerator for at least 3 hours and up to overnight.

Run a small knife around inside of molds and slide cheesecakes onto six plates, crust side down. Serve cheesecakes at room temperature, garnished with a piece of bacon, with lettuces and fruit chutney or honey on the side.

23 February 2008

Chocolate Cherry Bread


Every Christmas season, I am one of the many people in town who braves the cold and then stands patiently in line at our beloved Wheatfields, to pick up goodies for the holiday dinner table. There's plenty of time to look around while in that line, however my eyes always fixate on the stack of dense, shiny loaves of Cherry Chocolate Bread.

Most people in line make sure they have a loaf of this bread added to their order, but I have yet to do so. I have never tried this type of bread, to be honest. All I can imagine, looking at those pretty dark loaves, is a rich, chocolatey bread studded with cherries and quality chocolate chunks. I have heard lots of good things about chocolate cherry bread, and at $12.00 a loaf here, I am guessing it must be something truly amazing.

While my rational side would never allow me to pay that much for a small boule, I'm still insanely curious as to what, exactly, this bread tastes like. I love cherries very much, as well as chocolate, so it should be right up my alley. I've googled and searched and looked some more for a recipe to try on my own, finally settling on this one. And off I started one cold winter morning, just me and some coffee and lots and lots of cocoa powder/cherries, to make some of this bread for myself.

To be honest, it wasn't quite what I was expecting. Not to say it's bad, by any means, but not quite up to what I imagined. The icing and nuts on top, while pretty, really take away from the bread itself. All that topping reminds me of a coffee cake or danish, not chocolate bread. The bread was fine. Not as deep of a chocolate taste as I imagined, and the cherries lose something as well. Maybe it's the kirsch that makes it too cloyingly sweet (although I admit I used dried Rainier cherries, not the tart Door County cherries as I would have liked). And I also think using bittersweet chocolate chunks in the dough would work much better than semi-sweet miniature chips, to give it a bit more punch.

I haven't given up on you yet, chocolate cherry bread. I think this recipe will make an amazing bread pudding dessert for work on Monday. And one day, someday, I'll have a nice loaf like those in my fantasies. Even if it means paying twelve bucks for it.

Chocolate Cherry Bread


Ingredients:
2 3/4 - 3 1/4 c. all-purpose flour
1/3 c. unsweetened cocoa powder
1 package active dry yeast
3/4 c. milk
1/2 c. sugar
1/4 c. unsalted butter
1/2 tsp. salt
1 egg
1 Tbsp. kirsch
1/2 c. dried cherries
1/4 c. miniature semisweet chocolate pieces
Milk
1 c. sifted powdered sugar
1/4 tsp. kirsch
2-3 tsp. milk
2 Tbsp. toasted chopped hazelnuts

In a large mixing bowl stir together 1 cup of the flour, the cocoa powder, and yeast; set aside. In a medium saucepan heat and stir the milk, sugar, butter or margarine, and salt till mixture is warm (120 to 130 F) and butter or margarine is almost melted. Add to flour mixture. Add egg and kirsch. Beat with an electric mixer on low speed for 30 seconds, scraping bowl constantly. Beat on high speed for 3 minutes. Using a wooden spoon, stir in cherries, chocolate pieces, and as much of the remaining flour as you can.

Turn dough out onto a lightly floured surface. Knead in enough of the remaining flour to make a moderately soft dough that is smooth and elastic (3 to 5 minutes total). Shape into a ball. Place dough in a lightly greased bowl; turn once. Cover and let rise in a warm place till doubled (about 2 hours).

Punch dough down. Turn dough out onto a lightly floured surface. Cover and let rest for 10 minutes. Grease 2 large baking sheets. Divide dough into 4 equal portions. Roll each portion into a 12-inch-long rope. Place 2 ropes, side by side, on the prepared baking sheet. Twist together; pinch ends to seal and tuck under. Repeat with remaining dough. Cover and let rise in a warm place till nearly double (about 1 hour). Brush with additional milk. Bake in a preheated 350 F oven for about 35 minutes, or till bread is a rich brown color and sounds hollow when tapped. Remove from baking sheets; cool on racks.

In a small mixing bowl stir together sifted powdered sugar, kirsch, and enough milk to make a smooth icing of drizzling consistency. Drizzle cooled loaves with glaze; sprinkle with hazelnuts.

21 February 2008

Meatloaf


Stop gagging. Really, this is a good recipe. It's actually requested after people give it a try. How's that for meatloaf, my friends??

I used to make my mother's recipe. Then I used a friend's recipe for awhile. I never made meatloaf much back in the day, it was fine but never was quite exciting enough. Once I gave this one a try, though, there was no turning back. I actually will crave this dish.

I love all the flavors in it, and the saute you give the onions and garlic really bring a great flavor to this meatloaf. The glaze, too, is quite stellar. I like to make mine with turkey or venison (we try to be healthy in this little house), but I'm sure plain old ground beef works just fine as well! And I love making mine into little mini loaves - one loaf per person, and they are really easy to freeze this way too.

Time to get over that fear, folks! If you are meatloaf-phobic, this version's gonna convert you. Promise :)

Meatloaf
(adapted from Sara Moulton Cooks At Home, 2002)


Ingredients:
1/2 c. ketchup
1/4 c. packed light brown sugar
2 Tbsp. cider vinegar
1 Tbsp. olive oil
1 medium onion, finely chopped
3 garlic cloves, minced
1 large egg, beaten
1/4 c. milk
2 Tbsp. Dijon mustard
1 tsp. hot sauce
2 1/2 tsp. kosher salt
3/4 tsp. dried thyme
3/4 tsp. dried marjoram
1 tsp. freshly ground black pepper
1 c. bread crumbs
1/4 c. chopped parsley
2 lbs. ground meat (beef, turkey, venison; all work really well)

To make the glaze: combine ketchup, brown sugar, and vinegar. Set aside.

For the meat loaves, preheat the oven to 350 F. Oil a foil-lined rimmed baking sheet. Heat the oil in a medium skillet over medium heat. Add the onion and garlic and cook, stirring until the vegetables have softened and are starting to brown, about 7 minutes. Set aside to cool a bit.

In a large bowl: add the milk, egg, mustard, hot sauce, salt, thyme, marjoram, and pepper and whisk together to combine. Add the ground meat, bread crumbs, and parsley and combine well.

Scoop mixture onto baking sheet using 1/2 cup measure. Shape into ovals. Brush with glaze, and bake 25-30 minutes. Brush once again with glaze (I tend to just pour it over at this point, until I've used it up) and bake another 10 minutes. The internal temperature should be 165 F when tested with an instant-read thermometer.

Serve at once, while warm. Best with mashed potatoes and peas, mmm.

18 February 2008

Raised Lemon Doughnut Squiggles


Last time my parents came up for a visit we bummed around Kansas City for awhile, taking in the shops on The Plaza and hitting up a knitting store in nearby Westport. We tried to hunt down an embroidery shop for my mother, but when we got to the address we found it was replaced by... a thrift store.

However, instead of being upset, we hustled inside. Because, you see, I share a certain affliction with my parents. I can't stop buying used cookbooks. So there the three of us sat, tucked into the back corner of the thrift store, thumbing through the treasure-trove of used cookbooks they had. And we all trotted out happily loaded down with our great finds.

Among the books I found that day: my very own copy of Farm Journal's Country Cookbook. One from the late 1950s, it's a compilation of tried-and-true recipes from Farmer's Wife Magazine, and there are some real treats in there. Living in Kansas and married to a man from farming country, I can tell you one thing for certain: those farmers' wives make some mean baked goods.


After Peabody and Helen's Time to Make the Doughnuts event, for some darn reason I couldn't stop making the things. And voila, what was one of the first things I flipped to? Raised doughnuts. They had an orange version, but I changed it up and made it lemon (had to get rid of the last few in my fridge, they're too expensive to waste these days). One mistake I made? I don't have a doughnut cutter, but though I could get around it by rolling my dough into ropes and "pinching" them closed before the final rise. Ha! Ha ha! That did not work so well; they seemed well formed but popped apart as soon as they hit the hot oil. Hence my "squiggle" doughnuts. So a word to the wise: doughnut cutters are your friends.

They still tasted fabulous, though, regardless of their odd shape. Give them a try; they are wonderful with some warmed fruit jam for dipping :)

Raised Lemon Doughnuts
(Adapted from Farm Journal's Country Cookbook, 1959)

Ingredients:
3/4 c. milk
1/3 c. sugar
1 tsp. salt
1 pkg. dry active yeast
1/4 c. lemon juice
4 1/4 c. flour
2 Tbsp. lemon zest
1/3 c. shortening
2 eggs

Scald the milk. Add sugar and salt. Cool to lukewarm temperature.

Sprinkle yeast over warm (~110 F) lemon juice. Stir until dissolved. Add milk mixture, 2 c. flour, and lemon zest. Beat well. Stir in shortening, then eggs.

Add remaining flour, kneading in last portion on a lightly floured surface. Place in a greased bowl, turning once to grease the top. Let rise in a warm place until doubled.

Turn out on a lightly floured board. Roll dough about 1/3-inch thick; cut. Let cut doughnuts rise until very light (30-40 minutes). Leave uncovered so that a crust will form.

Pick up on a wide, floured spatula and ease into deep fat fryer/fry pan of oil (at 375 F). Fry until golden brown, turning once. Drain and dust with powdered sugar. Makes 2 dozen.

14 February 2008

Oatmeal Breakfast Bread


I wasn't going to update today. For one, I am leaving town early tomorrow morning, not to return until Sunday night, so I've been busy busy busy. For another, Hubs pretty much demolished this loaf before I could take any decent pictures. But then again: nothing can stop me from updating my blog, and this recipe seems pretty fitting for today. So after some packing and errand-running and whatnot, I made sure I took some pictures of the rest of this bread, just so I could post tonight.

I couldn't go without updating on Valentine's Day. Truly one of my favorite holidays, no matter how much others absolutely hate it. And what better day to break out a heart-healthy recipe, don't you agree?

This bread is very good for you, chock full of oatmeal and egg whites and applesauce as well as big chunks of dried fruit. A great breakfast for those in a hurry in the mornings; just bake up the loaf Sunday night, and you've got plenty to get you through the week. The fact that it's a Dorie Greenspan recipe only makes it that much better: you are guaranteed a soft, moist bread with a fabulous crunchy topping and tons of flavor. So for you, my dear readers - to your hearts, today on this heart-driven holiday: enjoy a healthy breakfast.

Oatmeal Breakfast Bread


Ingredients:
For the topping:
1/4 c. (packed) light brown sugar
1/4 c. chopped walnuts or pecans
1/4 tsp. ground cinnamon
For the bread:
2 egg whites
1 1/4 c. unsweetened applesauce
1/3 c. flavorless oil, such as canola or safflower
1/4 c. buttermilk or whole milk
1 1/4 c. all-purpose flour
3/4 c. sugar
1 1/2 tsp. baking powder
3/4 tsp. ground cinnamon
1/2 tsp. baking soda
1/2 tsp. salt
1/4 tsp. freshly grated nutmeg
Pinch of ground cloves
1/2 c. diced dried figs, apples, or apricots or moist, plump raisins
1 c. old-fashioned oats

Center a rack in oven; preheat to 350 F. Butter 9-by-5-inch loaf pan, dust with flour, and tap out excess. Put pan on a baking sheet.

Make the topping: In a small bowl, use your fingers to toss together the sugar, nuts, and cinnamon until evenly mix. Set aside.

Make the bread: Whisk together the egg whites, applesauce, oil, and buttermilk until well blended.

In a large bowl, whisk together the flour, sugar, baking powder, cinnamon, baking soda, salt, nutmeg, and cloves. Remove 1/2 teaspoon of mix; toss it with the fruit to coat. Set aside. Stir the oats into the bowl. Pour the liquid ingredients over the dry, and, using a large rubber spatula, stir just until everything is evenly moistened. Don't overdo the mixing. Scatter the dried fruit over batter and stir it to blend. Scrape batter into pan; sprinkle over topping, tamping it down lightly with fingers so it sticks.

Bake 55 to 65 minutes, or until the bread is browned and a thin knife inserted into center comes out clean. Transfer bread to a cooling rack for about 5 minutes. Run a knife around the sides of pan and unmold. Invert and cool to room temperature right side up.

12 February 2008

Grapefruit Salad with Apples

Last time I went home for a visit, my parents surprised me with a copy of 1080 Recipes by Simone and Inés Ortega. And what an awesome little cookbook it is! (Ha ha! Okay, large, 5-lb-ish, is more like it.) Spain's version of the Joy of Cooking, it immediately went to the best seller list when published, and has been in print for over 30 years. Phaidon (an art-heavy publisher) took on the task of translating and printing the tome, and I'm so very glad they did.


Each recipe is categorized and referred to by its given number rather than by page number, and there are tons of lovely pastel drawings throughout (the variety meats section has the most interesting by far!). Also tucked in each section is a group of smaller-sized, glossy imagess of some of the dishes found in each section. Maybe because I work in publishing and notice these little touches, but still I really gotta say: this is one of the most charming cookbooks I've ever laid eyes on.

I really dig this book not only for it's peculiarities, but also because most of the recipes are very simple and short - handful of ingredients, half a page for most recipes, and yet so interesting and different. It's a book I can dig into when needing a last-minute inspiration, and certainly come up with something cool. I will say that you need to go with your gut on most recipes - cook those onions at a higher heat if you think it works, or simmer your stew longer to get more tender meat. There's a wee bit lost in translation, but all in all it's a great cookbook.

I'm breaking this cookbook out into my blog with a nice little salad. This salad is very interesting - tart apples, and bitter/sweet grapefruit in a tangy, sharp dressing. Simple yet complex, and I find myself craving it often. Makes a great meal with a blackened chicken/fish and rice (or grapefruit roast chicken, which I hope to blog about in the near future...).

#385, Grapefruit Salad with Apples
(Ensalada de Pomelo co Manzana)


Ingredients:
1 pink grapefruit
1 apple (I used McIntosh)
Juice of 1/2 lemon
2 heads endive (I used a spring mix)
3 1/2 oz. Roquefort cheese
2 Tbsp. olive oil
Juice of 1 lemon
2 Tbsp. plain yogurt
Fresh mint leaves
Salt and pepper

Peel the grapefruit, removing all traces of pith. Cut out the segments from the membranes and cut them into pieces. Peel, core, and slice the apple and toss with half a lemon's worth of juice. Put the grapefruit, apple, and endive into a salad bowl and mix well.

Prepare the dressing by mashing the cheese with oil in a small bowl. Stir in lemon juice, and season to taste with salt and pepper. Slowly stir in yogurt, a little at a time. Add the dressing to the salad and chill well before serving, garnished with mint leaves.

09 February 2008

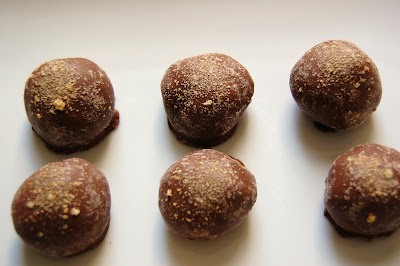
Peanut Butter Balls


This is definitely a favorite. I got the recipe from my sister Coco, she gave me a cool little recipe book in which you could write your own recipes, and she had written this one in before giving it to me (I still have it, even though the pages are grease-marked and are falling out, it rocks). I only modified the recipe to make into balls rather than in cups, and it is amazing.

Deceptively easy, which seems like it would be rather average, but oh no. These little suckers are addictive; thanks to the uneven crumbles of the graham crackers, the texture is smooth-yet-crunchy. Just enough buttery nutty goodness with sweet and chocolate. They are the closest thing to actual Reese's Peanut Butter Cups that I have ever come across, and this is one of my signatures, as simple as it is. I make these all the time, for any function (parties, potlucks, baptisms, Christmas, whatever). It still remains my most requested recipe. So here you go, everyone who has ever asked (and those that are first timers). My Famous Peanutbutter Balls. Enjoy, and try to keep the recipe to yourself :)

Peanut Butter Balls


Ingredients:
2 c. crushed graham crackers
2 c. powdered sugar
2 c. peanut butter (creamy or chunky, your choice)
1/4 c. butter (barely melted in the microwave)
Dipping chocolate

Mix together the first 4 ingredients as you would a pie crust. Chill in the fridge for at least 1 hour.

Melt the dipping chocolate. Roll peanut butter mixture into small balls, and dip into the chocolate. Allow to set on wax paper. Chill until served.

06 February 2008

Dark Chocolate Cupcakes


I found this recipe at Chockylit's wonderful site Cupcake Bakeshop (you really need to check that out, the woman makes some amazing cupcakes). Her recipe was originally for truffle cupcakes, but I went a little more simple and just made them dark chocolate. Still fabulous – dark, rich, and absolutely lovely. It's almost like a bittersweet-chocolate brownie, except in cupcake form.

I halved her recipe, hence the "1/8"th measurements. Feel free to double it back up; that would give you about 25 cupcakes. The batter is super-thick but man, it makes one mean chocolate cupcake.

Dark Chocolate Cupcakes


Ingredients:
3 to 4 oz. Valrhona 85% cacao (or any bittersweet chocolate)
12 Tbsp. (1 1/2 sticks) butter
1 1/8 c. sugar
4 eggs
5/8 c. flour
1/8 cup cocoa powder, unsweetened
3/4 tsp. baking powder
Pinch salt

Prepare baking sheets by lining with parchment paper and laying out cupcake cups. Preheat oven to 350 F.

Chop chocolate and transfer into the bowl of a standing mixer. Add butter to the chocolate and place the bowl over a pan of simmering water. Stir until chocolate melts and butter is combined.
Remove from heat and stir in sugar. Let mixture cool for 10 minutes. Beat in an electric mixer for 3 minutes. Add eggs, one at a time, mixing for 10 seconds between each.

Sift the flour, cocoa powder, baking powder, and salt into the mixture, return to the electric mixer, and mix until blended.

Scoop batter into cupcake cups and bake for 25 minutes or until a toothpick comes out clean.

03 February 2008

Death By Chocolate Event


The folks at Culinate are hosting a blogging event, Death by Chocolate. Check it out dear readers: there are 2 trips to Napa Valley as prizes, for readers as well as bloggers. I initially heard about this event through a group of online bloggers, but decided not to enter my blog. There are lots of fabulous blogs out there, with much more interesting recipes, better photos, and superior writing. So I was surprised to find out a few days ago that my blog had been nominated to enter the contest. Well, I'm not one to turn down something so lovely, so here we go.

I haven't been blogging long, so I thought it would be easy to find a past chocolatey-goodness post to enter. Heh. Apparently, I like chocolate more than I thought: there's several cookies that would fit the bill. The Bittersweet Chocolate Souffle with Earl Grey Sauce is impressive-sounding, but just not quite right. Chocolate tartlets? Truffles? Cupcakes? Nah, all are a bit too ordinary. I love my Spicy Chocolate Gingerbread, but the pictures didn't turn out too great (TOO BAD BECAUSE IT ROCKS).

I finally decided on Chocolate Cherry Cakes with Almond Buttercream. The photos are nice, the cakes are absolute chocolate-cherry heaven, and darn it - who can beat that Bonus Recipe at the end of the post, perfect to wash down those cakes?!? So go forth, dear readers, and pretty-please vote for me in the Death by Chocolate event (clicky click on the icon below). And thanks to the sweet person who nominated me! It means a ton just to be included with a lot of those fine blogging folks.


02 February 2008

Berliner Pfannkuchen


So, there's a funny little story out there involving John F. Kennedy. In 1963, he made a visit to West Berlin. Once there he gave a very moving speech, and ended it with a heartfelt "Ich bin ein Berliner!" ("I am a Berliner!"). The crowd before him, they roared with enthusiasm. Only, unfortunately for Kennedy, the literal translation of "Ich bin ein Berliner!" is actually, "I am a jelly doughnut!".

Okay okay,... because he was not an actual real Berliner, his translation was actually technically correct (true Berliners would say, "Ich bin Berliner"). But I rather enjoy the thought that he shouted to a crowd that he was a jelly doughnut. And besides, Berliners are one rockin' jelly doughnut, so it's a great choice if you were to actually pretend you were a doughnut.

Berliners, as you can tell by this point, are a German jelly doughnut. They are traditionally served in the days prior to Ash Wednesday (hence the post, as we're closing in quickly!). I love these doughnuts. They remind me of cannonballs, a nice poofy dough with a sweet jam center. The dough itself is not too sweet, which I find just lovely. Although I rolled mine in sugar instead of the traditional sprinkle of powdered sugar, to make up for that lack of sweetness (for those people like dear Hubs, who has an insatiable sweet tooth).


There's another reason for the timing of this post, and that would be Peabody and Tartlette's event "Time to Make the Doughnuts". When you get these two ladies together, it's a dynamic similar to the duo of me and my sister Beah (except for fabulous baked goods and sweets, not mischief). Considering the hostesses, there was no way I was passing this one up. Besides: what a great reason to break out the fryer, right?? So to you, my dear ladies, I bring Berliners. And I wanna hear a nice "Ich bin ein Berliner" from you!

Berliners
(recipe from German Cooking by Ruth Malinowski)


Ingredients:
3 c. all purpose flour
2 egg yolks, beaten
1/4 c. sugar
1/4 c. butter
1 1/2 tsp. salt
Grated rind of 1 lemon
1 1/4 c. warm water; (105 to 115 deg
1/4 c. plum or apricot jam (I used raspberry)
1 pkg. Active dry yeast

Mix 2 cups flour with sugar and salt. Make a well in the center and add 1/4 cup warm water and the yeast. Allow to rise 20 minutes.

Add egg yolks, remaining water, and butter. Beat until well-blended. Add lemon rind and remaining flour until a soft dough is formed. Knead for 5-10 minutes, until dough is smooth and elastic. Place dough in a lightly greased bowl. Cover and let rise in a warm place until doubled in bulk, about 1 1/2 hours.

Punch dough down. On lightly floured board roll dough 1/4 inch thick. cut dough into 2 inch rounds. On half of the rounds place about 1 teaspoons of jam or jelly. Moisten edges with water. Place a second round on top. Press firmly to seal edges. Let rise 15 minutes.

Fry in deep fat heated to 375 F for 4 minutes on each side or until browned. Cut into first doughnut to be sure it is done in the center. Drain on absorbent paper and sprinkle with lots of sugar as the doughnuts are not sweet.