Showing posts with label Daring Baker Challenge. Show all posts

28 February 2009

Chocolate Valentino and Chubby Hubs Ice Cream


The February 2009 challenge is hosted by Wendy of WMPE's blog and Dharm of Dad ~ Baker & Chef. We have chosen a Chocolate Valentino cake by Chef Wan; a Vanilla Ice Cream recipe from Dharm and a Vanilla Ice Cream recipe from Wendy as the challenge. Although I didn't use either ice cream recipe, as we were allowed to make any kind we wanted...

Okey dokey, the official wording is out of the way, so now I can do my real write up :)

Like probably half of the Daring Baker community, I made my cake for Valentine's Day. I mean really - what could be more romantic than a dense brownie-like cake and some homemade ice cream for dessert? I ran into a bit of a snag, but I was no worse for the wear.

This cake only has 3 ingredients. Now, at first reading I thought, Piece of cake! I'll have this one finished and done in no time. True, very true, but when I actually settled in to make it, I realized that if I mess up any part of this recipe, it'll be an expensive thing to re-do (especially since I was using my precious stash of Valrhona chocolate for this). But not to be easily intimidated, I forged ahead.


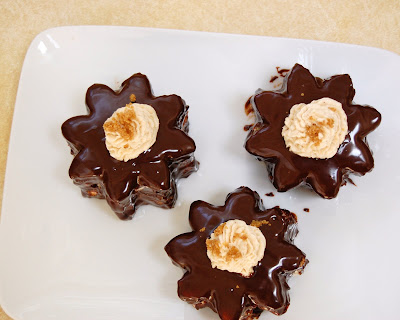
Things were a little hairy right off the bat, when I freaked for a second thinking I had overheated my butter/chocolate (therefore burning the chocolate to worthlessness), but thankfully that was fine. Whew! I whipped my whites and carefully folded them in. No screwing around. I carefully poured my batters into my cake pan and mini Le Creuset heart pan (perfect for pictures, thanks Anne!). I bake, and watch that lovely rise and slight fall of the cake, the characteristic dimpling of the top. I pulled the cakes out and set them too cool. Ten minutes later, faithful to the recipe, I picked up the round cake pan to unmold my cake.

Um. Well, here's where I had a problem: I went to gracefully (but quickly) flip it onto the cooling rack to finish cooling. Only I kinda moved too quick, and my pregnant butter-fingers started to lose grip on the pan. I fumbled with it, flipped it (very impressively, I might add) in the air, and then popped it with my palm when I went to desperately grasp it. Well, that was it. Up! it went and then Down! it landed. With a splat. Chocolate Valentino, shredded and smooshed and not looking too good:


Yeah.

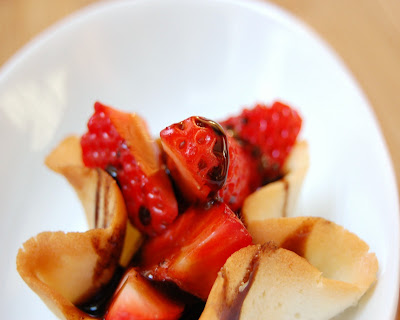
It wasn't a total loss - I just let the darn thing cool in the state you see above, then chunked up the surviving parts to make a lovely ice cream parfait for our dinners. The Le Creuset heart, fortunately, was just fine so I used that the next morning to take pictures.

So: on to the cake. If you try this, keep in mind that there is no messing around with this Valentino recipe! Use good chocolate, as the cake will taste exactly like the chocolate you use. It gets a bit expensive (as you need to use a pound of chocolate), but that won't stop me from making this again. The cake ends up very dense, reminiscent of a brownie. Oooooh, so good.

We were asked to make homemade ice cream to accompany the cake. Initially I was going to make something plain, as I didn't want to overtake the glorious cake. Then at the last minute I changed my mind, when I thought about just how good Chubby Hubby is (and how much I didn't want to buy ice cream when I needed to also make ice cream...). I came up with my own version thanks in part to this recipe, and I must say: it tastes remarkably like the original. Awesome.

For those not in the know: Chubby Hubby is only the BEST flavor ever made by Ben & Jerry's. It's a malted vanilla ice cream with chunks of chocolate-covered, peanut-butter-filled pretzel nubs, and ribbons of peanut butter and fudge. It is salty and sweet and creamy and crunchy and just all-around perfect. Go buy a pint and see for yourself, or make my version below...


Chocolate Valentino
(from Sweet Treats by Chef Wan)


Ingredients:
16 oz. of roughly chopped chocolate (I used half Ghirardelli milk chocolate, half Valrhona bittersweet)
1/2 c. + 2 Tbsp. unsalted butter
5 large eggs, separated

Put chocolate and butter in a heatproof bowl and set over a pan of simmering water (the bottom of the bowl should not touch the water) and melt, stirring often.

While your chocolate butter mixture is cooling. Butter your pan and line with a parchment circle then butter the parchment.

Separate the egg yolks from the egg whites and put into two medium/large bowls.

Whip the egg whites in a medium/large grease free bowl until stiff peaks are formed (do not over-whip or the cake will be dry).

With the same beater beat the egg yolks together. Add the egg yolks to the cooled chocolate.

Fold in 1/3 of the egg whites into the chocolate mixture and follow with remaining 2/3rds. Fold until no white remains without deflating the batter.

Pour batter into prepared pan, the batter should fill the pan 3/4 of the way full, and bake at 375 F. Bake for 25 minutes until an instant read thermometer reads 140 F. Note – If you do not have an instant read thermometer, the top of the cake will look similar to a brownie and a cake tester will appear wet.

Cool cake on a rack for 10 minutes, then unmold.


(Not Actually) Chubby Hubs Ice Cream
(my shameless adaption of B&J's Chubby Hubby, and no my Hubs is not actually chubby)


Ingredients:
2 c. half and half (or 1 c. heavy cream + 1 c. whole milk)
4 egg yolks
1/2 c. sugar, divided
A dash of salt
1 c. heavy cream
2/3 c. malt powder
1/2 recipe of Peanut Butter Swirl (follows)
Hot fudge (I just used jarred)
1 c. chocolate-covered, peanut-butter filled pretzel nuggets (World Market has them!)

Whisk yolks and 1/4 c. sugar until ribbon-like in a medium bowl.

Heat half and half and 1/4 c. sugar and the salt over medium heat until barely boiling, stirring constantly. Add the half and half mixture to the egg yolk mixture, slowly so as not to curdle the eggs, and return everything to the pan. Bring the mixture to a boil over medium-low heat and cook for about 10 minutes or so or until the mixture coats the back of a wooden spoon (you're going to have to stir it the entire time and probably will be using a wooden spoon, so at some point, take the spoon out, run your finger down the back and if the track stays 'clear', the mixture is done).

Turn off the heat, and add the heavy cream to cool the mix and then strain into the medium bowl.

Put the bowl over a larger bowl filled with ice water and stir in order to speed up the cooling process, whisk in the malt and vanilla, and then chill in the refrigerator overnight to make the following day.

Mix the malted custard in your ice cream maker as directed. Once the ice cream has finished churning (after 20-40 minutes): place in your freezable container. Add a few blobs of Peanut Butter Swirl and hot fudge, and fold a few times into the soft ice cream mixure. Add the pretzels, and fold 2-3 more times to fully incorporate. Freeze for at least a few hours before serving.

Peanut Butter Swirl

Ingredients:
1 c. creamy peanut butter
1 (14 oz.) can sweetened condensed milk
3-4 Tbsp. heavy cream, to thin

Whip peanut butter until fluffy. Slowly add the sweetened condensed milk. Once incorporated, use the heavy cream to thin the mixure a bit.

29 January 2009

Tuiles


This month's challenge is brought to us by Karen of Baking Soda and Zorra of 1x umruehren bitte aka Kochtopf. They have chosen Tuiles from The Chocolate Book by Angélique Schmeink and Nougatine and Chocolate Tuiles from Michel Roux. I was a wee bit sad at first, knowing the baking reputations these two lovely Europeans have, but was happy nonetheless to tackle the recipe, as I had never tried tuiles before :)

The whole bit of choosing this recipe for January was to help those who need some waistline mending following the December holidays. Amen! I personally can't actually diet, but eating healthy is very important these days, so I was glad to take on the challenge. We were asked to make our tuiles in any shape we desired, and pair with a light, healthy filling.


I made small baskets out of mine, simply pushing the hot round cookies into my tiny brioche molds to set. Taking advantage of the fact that the grocer actually had some plump tasty strawberries in the dead of winter, I used these tuile cups to serve up one of my favorite combos - fresh strawberries with a reduced balsamic vinegar.

Oh, mmmm - the tart and sweet and yet Terribly Healthy in a crisp cookie was just perfect. The balsamic reduction was compliments of Trader Joe's (one of several foodie Christmas gifts from my amazing sis Anne), so no recipe to follow unfortunately. Sorry for that. You can surf the Interwebs to find many a recipe though, I am sure.


Thanks to both Karen and Zorra for the recipe - I rather liked it, and will probably give these little light cookies a go again (and probably again). And as always - be sure to check out those other Daring Baker creations out there!

Tuiles
(from The Chocolate Book by Angélique Schmeinck, 1993)


Ingredients:
1/4 c.softened butter (not melted but soft)
1/2 c. sifted confectioner’s sugar
Dash of vanilla extract
2 large egg whites (slightly whisked with a fork)
1/2 c. sifted all purpose flour
1 Tbsp. cocoa powder
Butter or spray to grease baking sheet

Preheat the oven to 350 F. Using a hand whisk or a stand mixer fitted with the paddle (low speed) and cream butter, sugar and vanilla to a paste. Keep stirring while you gradually add the egg whites. Continue to add the flour in small batches and stir to achieve a homogeneous and smooth batter/paste. Be careful to not overmix.

Cover the bowl with plastic wrap and chill in the fridge for at least 30 minutes to firm up. (This batter will keep in the fridge for up to a week, take it out 30 minutes before you plan to use it).

Line a baking sheet with parchment paper or grease with either butter/spray and chill in the fridge for at least 15 minutes. This will help spread the batter more easily if using a stencil/cardboard template such as the butterfly. Press the stencil on the baking sheet and use an offset spatula to spread batter. Leave some room in between your shapes. Mix a small part of the batter with the cocoa and a few drops of warm water until evenly colored. Use this colored batter in a paper piping bag and proceed to pipe decorations on the wings and body of the butterfly (I totally skipped the cocoa-colored decorative bit myself).

Bake butterflies in a preheated oven (350 F) for about 5-10 minutes or until the edges turn golden brown. Immediately release from baking sheet and proceed to shape/bend the cookies in the desired shape. These cookies have to be shaped when still warm, you might want to bake a small amount at a time or maybe put them in the oven to warm them up again.

Or: place a baking sheet toward the front of the warm oven, leaving the door half open. The warmth will keep the cookies malleable.

If you don’t want to do stencil shapes, you might want to transfer the batter into a piping bag fitted with a small plain tip. Pipe the desired shapes and bake. Shape immediately after baking using for instance a rolling pin, a broom handle, cups, cones….

29 November 2008

Caramel Cake with Caramelized Butter Frosting


The plan was to get this post written and up first thing this morning. I had a glorious day planned, too: big coffee and blog writing, then decorate the house, watch the KU/MU game on TV, veg out, call the family. Instead I was awakened at 7am to a soft snowfall outside my bedroom window and the pitter-patter of. . . water dripping from our living room ceiling, splattering all over our beautiful dark hardwood floor. Lovely, just lovely.

Anyway, so I'm up and have done *quite a bit* already this morning but wanted to get this post done and over with, before I got wrapped up in all that other garbage I'll be dealing with all day.


I made mini cakes (from ramekins). I also thirded the recipe. I had read from other Daring Bakers that this cake was sweet sweet sweet, so I knew there was no way we would ever polish off more than a slice apiece. And yes, that is absolutely true. I won't be recreating the frosting anytime soon, that's where most of the sickeningly sweet flavor came from. The cake itself, though, was one of the best cakes I have ever made - incredibly soft crumb, like the kind you find in fancy wedding cakes and the like. With just a lightly sweet flavor of caramel. Oh, yes, the cake was very, very good.


We were also given the option to make caramels, but I've decided to tackle and blog that recipe another time. It got rave reviews from my fellow Daring Baker foodies. Thanks to Dolores, Alex (Brownie), and Jenny for hosting this month! And as always: check out those other Daring Bakers' creations this month.

Caramel Cake with Caramelized Butter Frosting


Ingredients:
10 Tbsp. unsalted butter, at room temperature
1 1/4 c. granulated sugar
1/2 tsp. kosher salt
1/3 c. Caramel Syrup (see recipe below)
2 eggs, at room temperature
Splash vanilla extract
2 c. all-purpose flour
1/2 tsp. baking powder
1 c. milk, at room temperature

Preheat oven to 350F. Butter one tall (2 – 2.5 inch deep) 9-inch cake pan.In the bowl of a stand mixer fitted with a paddle attachment, cream butter until smooth. Add sugar and salt & cream until light and fluffy.

Slowly pour room temperature caramel syrup into bowl. Scrape down bowl and increase speed. Add eggs/vanilla extract a little at a time, mixing well after each addition. Scrape down bowl again, beat mixture until light and uniform.

Sift flour and baking powder. Turn mixer to lowest speed, and add one third of the dry ingredients. When incorporated, add half of the milk, a little at a time. Add another third of the dry ingredients, then the other half of the milk and finish with the dry ingredients. {This is called the dry, wet, dry, wet, dry method in cake making. It is often employed when there is a high proportion of liquid in the batter.}

Take off mixer and by hand, use a spatula to do a few last folds, making sure batter is uniform. Turn batter into prepared cake pan.

Place cake pan on cookie sheet or 1/2 sheet pan. Set first timer for 30 minutes, rotate pan and set timer for another 15-20 minutes. Your own oven will set the pace. Bake until sides pull away from the pan and skewer inserted in middle comes out clean. Cool cake completely before icing it. Cake will keep for three days outside of the refrigerator.


Caramel Syrup
2 c. sugar
1/2 c. water
1 c. water (for "stopping" the caramelization process)

In a small stainless steel saucepan, with tall sides, mix water and sugar until mixture feels like wet sand. Brush down any stray sugar crystals with wet pastry brush. Turn on heat to highest flame. Cook until smoking slightly: dark amber.

When color is achieved, very carefully pour in one cup of water. Caramel will jump and sputter about! It is very dangerous, so have long sleeves on and be prepared to step back.

Whisk over medium heat until it has reduced slightly and feels sticky between two fingers. {Obviously wait for it to cool on a spoon before touching it.}

Note: For safety reasons, have ready a bowl of ice water to plunge your hands into if any caramel should land on your skin.

Caramelized Butter Frosting

12 Tbsp. unsalted butter
1 lb. confectioner’s sugar, sifted
4-6 Tbsp. heavy cream
2 tsp. vanilla extract
2-4 Tbsp. caramel syrup
Kosher or sea salt to taste

Cook butter until brown. Pour through a fine meshed sieve into a heatproof bowl, set aside to cool.Pour cooled brown butter into mixer bowl.

In a stand mixer fitted with a paddle or whisk attachment, add confectioner's sugar a little at a time. When mixture looks too chunky to take any more, add a bit of cream and or caramel syrup. Repeat until mixture looks smooth and all confectioner's sugar has been incorporated. Add salt to taste.

(recipes above courtesy of Shuna Fish Lydon)

29 October 2008

Pizza Dough


How excited was I to see that pizza was the official October Challenge for the Daring Bakers? Pizza dough is so easy, and you can get mad-creative with toppings. I saw the announcement and gloated about how much time I’d have to come up with some spectacular combination of exotic flavors... And then I barely made the deadline (what can I say, October totally got away from me). Granted, taking photos with no lightbox late in the evening does not make for the best photo opportunities, but I made do.

The “trick” to this challenge was that we had to toss the dough like the pros do, and get photographic evidence of this. Pizza dough I can make in my sleep, but tossing the dough? Yeah, I officially suck at that. That dough never got more than an inch from my knuckles and it usually got holes in it – oopie. But! I gave it the old college try, as evidenced by the photo below. Thanks to Hubs for capturing this stunning action shot:


Yeah, see? The late evening is not the best for shooting.

I decided to make a bunch of small pizzas with random toppings. One was what I call “autumn margherita style”, with fresh mozzeralla and garlic and sun-dried tomatoes with a touch of dried basil. Another was classic veggie, with lots of mushrooms, onions, bell peppers, black olives… The third was the Hub’s creation, some thing with man toppings (I have no idea, was in a cold-induced fog), and the last was roasted chicken with garlic, bell peppers, and onions. Yum! I was going to make dessert pizza but decided against it at the last minute, given all the Halloween candies I already consumed that day. C’est la vie, I’ll give it a go next time I make pizza…


A big thanks to Rosa of Rosa’s Yummy Yums for hosting this challenge. And don’t forget to check out the other Daring Bakers’ versions this month – there are a ton of mouth-watering pizza combinations out there!

Pizza Dough
(from The Bread Baker’s Apprentice by Peter Reinhart)


Ingredients:
4 1/2 c. unbleached high-gluten bread flour or all purpose flour, chilled
1 3/4 tsp. salt
1 tsp. instant yeast
1/4 c. olive oil
1 3/4 c. water, ice cold
1 Tbsp. sugar
Semolina/durum flour or cornmeal for dusting

Day 1
Mix together the flour, salt and instant yeast in a big bowl (or in the bowl of your stand mixer).

Add the oil, sugar and cold water and mix well (with the help of a large wooden spoon or with the paddle attachment, on low speed) in order to form a sticky ball of dough. On a clean surface, knead for about 5-7 minutes, until the dough is smooth and the ingredients are homogeneously distributed. If it is too wet, add a little flour (not too much, though) and if it is too dry add 1 or 2 teaspoons extra water.

NOTE: If you are using an electric mixer, switch to the dough hook and mix on medium speed for the same amount of time. The dough should clear the sides of the bowl but stick to the bottom of the bowl. If the dough is too wet, sprinkle in a little more flour, so that it clears the sides. If, on the contrary, it clears the bottom of the bowl, dribble in a teaspoon or two of cold water.

The finished dough should be springy, elastic, and sticky, not just tacky, and register 50°-55° F/10°-13° C.

Flour a work surface or counter. Line a jelly pan with baking paper/parchment. Lightly oil the paper.

With the help of a metal or plastic dough scraper, cut the dough into 6 equal pieces (or larger if you want to make larger pizzas).

To avoid the dough from sticking to the scraper, dip the scraper into water between cuts.

Sprinkle some flour over the dough. Make sure your hands are dry and then flour them. Gently round each piece into a ball.

NOTE: If the dough sticks to your hands, then dip your hands into the flour again.

Transfer the dough balls to the lined jelly pan and mist them generously with spray oil. Slip the pan into plastic bag or enclose in plastic food wrap.

Put the pan into the refrigerator and let the dough rest overnight or for up to thee days.

NOTE: You can store the dough balls in a zippered freezer bag if you want to save some of the dough for any future baking. In that case, pour some oil (a few tablespoons only) in a medium bowl and dip each dough ball into the oil, so that it is completely covered in oil. Then put each ball into a separate bag. Store the bags in the freezer for no longer than 3 months. The day before you plan to make pizza, remember to transfer the dough balls from the freezer to the refrigerator.

Day 2
On the day you plan to eat pizza, exactly 2 hours before you make it, remove the desired number of dough balls from the refrigerator. Dust the counter with flour and spray lightly with oil. Place the dough balls on a floured surface and sprinkle them with flour. Dust your hands with flour and delicately press the dough into disks about 1/2 inch thick and 5 inches in diameter. Sprinkle with flour and mist with oil. Loosely cover the dough rounds with plastic wrap and then allow to rest for 2 hours.


At least 45 minutes before making the pizza, place a baking stone on the lower third of the oven. Preheat the oven as hot as possible (500° F/260° C).

NOTE: If you do not have a baking stone, then use the back of a jelly pan. Do not preheat the pan.

Generously sprinkle the back of a jelly pan with semolina/durum flour or cornmeal. Flour your hands (palms, backs and knuckles). Take 1 piece of dough by lifting it with a pastry scraper. Lay the dough across your fists in a very delicate way and carefully stretch it by bouncing it in a circular motion on your hands, and by giving it a little stretch with each bounce. Once the dough has expanded outward, move to a full toss.

NOTE: Make only one pizza at a time. During the tossing process, if the dough tends to stick to your hands, lay it down on the floured counter and reflour your hands, then continue the tossing and shaping. In case you would be having trouble tossing the dough or if the dough never wants to expand and always springs back, let it rest for approximately 5-20 minutes in order for the gluten to relax fully,then try again. You can also resort to using a rolling pin, although it isn’t as effective as the toss method.

When the dough has the shape you want (about 9-12 inches/23-30 cm in diameter - for a 6 ounces/180g piece of dough), place it on the back of the jelly pan, making sure there is enough semolina/durum flour or cornmeal to allow it to slide and not stick to the pan.

Lightly top it with sweet or savory toppings of your choice.

NOTE: Remember that the best pizzas are topped not too generously. No more than 3 or 4 toppings (including sauce and cheese) are sufficient.

Slide the garnished pizza onto the stone in the oven or bake directly on the jelly pan. Close the door and bake for about 5-8 minutes.

NOTE: After 2 minutes baking, take a peek. For an even baking, rotate 180°.If the top gets done before the bottom, you will need to move the stone or jelly pane to a lower shelf before the next round. On the contrary, if the bottom crisps before the cheese caramelizes, then you will need to raise the stone or jelly pan.

Take the pizza out of the oven and transfer it to a cutting board or your plate. In order to allow the cheese to set a little, wait 3-5 minutes before slicing or serving.

27 September 2008

Lavash Crackers


This one kinda sneaked up on me. Thank goodness I double-checked the deadline a few days ago! Gave me time to eek out my entry into our monthly little baking club.

This month, we spiced things up a bit. Our challenge was to make lavash crackers (an Armenian hard flatbread), and gluten-free ones to boot. Our first Alternative Challenge! I have never in my life worried about the gluten in my life, love the stuff. Can't live without it. I've tried gluten-free bread just out of curiosity, from my favorite Hippie Grocery Store even, but it was just so... dry. Dry dry dry. Never grabbed the gluten-free bread again.

But for the Daring Bakers, I'll give it a shot.

These crackers actually whipped up rather quickly - in fact, I think it's a challenge for the record books as far as "least amount of time suck". We were given free reign as to our cracker toppings, and I went with sesame seeds. I have plans for some of the leftover crackers, muah-ha-ha-ha. You have to wait and see what that entails.


Another part of the challenge was to make a dip or relish to accompany our crackers, but on one condition: it had to be vegan and gluten-free. A wee bit trickier. My original intention was to make some cool little pickled hot relish, or maybe some exotic dip. I ran out of time trying to think up something Fantastic, however, so I went with the old stand-by: hummus. Not like that's a bad thing, to be honest, but a wee bit boring. Ah, well - nothing wrong with a classic, right?


I am happy to report that both crackers and dip were quite lovely together. I left my crackers a little bit thicker than I think was recommended, just so they would have the slightest bit of softness for my dip (would be sad to try to eat hummus with shards of cracker flying everywhere). Not bad! I might venture into the gluten-free bread world a little bit more often, even if just to make these crackers again.


A big thanks to Natalie and Shel for the challenge! And as always, click the link to see more Daring Baker takes on this vegan and gluten-free Challenge.


Lavash Crackers


Ingredients:
1 1/2 c. unbleached bread flour or gluten free flour blend
1/2 tsp. salt
1/2 tsp. instant yeast
1 Tbsp. agave syrup or sugar
1 Tbsp. vegetable oil
1/3 to 1/2 c. + 2 Tbsp. water, at room temperature
Poppy seeds, sesame seeds, paprika, cumin seeds, caraway seeds, or kosher salt for toppings

In a mixing bowl, stir together the flour, salt yeast, agave, oil, and just enough water to bring everything together into a ball. You may not need the full 1/2 cup + 2 Tb of water, but be prepared to use it all if needed.

For Non Gluten Free Cracker Dough: Sprinkle some flour on the counter and transfer the dough to the counter. Knead for about 10 minutes, or until the ingredients are evenly distributed. The dough should pass the windowpane test (see http://www.wikihow.com/Determine-if-Bread-Dough-Has-Been-Mixed-Long-Enough for a discription of this) and register 77 degrees to 81 degrees Fahrenheit. The dough should be firmer than French bread dough, but not quite as firm as bagel dough (what I call medium-firm dough), satiny to the touch, not tacky, and supple enough to stretch when pulled.

Lightly oil a bowl and transfer the dough to the bowl, rolling it around to coat it with oil. Cover the bowl with plastic wrap.

OR:

For Gluten Free Cracker Dough: The dough should be firmer than French bread dough, but not quite as firm as bagel dough (what I call medium-firm dough), and slightly tacky. Lightly oil a bowl and transfer the dough to the bowl, rolling it around to coat it with oil. Cover the bowl with plastic wrap.

Ferment at room temperature for 90 minutes, or until the dough doubles in size. (You can also retard the dough overnight in the refrigerator immediately after kneading or mixing).

For Non Gluten Free Cracker Dough: Mist the counter lightly with spray oil and transfer the dough to the counter. Press the dough into a square with your hand and dust the top of the dough lightly with flour. Roll it out with a rolling pin into a paper thin sheet about 15 inches by 12 inches. You may have to stop from time to time so that the gluten can relax. At these times, lift the dough from the counter and wave it a little, and then lay it back down.

Cover it with a towel or plastic wrap while it relaxes. When it is the desired thinness, let the dough relax for 5 minutes. Line a sheet pan with baking parchment. Carefully lift the sheet of dough and lay it on the parchment. If it overlaps the edge of the pan, snip off the excess with scissors. or4. For Gluten Free Cracker Dough: Lay out two sheets of parchment paper. Divide the cracker dough in half and then sandwich the dough between the two sheets of parchment. Roll out the dough until it is a paper thin sheet about 15 inches by 12 inches. Slowly peel away the top layer of parchment paper. Then set the bottom layer of parchment paper with the cracker dough on it onto a baking sheet.

Preheat the oven to 350 F with the oven rack on the middle shelf. Mist the top of the dough with water and sprinkle a covering of seeds or spices on the dough (such as alternating rows of poppy seeds, sesame seeds, paprika, cumin seeds, caraway seeds, kosher or pretzel salt, etc.) Be careful with spices and salt - a little goes a long way. If you want to precut the cracker, use a pizza cutter (rolling blade) and cut diamonds or rectangles in the dough. You do not need to separate the pieces, as they will snap apart after baking. If you want to make shards, bake the sheet of dough without cutting it first.

Bake for 15 to 20 minutes, or until the crackers begin to brown evenly across the top (the time will depend on how thinly and evenly you rolled the dough).

When the crackers are baked, remove the pan from the oven and let them cool in the pan for about 10 minutes. You can then snap them apart or snap off shards and serve.


Classic Hummus

Ingredients:
4 garlic cloves, minced and then mashed
2 (14 oz.) cans of chickpeas, drained and rinsed
2/3 c. tahini
1/3 c. freshly squeezed lemon juice
1/2 c. water
1/4 c. olive oil
1/2 tsp. salt
Paprika and olive oil, for garnish

Combine the first 5 ingredients in a food processor until smooth. Slowly stream in olive oil, until combined. Season to taste with salt.

Transfer to a serving bowl, sprinkle with paprika, and drizzle with olive oil.

31 August 2008

Pierre Hermé’s Chocolate Éclairs


Daring Bakers time once again, my pets. This time we're tackling éclairs.


Remember my dear sister Aimbot? Well. This recipe had her name written all over it. Aimbot was lucky enough to take a trip to France in high school, apparently to practice her mad French-speaking skillz. I may have only been ten years old, but from what I could see what she really got out of the trip was a suitcase stuffed with the latest fashions and a worldly air.

And an éclair recipe.


She flew home, and after many hugs and much chatting about her two weeks away, Aimbot did something I had never seen her do before. She donned a fashionable new chemise, tied on an apron, and set about the kitchen to bake. Aimbot, baking! And not only baking, but she was making éclairs. Those puffy, sweet, elegant little treats enjoyed in France. All I really remember is that she spent a LONG TIME in the kitchen, and what resulted were puffs of warm heaven, split in half and filled with a sweet creamy filling, and bitter chocolate swipe across the top.

When I saw we were making éclairs this challenge, I immediately thought of that time when I was younger and Aimbot made éclairs. I wanted more than a simple chocolate pastry filling, though, so added some orange zest and Grand Marnier to the pastry filling as well as Grand Marnier to the chocolate glaze.

Ooo la la! Good stuff, ladies and gents. Hubs and I enjoyed a few of these as our Sunday breakfast, with thick slices of cantaloupe and big steaming mugs of coffee. While making up fake French words, as to appear more sophisticated (I don't think that worked, though).


Don't forget to check out those other éclairs from my fellow Daring Bakers! And many thanks to this month's hosts Tony Tahhan and MeetaK, you really brought back memories :)

Pierre Hermé’s Chocolate Éclairs
(from Chocolate Desserts by Pierre Hermé)


Assembling the éclairs:
20-24 éclairs
Chocolate glaze
Chocolate pastry cream

Slice the éclairs horizontally, using a serrated knife and a gently sawing motion. Set aside the bottoms and place the tops on a rack over a piece of parchment paper.

The glaze should be barely warm to the touch (between 95 – 104 degrees F or 35 – 40 degrees C, as measured on an instant read thermometer). Spread the glaze over the tops of the éclairs using a metal icing spatula. Allow the tops to set and in the meantime fill the bottoms with the pastry cream.

Pipe or spoon the pastry cream into the bottoms of the éclairs. Make sure you fill the bottomswith enough cream to mound above the pastry. Place the glazed tops onto the pastry creamand wriggle gently to settle them.

Notes: If you have chilled your chocolate glaze, reheat by placing it in a bowl over simmering water, stirring it gently with a wooden spoon. Do not stir too vigorously as you do not want to create bubbles.

The éclairs should be served as soon as they have been filled.

Pierre Hermé’s Cream Puff Dough

Ingredients:
½ cup (125g) whole milk
½ cup (125g) water
1 stick (4 ounces; 115g) unsalted butter, cut into 8 pieces
¼ teaspoon sugar
¼ teaspoon salt
1 cup (140g) all-purpose flour
5 large eggs, at room temperature

In a heavy bottomed medium saucepan, bring the milk, water, butter, sugar and salt to theboil.

Once the mixture is at a rolling boil, add all of the flour at once, reduce the heat to medium and start to stir the mixture vigorously with a wooden spoon. The dough comes together very quickly. Do not worry if a slight crust forms at the bottom of the pan, it’s supposed to. You need to carry on stirring for a further 2-3 minutes to dry the dough. After this time the dough will be very soft and smooth.

Transfer the dough into a bowl of a mixer fitted with the paddle attachment, or using your hand mixer or if you still have the energy, continue by hand. Add the eggs one at a time, beating after each egg has been added to incorporate it into the dough. You will notice that after you have added the first egg, the dough will separate, once again do not worry. As you keep working the dough, it will come back all together again by the time you have added the third egg. In the end the dough should be thick and shiny and when lifted it should fall back into the bowl in a ribbon.

The dough should be still warm. It is now ready to be used for the éclairs as directed above.

Notes: Once the dough is made you need to shape it immediately.

You can pipe the dough and the freeze it. Simply pipe the dough onto parchment-lined baking sheets and slide the sheets into the freezer. Once the dough is completely frozen, transfer the piped shapes into freezer bags. They can be kept in the freezer for up to a month.

Preheat your oven to 375 degrees F (190 degrees C). Divide the oven into thirds by positioning the racks in the upper and lower half of the oven. Line two baking sheets with waxed or parchment paper.

Fill a large pastry bag fitted with a 2/3 (2cm) plain tip nozzle with the warm cream puff dough. Pipe the dough onto the baking sheets in long, 4 to 41/2 inches (about 11 cm) chubby fingers. Leave about 2 inches (5 cm) space in between each dough strip to allow them room to puff. The dough should give you enough to pipe 20-24 éclairs.

Slide both the baking sheets into the oven and bake for 7 minutes. After the 7 minutes, slip thehandle of a wooden spoon into the door to keep in ajar. When the éclairs have been in theoven for a total of 12 minutes, rotate the sheets top to bottom and front to back. Continue baking for a further 8 minutes or until the éclairs are puffed, golden and firm. The total bakingtime should be approximately 20 minutes.

Notes: The éclairs can be kept in a cool, dry place for several hours before filling.

Chocolate Pastry Cream Recipe

Ingredients:
2 cups (500g) whole milk
4 large egg yolks
6 tbsp (75g) sugar
3 tablespoons cornstarch, sifted
7 oz (200g) bittersweet chocolate, preferably Velrhona Guanaja, melted
2½ tbsp (1¼ oz: 40g) unsalted butter, at room temperature

In a small saucepan, bring the milk to a boil. In the meantime, combine the yolks, sugar and cornstarch together and whisk in a heavy‐bottomed saucepan.

Once the milk has reached a boil, temper the yolks by whisking a couple spoonfuls of the hot milk into the yolk mixture. Continue whisking and slowly pour the rest of the milk into the tempered yolk mixture.

Strain the mixture back into the saucepan to remove any egg that may have scrambled. Place the pan over medium heat and whisk vigorously (without stop) until the mixture returns to a boil. Keep whisking vigorously for 1 to 2 more minutes (still over medium heat). Stir in the melted chocolate and then remove the pan from the heat.

Scrape the pastry cream into a small bowl and set it in an ice‐water bath to stop the cooking process. Make sure to continue stirring the mixture at this point so that it remains smooth.

Once the cream has reached a temperature of 140 F remove from the ice‐water bath and stir in the butter in three or four installments. Return the cream to the ice‐water bath to continue cooling, stirring occasionally, until it has completely cooled. The cream is now ready to use or store in the fridge.

Notes: The pastry cream can be made 2‐3 days in advance and stored in the refrigerator.

In order to avoid a skin forming on the pastry cream, cover with plastic wrap pressed onto the cream.

Tempering the eggs raises the temperature of the eggs slowly so that they do not scramble.

Chocolate Glaze Recipe

Ingredients:
1/3 cup (80g) heavy cream
3½ oz (100g) bittersweet chocolate, finely chopped
4 tsp (20 g) unsalted butter, cut into 4 pieces, at room temperature
7 tbsp (110 g) Chocolate Sauce (recipe below), warm or at room temperature

In a small saucepan, bring the heavy cream to a boil. Remove from the heat and slowly begin to add the chocolate, stirring with a wooden spoon or spatula.

Stirring gently, stir in the butter, piece by piece followed by the chocolate sauce.

Notes: If the chocolate glaze is too cool (i.e. not liquid enough) you may heat it briefly in the microwave or over a double boiler. A double boiler is basically a bowl sitting over (not touching) simmering water. It is best to glaze the eclairs after the glaze is made, but if you are pressed for time, you can make the glaze a couple days ahead of time, store it in the fridge and bring it up to the proper temperature (95 to 104 F) when ready to glaze.

Chocolate Sauce Recipe

Ingredients:
4½ oz (130 g) bittersweet chocolate, finely chopped
1 cup (250 g) water
½ cup (125 g) crème fraîche, or heavy cream
1/3 cup (70 g) sugar

Place all the ingredients into a heavy‐bottomed saucepan and bring to a boil, making sure to stir constantly. Then reduce the heat to low and continue stirring with a wooden spoon until the sauce thickens.

It may take 10‐15 minutes for the sauce to thicken, but you will know when it is done when it coats the back of your spoon.

30 July 2008

Filbert Gateau with Praline Buttercream


I am in the process of reading Julie and Julia, a great book where a lovely blogger named Julie takes on a personal challenge to make and blog about every recipe in Julia Child's Mastering the Art of French Cooking in the span of 1 year. This is a must read, by the way (thanks Sarah for the recommendation!). Anyway, yesterday I was reading the chapter where Julie finally finishes the Oeufs en Gelée (Eggs in Aspic). She has been toiling over these darn things for more than a day, and finally finishes them after getting up at 6am Thanksgiving morning to work on them some more. Even though they looked rather unappetizing and blobby, and probably wouldn't be eaten further than an obligatory bite, she writes:

"It was 8 a.m., and though I still had a whole Thanksgiving meal left to cook, roast goose and cabbage and onions and green beans and souflée, I felt giddy with relief."

Yeah, that's kinda how I felt when I finally finished this challenge. Not like it was the hardest challenge I've done, more like the most frustrating, and not working into my schedule too well.


Working on the house seems to be my main priority these days, but I am also determined to work on my baking/blogging. And I missed the last challenge, something I am not too proud of. The Daring Bakers Rule is that you cannot miss two challenges in a row. So even though I had a million house things on my To Do list as well as friend obligations and tons of work, I was NOT going to miss another challenge and get kicked off.

I was terribly excited to make this lovely cake. So pretty! So many components! But it wasn't going to be easy, or cheap. I went out to the grocery store hopeful, though, and spent my hard-earned money on lots of eggs and hazelnuts. Then set to work. I had a whole 10 days to finish this sucker, after all.

First try: everything seemed fine. I toasted and skinned my hazelnuts. I measured, poured, carefully separated eggs. I mixed and whipped and ground my hazelnut meal. I lovingly toiled in a rather-warm kitchen for over an hour, and finally finished my batter. I poured it into my round cake pan and gently placed it in my preheated oven.

Then it got kinda bad.

I started my simple syrup while the cake baked. I hear sizzling and smell burning coming from the oven, and take a peek: oh, hurrah. Batter bubbling over everywhere, all over the inside of my oven, the thick batter coating the oven rack. Ack! I threw a sheet pan in underneath in a vain attempt to curb the overflow, but that seemed to only let out most of my heat and added a new level of cleaning to my batter-coated rack. But everything else seemed okay, so I finished up my simple syrup. The cake was supposed to be finished in 30-35 minutes, but it was still pale and wiggly at that point. I let it go to 40 minutes, then 50 minutes. Finally it started to brown and pull away from the sides of the pan. Looks done! I pulled it out and let it cool. Then I went to remove it from the pan: the sides of the cake slid out like a dream, and the center poured a sticky mess all over my counters.

*Sigh*

Well, at that point I was out some dough and a good chunk of a Sunday morning. I was... well, not happy. I pouted around the house and angrily did the laundry (which I'm sure was hilariously entertaining for my Hubs to watch). That's it, I'm done. I give up. Let them kick me out, I figured. I didn't want to see another hazelnut as long as I lived.


But, by the next weekend (and a mere 3-4 days before posting the dreaded challenge), I had come around again. I love being a Daring Baker, and my blog is the best little hobby I've ever had. I wasn't giving up. But: I was not spending a ton of money on new supplies, and I wasn't making a damn round cake again. So I bought the generic bags of chopped hazelnuts, cheap eggs, and broke out my big jelly roll pan. It was just going to have to do.

On Attempt 2, I am pleased to say I had no problems. Glad, in fact, that I gave it another shot. I didn't want to do any sort of boring square cake, so I cut my thin jelly roll genoise into flower shapes with a cookie cutter, then assembled. Frosting was a bit trickier to say the least, but still I am proud of my slightly-ugly results. Oh, and of course then I read in the Daring Baker instructions that our cakes MUST remain round. Oopie. Well, my flower shapes are round-ish. Take it or leave it.

And I gotta say: when I finally finished photographing those suckers, even though I still had a weekend's worth of painting/drapery sewing/picture hanging to do, I felt giddy with relief :)

*~*~*~*~*~*~*~*~*~*~*~*~*~*~*~*~*~*~*~*~*~*~*~*~*~*~*~*~*~*~*~*~*~*

This one cake kinda took a header, leaving a lovely Rorschach-like blob on the plate.

Again: don't forget to check out the other lovely cakes put out by our ever-growing cult! And a big thanks to Chris for the fabulous, yummy cake recipe :)

Filbert Gateau with Praline Buttercream
(From Great Cakes by Carol Walter)


Cake Components:
1 Filbert Genoise
1 recipe sugar syrup, flavored with dark rum
1 recipe Praline Buttercream
½ cup heavy cream, whipped to soft peaks
1 recipe Apricot Glaze
1 recipe Ganache Glaze, prepared just before using
3 tablespoons filberts, toasted and coarsely chopped

Filbert Genoise
Ingredients:
1 ½ c. hazelnuts, toasted/skinned
2/3 c. cake flour, unsifted
2 Tbsp. cornstarch
7 large egg yolks
1 c. sugar, divided ¼ & ¾ cups
1 tsp. vanilla extract
½ tsp. grated lemon rind
5 large. egg whites
¼ c. warm, clarified butter (100 – 110 degrees)

Position rack in the lower 3rd of the oven and preheat to 350 F. Grease and flour a 10” X 2” inch round cake pan.

Using a food processor, process nuts, cake flour, and cornstarch for about 30 seconds. Then, pulse the mixture about 10 times to get a fine, powdery mixture. You’ll know the nuts are ready when they begin to gather together around the sides of the bowl. While you want to make sure there aren’t any large pieces, don’t over-process. Set aside.

Put the yolks in the bowl of an electric mixer, with the whisk attachment, and beat until thick and light in color, about 3-4 minutes on med-high speed. Slowly, add ¾ cup of sugar. It is best to do so by adding a tablespoon at a time, taking about 3 minutes for this step. When finished, the mixture should be ribbony. Blend in the vanilla and grated lemon rind. Remove and set aside.

Place egg whites in a large, clean bowl of the electric mixer with the whisk attachment and beat on medium speed, until soft peaks. Increase to med-high speed and slowly add the remaining ¼ cup of sugar, over 15-20 seconds or so. Continue to beat for another ½ minute. Add the yolk mixture to the whites and whisk for 1 minute. Pour the warm butter in a liquid measure cup (or a spouted container). * It must be a deep bottom bowl and work must be fast.*

Put the nut meal in a mesh strainer (or use your hand – working quickly) and sprinkle it in about 2 tablespoons at a time – folding it carefully for about 40 folds. Be sure to exclude any large chunks/pieces of nuts. Again, work quickly and carefully as to not deflate the mixture. When all but about 2 Tbsp. of nut meal remain, quickly and steadily pour the warm butter over the batter. Then, with the remaining nut meal, fold the batter to incorporate, about 13 or so folds.

With a rubber spatula, transfer the batter into the prepared pan, smoothing the surface with the spatula or back of a spoon. **If collected butter remains at the bottom of the bowl, do not add it to the batter! It will impede the cake rising while baking.Tap the pan on the counter to remove air bubbles and bake in the preheated oven for 30-35 minutes. You’ll know the cake is done when it is springy to the touch and it separates itself from the side of the pan. Remove from oven and allow to stand for 5 minutes. Invert onto a cake rack sprayed with nonstick coating, removing the pan. Cool the cake completely.*

Sugar Syrup
Ingredients:
1 c. water
¼ c. sugar
2 Tbsp. dark rum or orange flavored liqueur

In a small, yet heavy saucepan, bring the water and sugar to a boil and simmer for 5 minutes. Remove from heat, add the liqueur. Cool slightly before using on the cake.

Praline Buttercream
Ingredients:
1 recipe Swiss Buttercream
1/3 c. praline paste1
½ - 2 Tbsp. Jamaican rum (optional)

Blend ½ cup buttercream into the paste, then add to the remaining buttercream. Whip briefly on med-low speed to combine. Blend in rum.

Swiss Buttercream
Ingredients:
4 large egg whites
¾ c. sugar
1 ½ c. (3 sticks) unsalted butter, slightly firm
1 ½ -2 Tbsp. Grand Marnier or liqueur of your choice
1 tsp. vanilla

Place the egg whites in a lg/ bowl of a elevtric mixer and beat with the whisk attachment until the whites are foamy and they begin to thicken (just before the soft peak stage). Set the bowl over a saucepan filled with about 2 inches of simmering water, making sure the bowl is not touching the water. Then, whisk in the sugar by adding 1-2 tablespoon of sugar at a time over a minutes time. Continue beating 2-3 minutes or until the whites are warm (about 120 degrees) and the sugar is dissolved. The mixture should look thick and like whipped marshmallows.

Remove from pan and with either the paddle or whisk attachment, beat the egg whites and sugar on med-high until its a thick, cool meringue – about 5-7 minutes. *Do not overbeat*. Set aside.

Place the butter in a separate clean mixing bowl and, using the paddle attachment, cream the butter at medium speed for 40-60 seconds, or until smooth and creamy. *Do not overbeat or the butter will become toooooo soft.*On med-low speed, blend the meringue into the butter, about 1-2 Tbsp. at a time, over 1 minute. Add the liqueur and vanilla and mix for 30-45 seconds longer, until thick and creamy.Refrigerate 10-15 minutes before using.

Praline Paste
Ingredients:
1 c. hazelnuts, toasted/skinless
2/3 c. Sugar

Line a jelly roll pan with parchment and lightly butter. Put the sugar in a heavy 10-inch skillet. Heat on low flame for about 10-20 min until the sugar melts around the edges. Do not stir the sugar. Swirl the pan if necessary to prevent the melted sugar from burning. Brush the sides of the pan with water to remove sugar crystals. If the sugar in the center does not melt, stir briefly. When the sugar is completely melted and caramel in color, remove from heat. Stir in the nuts with a wooden spoon and separate the clusters. Return to low heat and stir to coat the nuts on all sides. Cook until the mixture starts to bubble. **Remember – extremely hot mixture.** Then onto the parchment lined sheet and spread as evenly as possible. As it cools, it will harden into brittle.

Break the candied nuts into pieces and place them in the food processor. Pulse into a medium-fine crunch or process until the brittle turns into a powder. To make paste, process for several minutes. Store in an airtight container and store in a cook dry place. Do not refrigerate.

Apricot Glaze
Ingredients:
2/3 c. thick apricot preserves
1 Tbsp. water

In a small, yet heavy saucepan, bring the water and preserves to a slow boil and simmer for 2-3 minutes. If the mixture begins to stick to the bottom of the saucepan, add water as needed.

Remove from heat and, using a strainer, press the mixture through the mesh and discard any remnants. With a pastry brush, apply the glaze onto the cake while the cake is still warm. If the glaze is too thick, thin to a preferred consistency with drops of water.

Ganache Glaze
Ingredients:
6 oz. (good) semisweet or bittersweet chocolate, like Lindt
¾ c. heavy cream
1 Tbsp. light corn syrup
1 Tbsp. Grand Marnier, Cointreau, or dark Jamaican rum (optional)
¾ tsp. vanilla
½ - 1 tsp. hot water, if needed

Blend vanilla and liqueur/rum together and set aside. Break the chocolate into 1-inch pieces and place in the basket of a food processor and pulse until finely chopped. Transfer into a medium sized bowl and set aside.

Heat the cream and corn syrup in a saucepan, on low, until it reached a gentle boil. Once to the gently boil, immediately and carefully pour over the chocolate. Leave it alone for one minute, then slowly stir and mix the chocolate and cream together until the chocolate is melted and incorporated into the cream. Carefully blend in vanilla mixture. If the surface seems oily, add ½ - 1 tsp hot water.

Assembling Cake:

Cut a cardboard disk slightly smaller than the cake. Divide the cake into 3 layers and place the first layer top-side down on the disk. Using a pastry brush, moisten the layer with 3-4 Tbsp. of warm sugar syrup. Measure out 1 cup of praline buttercream and set aside.

Spread the bottom layer with a ¼-inch thickness of the remaining buttercream. Cover with ½ of the whipped cream, leaving ¼-inch border around the edge of the cake. Place the middle layer over the first, brush with sugar syrup, spreading with buttercream. Cover with the remaining whipped cream. Moisten the cut side of the third layer with additional sugar syrup and place cut side down on the cake. Gently, press the sides of the cake to align the layers.

Refrigerate to chill for at least 30 minutes. Lift the cake by sliding your palm under the cardboard. Holding a serrated or very sharp night with an 8-ich blade held parallel to the sides of the cake, trim the sides so that they are perfectly straight. Cut a slight bevel at the top to help the glaze drip over the edge. Brush the top and sides of the cake with warm apricot glaze, sealing the cut areas completely. Chill while you prepare the ganache.

Place a rack over a large shallow pan to catch the ganache drippings. Remove the gateau from the refrigerator and put it the rack. With a metal spatula in hand, and holding the saucepan about 10 inches above the cake, pour the ganache onto the cake’s center. Move the spatula over the top of the ganache about 4 times to get a smooth and mirror-like appearance. The ganache should cover the top and run down the sides of the cake. When the ganache has been poured and is coating the cake, lift one side of the rack and bang it once on the counter to help spread the ganache evenly and break any air bubbles. (Work fast before setting starts.) Patch any bare spots on the sides with a smaller spatula, but do not touch the top after the “bang”. Let the cake stand at least 15 minutes to set after glazing.

To garnish the cake, fit a 12 – 14-inch pastry bag with a #114 large leaf tip. Fill the bag with the reserved praline cream. Stating ½ inch from the outer edge of the cake, position the pastry tube at a 90 degree angle with the top almost touching the top of the cake. Apply pressure to the pastry bag, moving it slightly toward the center of the cake. As the buttercream flows on the cake, reverse the movement backward toward the edge of the cake and finish by pulling the bag again to the center. Stop applying pressure and press the bag downward, then quickly pull the tip up to break the flow of frosting. Repeat, making 12 leaves evenly spaced around the surface of the cake. Make a second row of leaves on the top of the first row, moving the pastry bag about ¾ inch closer to the center. The leaves should overlap. Make a 3rd row, moving closer and closer to the center. Add a 4th row if you have the room. But, leave a 2-inch space in the center for a chopped filbert garnish.

Refrigerate uncovered for 3-4 hours to allow the cake to set. Remove the cake from the refrigerator at least 3 hours before serving.Leftover cake can be covered with foil and kept in the refrigerator for up to 5 days.

28 May 2008

Opéra Cake


I made it! I posted! Finished! That, my friends, is quite the accomplishment.

We’re currently working on our new house. Lots of little updates and painting and such, every evening as well as weekends have been spent sprucing up the new space so we can move in. When back at the apartment, I’ve been trying desperately to pack up all our things. That doesn’t leave much downtime, unless you count sleeping.

Still, my stubborn self still refused to miss a challenge. So between quick dinners scarfed down over the sink and scrubbing paint off before falling into bed, I found the time to eek out the components to my Opera cake bit by bit. One night the syrup, another night the mousse, then the buttercream...


Then I had problems with the darn buttercream – I usually don’t have trouble with Italian buttercream, but this version refused to set up. It was the consistency of a melted milkshake. It set up a bit when I put it in the freezer (!!), so I just went with it.

It took me almost a week to finish the components, but I got there and assembled just in time for Memorial Day weekend. And all weekend, it was dark and rainy and there was absolutely no light to photograph the finished product. I tried a few shots with my flash but um: they were really bad. I was bummed. I stuck the leftovers in the fridge: they should still be photograph-worthy for at least another day or so.


Monday afternoon, the sun peeked out for a good hour, so threw down my paint brush and hustled back to the tiny apartment to photograph the darn thing. All of 10 shots taken – and my camera battery died. No joke. My goodness, what luck I have.

Luckily there were a few good pictures out of the 10 shots, so here I am! Even though all the madness, I’m glad I made this. Opera cake is such a pretty pretty cake: all those layers of jaconde soaked in syrup and sandwiched with buttercream and mousse, then topped with a ganache. We were allowed to make it any flavor we liked, as long as we kept it light. I went with mango, using some mango puree I found at our local grocery store. I’m not a huge fan of mango but the Hubs loves it, so I thought I’d be nice this time around and give him something he enjoys.

There was another reason I worked to get this sucker finished and posted – this month, our Daring Baker efforts are dedicated to a fellow (retired, but still fellow) Daring Baker: Barbara of winosandfoodies.com. The same Barbara from the LiveSTRONG challenge post. I don’t know her personally, but through her blog she comes across as such a strong and upbeat person. So Barbara: we all dedicate our Opera Cake to you. Enjoy dearie :)

A big thanks to Lis and Ivonne for the awesome challenge recipe! And as always - don't forget to check out the other Daring Bakers versions of this cake. I would imagine all if not most will have better images than moi.

Opéra Cake


Ingredients:

For the joconde:
6 large egg whites, at room temperature
2 Tbsp. granulated sugar
2 c. ground blanched almonds
2 c. icing sugar, sifted
6 large eggs
½ c. all-purpose flour
3 Tbsp. unsalted butter, melted and cooled

Divide the oven into thirds by positioning a rack in the upper third of the oven and the lower third of the oven.

Preheat the oven to 425◦F. (220◦C). Line two 12½ x 15½- inch (31 x 39-cm) jelly-roll pans with parchment paper and brush with melted butter.

In the bowl of a stand mixer fitted with the whisk attachment (or using a handheld mixer), beat the egg whites until they form soft peaks. Add the granulated sugar and beat until the peaks are stiff and glossy. If you do not have another mixer bowl, gently scrape the meringue into another bowl and set aside.

If you only have one bowl, wash it after removing the egg whites or if you have a second bowl, use that one. Attach the paddle attachment to the stand mixer (or using a handheld mixer again) and beat the almonds, icing sugar and eggs on medium speed until light and voluminous, about 3 minutes.

Add the flour and beat on low speed until the flour is just combined (be very careful not to overmix here!!!).

Using a rubber spatula, gently fold the meringue into the almond mixture and then fold in the melted butter. Divide the batter between the pans and spread it evenly to cover the entire surface of each pan.

Bake the cake layers until they are lightly browned and just springy to the touch. This could take anywhere from 5 to 9 minutes depending on your oven. Place one jelly-roll pan in the middle of the oven and the second jelly-roll pan in the bottom third of the oven.

Put the pans on a heatproof counter and run a sharp knife along the edges of the cake to loosen it from the pan. Cover each with a sheet of parchment or wax paper, turn the pans over, and unmold.

Carefully peel away the parchment, then turn the parchment over and use it to cover the cakes. Let the cakes cool to room temperature.

For the syrup:
½ c. water
⅓ c. granulated sugar
1 to 2 Tbsp. of the flavouring of your choice

Stir all the syrup ingredients together in the saucepan and bring to a boil.2.Remove from the heat and let cool to room temperature.

For the buttercream:
1 c. granulated sugar
¼ c. water
Seeds of one vanilla bean or 1 Tbsp. pure vanilla extract
1 large egg
1 large egg yolk
1¾ sticks unsalted butter, at room temperature
Favouring of your choice

Combine the sugar, water and vanilla bean seeds or extract in a small saucepan and warm over medium heat just until the sugar dissolves.

Continue to cook, without stirring, until the syrup reaches 225◦F (107◦C) [*Note: Original recipe indicates a temperature of 255◦F (124◦C), however, when testing the recipe I found that this was too high so we heated to 225◦F and it worked fine] on a candy or instant-read thermometer. Once it reaches that temperature, remove the syrup from the heat.

While the syrup is heating, begin whisking the egg and egg yolk at high speed in the bowl of your mixer using the whisk attachment. Whisk them until they are pale and foamy.

When the sugar syrup reaches the correct temperature and you remove it from the heat, reduce the mixer speed to low speed and begin slowly (very slowly) pouring the syrup down the side of the bowl being very careful not to splatter the syrup into the path of the whisk attachment. Some of the syrup will spin onto the sides of the bowl but don’t worry about this and don’t try to stir it into the mixture as it will harden!

Raise the speed to medium-high and continue beating until the eggs are thick and satiny and the mixture is cool to the touch (about 5 minutes or so).

While the egg mixture is beating, place the softened butter in a bowl and mash it with a spatula until you have a soft creamy mass.

With the mixer on medium speed, begin adding in two-tablespoon chunks. When all the butter has been incorporated, raise the mixer speed to high and beat until the buttercream is thick and shiny.

At this point add in your flavouring and beat for an additional minute or so.9.Refrigerate the buttercream, stirring it often, until it’s set enough (firm enough) to spread when topped with a layer of cake (about 20 minutes).

For the white chocolate ganache/mousse:
7 oz. white chocolate
1 c. + 3 Tbsp. heavy cream (35% cream)
1 Tbsp. liquer of your choice

Melt the white chocolate and the 3 tbsp. of heavy cream in a small saucepan.

Stir to ensure that it’s smooth and that the chocolate is melted. Add the tablespoon of liqueur to the chocolate and stir. Set aside to cool completely.

In the bowl of a stand mixer, whip the remaining 1 cup of heavy cream until soft peaks form.

Gently fold the whipped cream into the cooled chocolate to form a mousse. If it’s too thin, refrigerate it for a bit until it’s spreadable.

If you’re not going to use it right away, refrigerate until you’re ready to use.


For the glaze:
14 oz. white chocolate, coarsely chopped
½ c. heavy cream (35% cream)

Melt the white chocolate with the heavy cream. Whisk the mixture gently until smooth.

Let cool for 10 minutes and then pour over the chilled cake. Using a long metal cake spatula, smooth out into an even layer.

Place the cake into the refrigerator for 30 minutes to set.

Assembling the Opéra Cake:

Line a baking sheet with parchment or wax paper. Working with one sheet of cake at a time, cut and trim each sheet so that you have two pieces (from each cake so you’ll have four pieces in total): one 10-inch (25-cm) square and one 10 x 5-inch (25 x 12½-cm) rectangle.

Place one square of cake on the baking sheet and moisten it gently with the flavoured syrup. pread about three-quarters of the buttercream over this layer. Top with the two rectangular pieces of cake, placing them side by side to form a square. Moisten these pieces with the flavoured syrup.

Spread the remaining buttercream on the cake and then top with the third square of joconde. Use the remaining syrup to wet the joconde and then refrigerate until very firm (at least half an hour).

Prepare the ganache/mousse (if you haven’t already) and then spread it on the top of the last layer of the joconde. Refrigerate for at least two to three hours to give the ganache/mousse the opportunity to firm up.

Make the glaze and after it has cooled, pour/spread it over the top of the chilled cake. Refrigerate the cake again to set the glaze.Serve the cake slightly chilled. This recipe will yield approximately 20 servings.

27 April 2008

Cheesecake Pops, Tiki-Style


It's Daring Baker time again! This month, we're making cheesecake. Cheesecake pops, that is: little chunks of cheesecake on a stick, dipped in chocolate and chilled. Yum! I will admit, a recipe with 5 blocks of cream cheese does make me hesitate for a second, but hey - it's only once a month that I indulge like this, right? Ahem.

We were given the opportunity to play around with this recipe, as long as we kept the cheesecake 'white'. I decided to get a bit tropical - for heavens sakes, when I made this it was freezing cold outside (and it is APRIL in KANSAS, it should be in the 70s). I thought some warm-thinking would maybe jump-start the weather around here.


Well, to me nothing screams 'warm and tropical' like tiki men and exotic flavors. Hence my theme! I made a pina colada cheesecake, using pineapple and coconut liqueur. I stacked my blocks of cheesecake on bamboo skewers (to get that true tiki statue feel), and dipped them in a coconut-spiked white chocolate. And the crowning touch: to decorate, I used yellow sparkling sprinkles and sugar-cast tiki masks.


Deborah and Elle hosted this month's challenge, and a big thanks to both ladies - the challenge was fun, and the cheesecake recipe is a keeper. The cheesecake is so smooth and creamy, so rich that the cheesecake is perfect for these little dipped bites.


Don't forget to check out the other cheesecake pops out there, compliments of my fellow Daring Bakers! We're hundreds strong, so I'm sure there are a lot of fun variations out there :)

Cheesecake Pops
(Recipe taken from Sticky, Chewy, Messy, Gooey by Jill O’Connor)

Ingredients:
5 (8-oz.) packages cream cheese at room temperature
2 c. sugar
¼ c. all-purpose flour
¼ tsp. salt
5 large eggs
2 egg yolks
2 tsp. pure vanilla extract
¼ c. heavy cream
Boiling water as needed
30-40 (8-inch) lollipop sticks
1 lb. chocolate, finely chopped (whatever type you want for dipping)
2 Tbsp. vegetable shortening
Assorted decorations (sprinkles, sanding sugar, chopped nuts, etc.)

Position oven rack in the middle of the oven and preheat to 325 F. Set some water to boil.

In a large bowl, beat together the cream cheese, sugar, flour, and salt until smooth. If using a mixer, mix on low speed. Add the whole eggs and the egg yolks, one at a time, beating well (but still at low speed) after each addition. Beat in the vanilla and cream.

Grease a 10-inch cake pan (not a springform pan), and pour the batter into the cake pan. Place the pan in a larger roasting pan. Fill the roasting pan with the boiling water until it reaches halfway up the sides of the cake pan. Bake until the cheesecake is firm and slightly golden on top, 35 to 45 minutes (*note: I baked mine for an hour, so keep in the oven longer if needed).

Remove the cheesecake from the water bath and cool to room temperature. Cover the cheesecake with plastic wrap and refrigerate until very cold, at least 3 hours or up to overnight.

When the cheesecake is cold and very firm, scoop the cheesecake into 2-ounce balls and place on a parchment paper-lined baking sheet. Carefully insert a lollipop stick into each cheesecake ball. Freeze the cheesecake pops, uncovered, until very hard, at least 1 – 2 hours.

When the cheesecake pops are frozen and ready for dipping, prepare the chocolate. In the top of a double boiler, set over simmering water, or in a heatproof bowl set over a pot of simmering water, heat half the chocolate and half the shortening, stirring often, until chocolate is melted and chocolate and shortening are combined. Stir until completely smooth. Do not heat the chocolate too much or your chocolate will lose it’s shine after it has dried. Save the rest of the chocolate and shortening for later dipping, or use another type of chocolate for variety.

Alternately, you can microwave the same amount of chocolate coating pieces on high at 30 second intervals, stirring until smooth.

Quickly dip a frozen cheesecake pop in the melted chocolate, swirling quickly to coat it completely. Shake off any excess into the melted chocolate. If you like, you can now roll the pops quickly in optional decorations. You can also drizzle them with a contrasting color of melted chocolate (dark chocolate drizzled over milk chocolate or white chocolate over dark chocolate, etc.). Place the pop on a clean parchment paper-lined baking sheet to set. Repeat with remaining pops, melting more chocolate and shortening (or confectionary chocolate pieces) as needed.

Refrigerate the pops for up to 24 hours, until ready to serve.