31 May 2008

Ting Town Barbeque Beef Sandwiches


I have a new idea. I love my new house, and of course want to work on it constantly. But I also love my blog, and miss my dear readers, and I miss home-cooked meals too, darn it. Enough with the frozen pizzas and take out meals. Then inspiration hit: why not break out the crockpot? My auntie got us a shiny new one for a wedding gift that I hardly ever put to use, and besides: this way I can cook, and even bake, but don't have to be standing there while it's going on. Genius! I love you, inventor of the Crockpot! And off I went, to harvest several recipes. You'll be seeing a lot of them in the coming days :)

This first one comes from allrecipes.com, and is an original recipe from a popular (now closed) drive-in restaurant in Minnesota. Hubs and I popped all the ingredients in the crockpot, dashed off to the new house to get to work, and headed back to the apartment several hours later. And there was our dinner: beef sandwiches that tasted like we've been standing over the slow roaster basting the beef all day, along with chips and some pasta salad. A perfect Sunday summer meal.


The meat gets so tender, it was falling apart after 3 hours so there was no need to pull it out and shred, just give the crockpot a good couple of stirs. I rather liked the flavor, too: tangy, and not too BBQ-sauce-tasting (which really kills me in some recipes). The sauce thickened up nicely, although it wasn't as spicy as I would have liked, but I can fix that next time I make it.

All in all a great sandwich recipe, which is nice for those with little time but need to whip up dinner. And the original recipe feeds an army: I halved the recipe below, and even then: it provided many lunches and 2 dinners. A lovely thing for those who are too busy to cook!

Ting Town Barbeque Beef Sandwiches


Ingredients:
3 stalks celery, sliced thin
1 large onion, coarsely chopped
4 cloves garlic, minced
1 c. ketchup
1 c. barbeque sauce
1 Tbsp. prepared yellow mustard
1 c. beer
2 Tbsp. cider vinegar
2 Tbsp. Worcestershire sauce
2 Tbsp. brown sugar, packed
2 tsp. chili powder
1 tsp. salt
1 tsp. ground black pepper
4 lbs. boneless beef chuck roast, trimmed of fat
16 hamburger buns, split

To make the sauce, combine the celery, onion, garlic, ketchup, barbeque sauce, mustard, beer, cider vinegar, Worcestershire sauce, brown sugar, chili powder, salt, and pepper in a bowl; stir until well blended.

Place the chuck roast in a slow cooker. Pour the sauce evenly over the meat. Cover and cook the roast on HIGH for 3 hours. Reduce heat to LOW, and continue cooking until very tender, about 4 hours more.

About 1/2 hour before serving, remove the chuck roast from the slow cooker and shred the meat with a large fork. Return the meat to the slow cooker, and cook uncovered so the sauce thickens, on LOW for 20 minutes.

To serve, dip the flat sides of hamburger buns into the sauce and top with meat.

28 May 2008

Opéra Cake


I made it! I posted! Finished! That, my friends, is quite the accomplishment.

We’re currently working on our new house. Lots of little updates and painting and such, every evening as well as weekends have been spent sprucing up the new space so we can move in. When back at the apartment, I’ve been trying desperately to pack up all our things. That doesn’t leave much downtime, unless you count sleeping.

Still, my stubborn self still refused to miss a challenge. So between quick dinners scarfed down over the sink and scrubbing paint off before falling into bed, I found the time to eek out the components to my Opera cake bit by bit. One night the syrup, another night the mousse, then the buttercream...


Then I had problems with the darn buttercream – I usually don’t have trouble with Italian buttercream, but this version refused to set up. It was the consistency of a melted milkshake. It set up a bit when I put it in the freezer (!!), so I just went with it.

It took me almost a week to finish the components, but I got there and assembled just in time for Memorial Day weekend. And all weekend, it was dark and rainy and there was absolutely no light to photograph the finished product. I tried a few shots with my flash but um: they were really bad. I was bummed. I stuck the leftovers in the fridge: they should still be photograph-worthy for at least another day or so.


Monday afternoon, the sun peeked out for a good hour, so threw down my paint brush and hustled back to the tiny apartment to photograph the darn thing. All of 10 shots taken – and my camera battery died. No joke. My goodness, what luck I have.

Luckily there were a few good pictures out of the 10 shots, so here I am! Even though all the madness, I’m glad I made this. Opera cake is such a pretty pretty cake: all those layers of jaconde soaked in syrup and sandwiched with buttercream and mousse, then topped with a ganache. We were allowed to make it any flavor we liked, as long as we kept it light. I went with mango, using some mango puree I found at our local grocery store. I’m not a huge fan of mango but the Hubs loves it, so I thought I’d be nice this time around and give him something he enjoys.

There was another reason I worked to get this sucker finished and posted – this month, our Daring Baker efforts are dedicated to a fellow (retired, but still fellow) Daring Baker: Barbara of winosandfoodies.com. The same Barbara from the LiveSTRONG challenge post. I don’t know her personally, but through her blog she comes across as such a strong and upbeat person. So Barbara: we all dedicate our Opera Cake to you. Enjoy dearie :)

A big thanks to Lis and Ivonne for the awesome challenge recipe! And as always - don't forget to check out the other Daring Bakers versions of this cake. I would imagine all if not most will have better images than moi.

Opéra Cake


Ingredients:

For the joconde:
6 large egg whites, at room temperature
2 Tbsp. granulated sugar
2 c. ground blanched almonds
2 c. icing sugar, sifted
6 large eggs
½ c. all-purpose flour
3 Tbsp. unsalted butter, melted and cooled

Divide the oven into thirds by positioning a rack in the upper third of the oven and the lower third of the oven.

Preheat the oven to 425◦F. (220◦C). Line two 12½ x 15½- inch (31 x 39-cm) jelly-roll pans with parchment paper and brush with melted butter.

In the bowl of a stand mixer fitted with the whisk attachment (or using a handheld mixer), beat the egg whites until they form soft peaks. Add the granulated sugar and beat until the peaks are stiff and glossy. If you do not have another mixer bowl, gently scrape the meringue into another bowl and set aside.

If you only have one bowl, wash it after removing the egg whites or if you have a second bowl, use that one. Attach the paddle attachment to the stand mixer (or using a handheld mixer again) and beat the almonds, icing sugar and eggs on medium speed until light and voluminous, about 3 minutes.

Add the flour and beat on low speed until the flour is just combined (be very careful not to overmix here!!!).

Using a rubber spatula, gently fold the meringue into the almond mixture and then fold in the melted butter. Divide the batter between the pans and spread it evenly to cover the entire surface of each pan.

Bake the cake layers until they are lightly browned and just springy to the touch. This could take anywhere from 5 to 9 minutes depending on your oven. Place one jelly-roll pan in the middle of the oven and the second jelly-roll pan in the bottom third of the oven.

Put the pans on a heatproof counter and run a sharp knife along the edges of the cake to loosen it from the pan. Cover each with a sheet of parchment or wax paper, turn the pans over, and unmold.

Carefully peel away the parchment, then turn the parchment over and use it to cover the cakes. Let the cakes cool to room temperature.

For the syrup:
½ c. water
⅓ c. granulated sugar
1 to 2 Tbsp. of the flavouring of your choice

Stir all the syrup ingredients together in the saucepan and bring to a boil.2.Remove from the heat and let cool to room temperature.

For the buttercream:
1 c. granulated sugar
¼ c. water
Seeds of one vanilla bean or 1 Tbsp. pure vanilla extract
1 large egg
1 large egg yolk
1¾ sticks unsalted butter, at room temperature
Favouring of your choice

Combine the sugar, water and vanilla bean seeds or extract in a small saucepan and warm over medium heat just until the sugar dissolves.

Continue to cook, without stirring, until the syrup reaches 225◦F (107◦C) [*Note: Original recipe indicates a temperature of 255◦F (124◦C), however, when testing the recipe I found that this was too high so we heated to 225◦F and it worked fine] on a candy or instant-read thermometer. Once it reaches that temperature, remove the syrup from the heat.

While the syrup is heating, begin whisking the egg and egg yolk at high speed in the bowl of your mixer using the whisk attachment. Whisk them until they are pale and foamy.

When the sugar syrup reaches the correct temperature and you remove it from the heat, reduce the mixer speed to low speed and begin slowly (very slowly) pouring the syrup down the side of the bowl being very careful not to splatter the syrup into the path of the whisk attachment. Some of the syrup will spin onto the sides of the bowl but don’t worry about this and don’t try to stir it into the mixture as it will harden!

Raise the speed to medium-high and continue beating until the eggs are thick and satiny and the mixture is cool to the touch (about 5 minutes or so).

While the egg mixture is beating, place the softened butter in a bowl and mash it with a spatula until you have a soft creamy mass.

With the mixer on medium speed, begin adding in two-tablespoon chunks. When all the butter has been incorporated, raise the mixer speed to high and beat until the buttercream is thick and shiny.

At this point add in your flavouring and beat for an additional minute or so.9.Refrigerate the buttercream, stirring it often, until it’s set enough (firm enough) to spread when topped with a layer of cake (about 20 minutes).

For the white chocolate ganache/mousse:
7 oz. white chocolate
1 c. + 3 Tbsp. heavy cream (35% cream)
1 Tbsp. liquer of your choice

Melt the white chocolate and the 3 tbsp. of heavy cream in a small saucepan.

Stir to ensure that it’s smooth and that the chocolate is melted. Add the tablespoon of liqueur to the chocolate and stir. Set aside to cool completely.

In the bowl of a stand mixer, whip the remaining 1 cup of heavy cream until soft peaks form.

Gently fold the whipped cream into the cooled chocolate to form a mousse. If it’s too thin, refrigerate it for a bit until it’s spreadable.

If you’re not going to use it right away, refrigerate until you’re ready to use.


For the glaze:
14 oz. white chocolate, coarsely chopped
½ c. heavy cream (35% cream)

Melt the white chocolate with the heavy cream. Whisk the mixture gently until smooth.

Let cool for 10 minutes and then pour over the chilled cake. Using a long metal cake spatula, smooth out into an even layer.

Place the cake into the refrigerator for 30 minutes to set.

Assembling the Opéra Cake:

Line a baking sheet with parchment or wax paper. Working with one sheet of cake at a time, cut and trim each sheet so that you have two pieces (from each cake so you’ll have four pieces in total): one 10-inch (25-cm) square and one 10 x 5-inch (25 x 12½-cm) rectangle.

Place one square of cake on the baking sheet and moisten it gently with the flavoured syrup. pread about three-quarters of the buttercream over this layer. Top with the two rectangular pieces of cake, placing them side by side to form a square. Moisten these pieces with the flavoured syrup.

Spread the remaining buttercream on the cake and then top with the third square of joconde. Use the remaining syrup to wet the joconde and then refrigerate until very firm (at least half an hour).

Prepare the ganache/mousse (if you haven’t already) and then spread it on the top of the last layer of the joconde. Refrigerate for at least two to three hours to give the ganache/mousse the opportunity to firm up.

Make the glaze and after it has cooled, pour/spread it over the top of the chilled cake. Refrigerate the cake again to set the glaze.Serve the cake slightly chilled. This recipe will yield approximately 20 servings.

25 May 2008

Cream Puffs


I pulled this recipe from my copy of Baking Boot Camp, my dear Hubs bought it for me (as well as other cookbooks) for Christmas this past year. I've been itching to try a few recipes out of it, and when the time finally came, I went for the cream puffs.

Now, I should add: I made a filling of goji berry pastry cream, but since that portion didn't photograph too well, I'm leaving out that end of the recipe. I basically piped the filling in with a pastry bag, and dipped the cream puffs in melted bittersweet chocolate to hide the holes. YUM. These are soooo good, tiny little bites of fluffy air. Hubs and I polished off my entire batch in the span of a weekend, which doesn't happen often (usually I try to share as to not add too much to the thighs).

Cream Puffs


Ingredients:
1 c. milk
1/2 c. unsalted butter, cubed
2 Tbsp. sugar
1/2 tsp. salt
1 c. sifted bread flour
3 eggs
Egg wash of 1 egg whisked with 1 Tbsp. milk

Preheat the oven to 375 F. Line baking sheets with parchment paper.

Combine the milk, butter, sugar, and salt in a saucepan over high heat and bring to a boil. Add the flour all at once and stir in well. Cook, stirring constantly, until the dough begins to come away from the sides of the pan, about 5 minutes.

Immediately transfer the dough to a bowl and stir by hand or with the paddle attachment until the mixture cools to body temperature. Add the eggs one at a time, beating well and scraping down the bowl with a rubber spatula after each addition.

Pipe the batter using a plain round tip or spoon the dough into 20 balls the size of golf balls on a the prepared baking sheets, about 2 inches apart. Brush the unbaked puffs very lightly with the egg wash. Place the puffs in the oven and bake until they are puffy and lightly browned, about 20 minutes. Reduce the oven temperature to 325 F and continue to bake until the puffs appear dry and a rich golden brown, another 20 to 25 minutes. Remove from the oven and cool completely before splitting and filling.

When the pastry has cooled, slice the top 1/2 inch off each cream puff. Fill the base of each with pastry cream. Replace the tops on the cream puffs. These can be assembled up to 4 hours before serving; keep refrigerated.

22 May 2008

Nutella Peanut Butter Chip Cookies


I found some Nusco Hazelnut Duo at my favorite little market here, and decided it was high time to give Mary's Nutella cookie recipe a shot. I mixed things up a little (used the Nusco and added some peanut butter chips for good measure), and loved them. Still chewy with crispy edges and a nice chocolate/hazelnut/peanut butter flavor. A good little cookie to keep around for company :)


Nutella Cookies
(adapted a wee bit from Alpineberry)


Ingredients:
1 1/3 c. all-purpose flour
2 Tbsp. unsweetened cocoa
1/4 tsp. baking powder
1/4 tsp. baking soda
Pinch of salt
7 Tbsp. unsalted butter, at room temp.
2/3 c. granulated sugar
1/3 c. light brown sugar
2/3 c. Nutella (I used Nusco Hazelnut Duo)
1/2 tsp. vanilla extract
1 large egg
1/2 c. peanut butter chips
1/2 c. toasted and skinned hazelnuts, coarsely chopped

Preheat oven to 350 F. Sift together flour, cocoa, baking powder, baking soda, and salt. Set aside.

Cream together butter, granulated sugar and brown sugar until light and fluffy. Mix in Nutella and vanilla extract. Add egg.

Add flour mixture and mix until just incorporated. Add peanut butter chips and hazelnuts.

Drop tablespoons of dough 2 inches apart onto parchment lined baking sheets. Bake for about 11 minutes until the edges look set. Cool on baking sheet for 5 minutes then carefully remove to cooling racks.

19 May 2008

Zebra (Cup)Cake


I will admit – it was the look of this cake that made me want to make it, not any special ingredients or flavor components. It turns out that it's a very soft cake with a lovely chocolate flavor, but that doesn't really matter. I mean, who isn't a sucker for those lovely stripes? I bookmarked this recipe awhile ago, but hadn't gotten to it yet. Until last weekend.

What finally seduced me to trying this recipe? Well, I had a free evening to myself with nothing better to do than watch an America's Next Top Model marathon – so it was a no-brainer. Cake that takes patience and a steady hand and lots of time to pour the batter? I'm in! I even did one better, and made cupcakes. Er, but I don't recommend that, to be honest – I was almost out of flour and my only choice was to halve the recipe, which meant I had to make mini cakes. Dropping the batter teaspoon by teeny teaspoon is a bit tedious, even with a good reality show marathon to keep you company.

If you give this a shot (in real cake size, of course): I highly recommend checking out Farida's blog post before getting started – she has photos step by step, which is extremely helpful.

Zebra Cake
(recipe from Farida)


Ingredients:
4 large eggs, at room temperature
1 c. granulated sugar
1 c. milk, at room temperature
1 c. oil
1/3 tsp. vanilla powder (optional)
2 c. all-purpose flour
1 Tbsp. baking powder
4-5 Tbsp. dark cocoa powder

In a large mixing bowl, combine eggs and sugar. Using a hand-held electric mixer or wire whisk beat until the mixture is creamy and light in color.

Add milk and oil, and continue beating until well blended.

Add vanilla powder and baking powder to the mixture. Gradually add flour and then beat until the batter is smooth and the dry ingredients are thoroughly incorporated.

Divide the mixture into 2 equal portions. Keep one portion plain. Add cocoa powder into another and mix well. The color of the cocoa batter should be quite dark, so add more if needed.
Preheat the oven to 350 F.

Lightly grease the pan with oil. If you don't have non-stick baking pan, grease whatever pan you have then line it with parchment paper.

The most important part is assembling the cake batter in a baking pan. This is what you do. Scoop 3 heaped tablespoons of plain batter (you can also use a ladle that would hold 3 tablespoons) into the middle of the baking pan. Then scoop 3 tablespoons of cocoa batter and pour it in the center on top of the plain batter. NOTE: Do not spread the batter or tilt the pan to distribute the mixture. It will spread by itself and fill the pan gradually. Continue alternating the batters until you finish them. The pictures below will guide you through.

Bake in the oven for about 40 minutes. Do not open the oven door at least the first 20 minutes or the cake will shrink and will not rise. To check if the cake is ready, insert a toothpick into the center. It should come out clean when ready. Remove from the oven. Immediately run a small thin knife around the inside of the pan to loosen the cake, then invert the cake onto a cooking rack. Turn the cake back over and let cool.

16 May 2008

Mexican-Style Gazpacho


Sarah gave me her gazpacho recipe recently, when I was hard up for an easy soup that was tasty and healthy to boot. She got this recipe from her teacher when she was studying in Spain, so it's authentic as it gets. I have tried my hand at gazpacho before using other recipes I've found online, and nothing compares to this flavorful soup.

I love it because it comes together easily, and is quite tasty. Feel free to just make the regular old recipe without the additional add-ins (that's for my sake, I need lots o chunks in my soup to enjoy it). I wanted to give it a Tex-Mex type flair, so added nontraditional flavors to the gazpacho: cilantro and avocado and hot sauce. Quite good! And perfect for a hot summer day, when you want something cold and soothing and don't feel like firing up the stove.

Mexican Gazpacho


Ingredients:
3 medium tomatoes, cut into chunks
1 green pepper (Sarah recommends Anaheim)
1 clove of garlic
About 3/4 c. olive oil
2 tsp. vinegar
1 tsp. salt
3 thick pieces of stale, wet bread (Sarah's note: 'I usually cut a few pieces from leftover French bread, then run them under water for a few seconds and squeeze them out slightly')

1/4 c. fresh lime juice
1 tsp. hot sauce such as Tabasco
1/2 c. finely chopped white onion
1/4 c. chopped fresh cilantro
1 ripe avocado, peeled, pitted, and cut into small chunks
1/2 lb. fresh lump crabmeat (1 cup), picked over
1/4 lb. cooked baby shrimp

To make the base (from Sarah):
"Blend the first 7 ingredients together (from tomatoes to stale bread). I like to use my hand blender because that is what we used in Spain, but a regular blender works just as well. I prefer the mixture to be blended very well and have tiny chunks instead of a thicker, bruschetta size blend. After mixture is blended, add 3/4 cup of ice cold water".

Stir lime juice and hot sauce into gazpacho base until well mixed. Gently stir in onions, cilantro, avocado, and crab and shrimp. Chill for at least one hour, to allow the gazpacho to cool and blend all the flavors.

13 May 2008

Roasted Tomato Soup


My Husband is like most men – he needs protein (MEAT) with every meal, or it's not really a meal. Tomato soup is the one exception to this rule, for some reason. The man loves tomatoes, and will gladly skip meat for a nice bowl of tomato soup. So when my buddy Sarah recommended a roasted tomato soup she tried, I had to give it a shot. Anytime I can get away with a meal where I don't have to make some sort of meat product, I'm all over it!


This soup is divine; roasting the tomatoes gives the soup a lovely flavor. I like to leave it a bit chunky, just for texture in the soup. Just a touch of cream poured on top when you are ready to serve, and it's perfect!

**NEWS FLASH FOR ALL REGULAR READERS OUT THERE**
I am moving. We finally (FINALLY) bought a house, and take possession this week. It is 70 years old but in tip-top structural shape, tons of lovely little vintage details throughout. Still, there's lots of updating to do to it when we get in. I won't be able to spend as many fun days in the kitchen, because I'll be painting and replacing hardware and painting and updating cabinetry and painting and picking out furniture. And painting.

And to add to that: as a farewell gift, ants have invaded our apartment kitchen. INVADED. I put all the sweet stuff in baggies and hid them. I've scoured the space, wiped everything down with vinegar, sprinkled pepper everywhere, put out traps. Still they are everywhere. So this is also not helping with my situation, since I can't really stand to be in the kitchen.

Anyhoo: I do have a nice backlog of recipes built up. Just know that they probably won't be posted every other day as I'm doing now, maybe more like 3 times a week. So be prepared! I am not abandoning the blog, I just have lots on my hands right now. So hold tight, soon there will be lots more postings from my fabulous new kitchen to come. Much better lighting in our new house, I'm so excited!!

Roasted Tomato Soup
(from Sarah, from Tyler Florence)


Ingredients:
2 1/2 lbs. fresh tomatoes (a mix of as many types as you'd like)
6 cloves garlic, peeled
2 small yellow onions, sliced
1/2 c. extra-virgin olive oil
Salt and freshly ground black pepper
1 qt. chicken stock
2 bay leaves
4 Tbsp. butter
1/2 c. chopped fresh basil leaves
3/4 c. heavy cream, optional


Preheat oven to 450 F.

Wash, core and cut the tomatoes into halves. Spread the tomatoes, garlic cloves, and onions onto a baking tray. Drizzle with 1/2 c. of olive oil and season with salt and pepper. Roast for 20 to 30 minutes, or until caramelized.

Remove roasted tomatoes, garlic and onion from the oven and transfer to a large stock pot (set aside the roasted vine tomatoes for later). Add 3/4 of the chicken stock, bay leaves, and butter. Bring to a boil, reduce heat and simmer for 15 to 20 minutes or until liquid has reduced by a third.

Wash and dry basil leaves, and add to the pot. Use an immersion blender to puree the soup until smooth. Return soup to low heat, add cream and adjust consistency with remaining chicken stock, if necessary. Season to taste with salt and freshly ground black pepper. Garnish in bowl with a splash of heavy cream.

11 May 2008

Key Lime Angel Food Cake


My first introduction to Key Lime Pie is thanks to my Muzzy (my mom, that's her nickname). Once we stopped for lunch on one of our "shopping days" *, and we ordered Key Lime Pie to share for dessert.

I had never had it before, but agreed that it was definitely the pie to order. And oh, my goodness. Creamy yet tart, tangy, and slightly sweet. I was hooked, and whether it's the good memories of eating it with my Muzzy or just plain the fabulous taste of the limes, I was hooked from that day forward. To this day, Key Lime Pie holds 1st Place in my heart as the best of the best of pies.

That being said, I've seen a ton of Key Lime desserts lately, all making me pine for that lovely pie. The Key Lime Angel Food Cake came to me because I had a ton of egg whites sitting in the freezer, waiting for the perfect recipe. I know I say this a lot in regard to recipes I post, but seriously: this is an easy cake. The lime really gives it a tangy and tart kick, just what I was looking for. And the curd, oh yes. It was tart tart tart, which was a great contrast to the light sweet cake.

AND: a few words on this wonderful holiday:

* I grew up in a large family, it's true. Always there were a million people around. But every once in a blue moon, when I was still a kid and living at home, my Muzzy would come in to my room in the morning (as if she was getting me up for school) and whisper "Let's have a shopping day, I'll call you in sick to school". It was the best day ever! I fondly remember those days. They didn't come around very often, and I'm sure she did this with all my siblings separately, but still. Loved those days. Thanks Muzzy. And thanks for the Key Lime obsession, too :)

I need to mention my mother today. It's that special day of the year, a day to remember, honor, and thank our lucky stars for our moms. Moms have a thankless job, really. My mother was a "housewife" but my goodness, she worked harder than any person I've ever known. It's not an easy task to keep an immaculate house and always a hot dinner on the table and juggle an entire household's schedules, let alone doing all of this while simultaneously raising eleven kids. Yet my mother – given all our random disasters and assorted moments of childhood naughtiness - still did it all with a sense of humor and warmth.

I can't tell you the number of things that remind me of my mother on a daily basis, little things she'd do especially just with me - and I know all my sisters and brothers have the same kind of unique memories too. She found the time to fit all this in, and still look like a million bucks (there has always been something inherently graceful about my mother). Hopefully I'm half the person she is when it's my time to have kids.

So Happy Mother's Day Muzzy: I love you bunches. Now have a slice of key lime goodness.

Key Lime Angel Food Cake
(Adapted from Alton Brown)


Ingredients:
1 3/4 c. granulated sugar
1/4 tsp. salt
1 c. cake flour, sifted
12 egg whites, room temperature
1/3 c. warm water
3 Tbsp. lime zest
1/3 c. lime juice
1 1/2 tsp. cream of tartar

Lime curd (adapted from Ina Garten):
9-10 key limes, at room temperature
1 1/2 c. sugar
1/4 lb. unsalted butter, at room temperature
4 extra-large eggs, at room temperature
1/8 tsp. salt

For the cake:
Preheat oven to 350 F. In a food processor spin sugar about 2 minutes until it is superfine. Sift half of the sugar with the salt and the cake flour, setting the remaining sugar aside. In a large bowl, use a balloon whisk to thoroughly combine egg whites, water, lime zest, lime juice, and cream of tartar. After 2 minutes, switch to a hand mixer. Slowly sift the reserved sugar, beating continuously at medium speed. Once you have achieved medium peaks, sift enough of the flour mixture in to dust the top of the foam. Using a spatula fold in gently. Continue until all of the flour mixture is incorporated.

Carefully spoon mixture into an ungreased tube pan. Bake for 35 minutes before checking for doneness with a wooden skewer. (When inserted halfway between the inner and outer wall, the skewer should come out dry). Cool upside down on cooling rack for at least an hour before removing from pan.

For the curd:
Remove the zest of limes with a vegetable peeler or zester, being careful to avoid the white pith. Squeeze the limes to make 1/2 cup of juice and set the juice aside. Put the zest in a food processor fitted with a steel blade. Add the sugar and process for 2 to 3 minutes, until the zest is very finely minced.

In the bowl of an electric mixer fitted with a paddle attachment, cream the butter with the sugar and lime zest. Add the eggs, 1 at a time, and then add the lime juice, vanilla, and salt. Mix until combined. Serve a good-sized dollop on the angel food cake.

09 May 2008

Coconut Cashew Basmati Rice Salad


Food Network has gotten out of hand in the past few years, I will admit. Sometimes there's more flash and showboating than actual quality cooking going on. But every once in awhile, there's still a gem of a recipe to be had. This one I picked up from Boy Meets Grill 3-4 years ago, and it's practically a staple in our house in the warmer months. This exotic little rice dish has a great mix of flavors and best of all - is good hot, warm, or room temperature. It really goes well with a lot of dishes, and is great paired with grilled food.

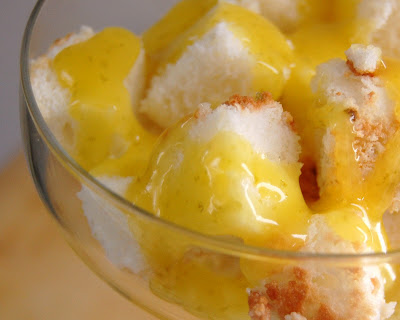
The textures going on in this salad are insane - creamy rice (thanks to that warm, almost sweet coconut milk) with crunchy cashews and green onions, and coconut bits to round everything out. The flavors are brilliant, a dish that hints at sweetness but is also so nutty and fresh-tasting. This is another one of those dishes that I find people raving over, and I never have leftovers. Try it next time you throw some fish or meat on the grill and you'll see why.

Coconut Cashew Basmati Rice Salad
(from Bobby Flay)


Ingredients:
3 Tbsp. peanut oil + 1 Tbsp. for the cashews (I like to use coconut oil)
1 medium yellow onion, peeled, halved and thinly sliced
1 clove garlic, chopped
1 Tbsp. grated fresh ginger
2 c. basmati rice, rinsed several times in cold water and drained well
Salt and freshly ground pepper (it is important to properly salt this dish! It's rather bland otherwise)
1/4 c. raw cashews, halved
2 c. unsweetened coconut milk
2 c. water
1/2 c. thinly sliced green onion
1/4 c. grated fresh coconut (optional)
1/4 c. chopped cilantro (optional)

Heat oil in a medium saucepan. Add onion, garlic and ginger and cook until soft. Add the drained rice, salt and pepper and cook for 3 to 4 minutes.

While the rice is cooking, heat the remaining tablespoon of oil in a small saute pan over medium heat. Add the cashews and cook until lightly golden brown. Drain on paper towels.

Place coconut milk and water in a medium saucepan and bring to a simmer. Add the hot liquid to the rice and bring to a boil. Reduce the heat, cover and cook for about 15 to 20 minutes. When the rice is cooked, remove from the oven and fold in the green onion, and cilantro/coconut (if using). Spoon the rice onto a platter and garnish with the toasted cashews.

07 May 2008

Cheese Bread


Madison, Wisconsin: Home of Bucky, State Street, Ella's Deli, and the Wisconsin Capital. Aside from being known for these things, it is also home to a pretty stellar Farmers Market.

One of the highlights at that Farmer's Market, most attendees would agree, is Stella's Bakery's Hot & Spicy Cheese Bread. Many people buy it and it never makes it home - no, instead they munch down on the hot loaves while perusing the rest of the market. The bread is a basic white, but with molten chunks of spicy cheese inside. Amazing, best treat ever I would imagine.


I have never had it myself, but from what I hear it is not to be missed. I've been thinking about this odd little loaf of bread a lot lately because, well, for one I always miss my home state and these things creep into my little brain. But for another, I've been terribly excited that our own town's Farmers Market has fired up finally. Farmers Market + some random image of home relating to Farmers Markets = cheese bread. Get it? They don't have the fancy cheese bread at our Farmers Market, unfortunately. But hey, why not give it a shot at home, right?

The recipe I used as a base for this can be found here, it's a basic Amish sweet bread. It's a good basic bread recipe, and very easy to follow. The original recipe linked actually makes a very sweet bread, almost like the Hawaiian Sweet Bread you can buy in grocery stores. But: I wanted less sweet and more cheese (CHEESE!), so I made several changes. Less sugar, more kneading, a bit more rising time, and the cheese (which I chunked rather than shredded, so that the chunks would still be visible and tasty in the finished loaf instead of melting into the dough).


I think it turned out quite well. Hubs and I tore into it while it was still hot, and I like to think it had many of the same characteristics I've heard about Stella's cheese bread: warm, soft bread with gooey chunks of melted cheese studded throughout. Yum! So if you want a bit of a treat, I recommend you give this a shot. Or fly into Madison to hit up their Farmers Market on a Saturday morning, I guess there's that option too...


Cheese Bread


Ingredients:
2 c. warm water (~110 F)
1/4 c. white sugar
1 1/2 Tbsp. active dry yeast
1 1/2 tsp. salt 1/4 c. vegetable oil 6 c. bread flour, sifted
1 c. cheddar cheese, cubed
2 c. Monterey Jack cheese, cubed
2 Tbsp. chopped jalapeno

In a large bowl, dissolve the sugar in warm water, and then stir in yeast. Allow to proof until yeast resembles a creamy foam (about 10 minutes).

Mix salt and oil into the yeast. Mix in flour one cup at a time. Knead dough on a lightly floured surface until smooth, about 10 minutes. Place in a well oiled bowl, and turn dough to coat. Cover with a damp cloth. Allow to rise until doubled in bulk, about 90 minutes.

Punch dough down. Add cheese and jalapeno to dough and knead for about 5 minutes, until the cheese chunks are dispersed throughout (you will have some seriously bumpy dough!). Then divide dough in half. Shape into loaves, and place into two well oiled 9x5 inch loaf pans. Allow to rise for 30 minutes, or until dough has risen 1 inch above pans.

Bake at 350 degrees F (175 degrees C) for 30 minutes.

05 May 2008

Brown Butter Baumkuchen


A German pound cake of sorts, this recipe can't be missed. "Baumkuchen" translates to tree cake, because of its rings of cake when cut (like the rings in a cut tree trunk). This is a version adapted for the normal kitchen, rather than being made over a spit as is traditional. It is still time-intensive, but well worth the effort.


I made mine in a loaf pan (and halved the recipe), but I'm sure it's just as lovely and gorgeous in its original form for this recipe, a 10-inch round. The layers are so lovely to see when you cut into it (although I must admit, I didn't let my layers brown enough so they aren't as visible as I would have liked; stupid Nemmie impatience). The cake itself was so good: that browned flavor from the butter, the rum comes out nicely, and the apricot glaze gives it that little extra sweetness and charm. This is an adorable cake, it makes a great presentation, and the flavors are sooo good to boot. Definitely a keeper of a recipe - although admitedly, only when I have hours to stand in front of the oven!

Brown Butter Baumkuchen
(from Sherry Yard's The Secrets of Baking, 2003)


Ingredients:
1 3/4 sticks unsalted butter
1 1/2 c. sugar
9 large eggs
1/4 c. water
1 tsp. freshly grated nutmeg
2 Tbsp. dark rum
1 1/4 c. cake flour, sifted 3 times
2 Tbsp. heavy cream

Apricot Glaze:
1 c. apricot jelly
1/2 c. water

Ganache Glaze:
8 oz. bittersweet chocolate
4 Tbsp. apricot jelly
1/2 c. heavy cream
1/4 c. milk
2 Tbsp. light corn syrup

For the cake:
Preheat oven to 425 F. Adjust the rack to the upper part of the oven. Spray the bottom only of a 10-x-3-inch round cake pan or two 9-x-2-inch pans with cooking spray. Line each with a circle of parchment paper and spray the paper. Place the prepared pans inside empty cake pans if you have enough cake pans. This prevents the outside of the cake from browning too much.

Melt the butter in a medium saucepan over medium heat. Cook until the solids separate and begin to brown on the bottom of the pan, about 7 minutes. When this happens, turn off the heat and set the butter aside to cool slightly. It should remain liquid.

Fill a medium saucepan halfway with water and bring it to a simmer over medium heat. Combine the sugar, eggs, water, nutmeg and rum in the bowl of your standing mixer or another metal bowl and place it over the simmering water, creating a double boiler, being careful that the bottom of the bowl does not touch the water. Insert a thermometer. Whisk continuously until the temperature reaches 110 F, 2 to 3 minutes.

Remove from the heat and transfer the bowl to a standing mixer fitted with a whisk attachment, or use a hand mixer. Whip on high speed for 5 to 8 minutes, or until the eggs are three times their original volume, are thick and pale yellow in color, and form a ribbon when drizzled from a spatula. Turn down the mixer to medium speed and whip for 2 minutes more. This stabilized the foam. Fold in the cream and browned butter. Be sure to scrape all the browned butter bits in. Carefully scrape the batter into a large, wide bowl.

Fold in the flour using a balloon whisk, being careful not to deflate the foam.


Pour 1 1/2 cups of the batter into the prepared pan or pans, enough to coat the pan (or pans) in a thin layer. Keep the remaining batter away from the stove's heat so that it doesn't deflate. Bake for 7 minutes, or until the top is golden brown. Remove it from the oven and pour another 1 to 1 1/2 cups of batter on top. Return the cake pan to the oven and bake for 5 minutes more, or until the top is golden brown. Repeat until all the batter has been used. Once the final layer has been baked, remove the cake from the oven and immediately turn it out of the pan onto a rack set over a sheet of aluminum foil. Stack one cake on top of the other.

For the apricot glaze:
Combine the apricot jelly and water in a small saucepan and warm over low heat until the jelly is liquefied. While the cake is still hot, brush the top and sides with the apricot glaze. Let cake cool completely, at least 1 hour before applying ganache glaze.

For the ganache glaze:
Using a serrated knife, finely chop the chocolate into 1/4-in. pieces and place3 it in a medium heat-proof bowl.

Warm the apricot jelly in a small saucepan over low heat for 2 to 3 minutes, stirring until melted. Whisk in the cream, milk, and corn syrup. Increase the heat to medium and bring the mixture to a boil.

Pour the hot cream mixture over the chopped chocolate. Tap the bowl on the counter to settle the chocolate into the cream, then let it sit for 1 minute. Using a rubber spatula, slowly stir in a circular motion, starting from the center of the bowl and working out to the sides. Be careful not to add too much air to the ganache. Stir until all the chocolate is melted, about 2 minutes.

When all the chocolate has melted, insert a thermometer. The temperature should be 90 F for best glazing results. If the temperature is too low, place the bowl over a saucepan half full of simmering water, creating a double boiler, and gently stir until the thermometer reads 90 F. If the temperature is too high, occasionally stir the ganache off the heat until it is ready to be poured. Glazing should be done as soon as the ganache reaches 90 F for maximum viscosity.

Line a baking sheet with parchment or wax paper and place a cooling rack on top. Position the cake on the cooling rack. The ganache will flow over the cake, through the cooling rack, and onto the baking sheet below.

When the ganache is at 90 F, pour all the warm ganache onto the top of the cake, directly in the center. The speed and weight of the pouring ganache will push itself over the edges, coated the sides of the cake. If some spots are left uncoated, carefully lift the cooling rack and swirl the cake gently to coax the ganache into place. Give the rack a couple of gentle taps on the counter to send any remaining ganache over the edge. Let the cake sit for 5 minutes at room temperature to settle before serving.

03 May 2008

Crunchy Pea Salad


Here is how it usually goes down when I make this salad: I toss it together, usually in the summertime when we are grilling out. When it's time to eat, Hubs and I take a conservative portions of our fresh-off-the-grill chicken or fish and grilled vegetable (or green salad). Then we take a gigantic heaping scoop of this pea salad. After dinner, I pack up the leftover pea salad (notice that I show incredible self-control by packing it up, rather than scarfing it down). Then, at some point later that evening, the container of leftover pea salad magically appears in front of us and we together polish it off. End of story. I don't really know why I bother packing the leftover salad into Tupperware.

This is really good, and really addictive. I hate pea salads with gloppy old mayonnaise, and this one (sour cream-based) makes it not only healthier but lighter, still tangy but not so overpowering like mayonnaise can sometimes be. I like the mix of textures, and of course bacon on anything is just plain good.

Because we tend to pig out on it, I am careful to only make small batches of this salad. I also try to make it more healthy, by swapping out the cashews for sunflower seeds and the bacon (sometimes) for turkey bacon. I imagine that if you don't want to do the nuts, you could also throw some chopped water chestnuts in there, which would still give the nutty flavor. Believe me, it's possible to make this more healthy. And take it from me: there still won't be leftovers.

Crunchy Pea Salad
(Adapted from allrecipes.com)


Ingredients:
8 slices bacon
1 (10 oz.) package frozen green peas, thawed and drained
1/2 cup chopped celery
1/3 c. finely chopped red onion (or use green onions)
2/3 c. low-fat sour cream
1 c. chopped cashews or sunflower seeds
Salt and pepper to taste

Place bacon in a large, deep skillet. Cook over medium high heat until evenly brown. Drain, crumble and set aside.

In a medium bowl, combine peas, celery, onion, and sour cream. Toss gently to mix.
Just before serving, stir nuts and bacon into salad. Season with salt and pepper to taste.

01 May 2008

Vegetable Soup


Every day for lunch at work, I have soup. Call me a creature of habit, or boring, or granny-tastic. I don't mind. It's filling and generally healthy and very easy to eat at my desk, especially when you buy that soup in the convenient to-go containers.

However I must admit: it's not the most economical way to bring a lunch, and not exactly earth-friendly, either. So: in an effort to save some cash as well as our dear planet Earth, I decided to give up my beloved Progresso Light soup habit. I still love soup for lunch, though. So instead, I make a big pot of soup on Sunday afternoon, divide it up into my individual Tupperware containers, and use that for my lunches throughout the week.

This soup recipe below is one that I find myself making time and time again. It comes from Jules, bless that darling girl. It's mad healthy and very versatile. Sometimes I toss in different vegetables, like peas or corn or okra. I may add beans. Sometimes rice or pasta, even (like the mini shell pasta in my pictures). The garlic and sage are great base flavors, I add additional spices depending on the flavor I want. It's just all-in-all a great recipe!

Vegetable Soup
(from my good buddy Jules, adapted just a wee bit)


Ingredients:
3-4 Tbsp. olive oil
1 c. diced carrots
1 c. sliced onions
1 1/2 c. celery
5 c. low sodium chicken broth
8 oz. tomato sauce
1 (14 oz.) can tomatoes
1 1/2 c. mushrooms
2 c. zucchini
Garlic powder
Sage (fresh or dried)
Salt and pepper

Place a large stockpot on the stovepot, over medium heat. Add olive oil, carrots, onions, and celery. Sweat for 10-15 minutes, until vegetables soften.

Add broth, tomato sauce, canned tomatoes, and remaining vegetables. Bring to a boil, and then turn down to simmer. Add garlic powder, sage, and salt and pepper to taste. Let the soup simmer for 30-45 minutes to blend flavors.

This will make 10 to 12 one-cup servings. Perfect for lunches!