31 August 2008

Pierre Hermé’s Chocolate Éclairs


Daring Bakers time once again, my pets. This time we're tackling éclairs.


Remember my dear sister Aimbot? Well. This recipe had her name written all over it. Aimbot was lucky enough to take a trip to France in high school, apparently to practice her mad French-speaking skillz. I may have only been ten years old, but from what I could see what she really got out of the trip was a suitcase stuffed with the latest fashions and a worldly air.

And an éclair recipe.


She flew home, and after many hugs and much chatting about her two weeks away, Aimbot did something I had never seen her do before. She donned a fashionable new chemise, tied on an apron, and set about the kitchen to bake. Aimbot, baking! And not only baking, but she was making éclairs. Those puffy, sweet, elegant little treats enjoyed in France. All I really remember is that she spent a LONG TIME in the kitchen, and what resulted were puffs of warm heaven, split in half and filled with a sweet creamy filling, and bitter chocolate swipe across the top.

When I saw we were making éclairs this challenge, I immediately thought of that time when I was younger and Aimbot made éclairs. I wanted more than a simple chocolate pastry filling, though, so added some orange zest and Grand Marnier to the pastry filling as well as Grand Marnier to the chocolate glaze.

Ooo la la! Good stuff, ladies and gents. Hubs and I enjoyed a few of these as our Sunday breakfast, with thick slices of cantaloupe and big steaming mugs of coffee. While making up fake French words, as to appear more sophisticated (I don't think that worked, though).


Don't forget to check out those other éclairs from my fellow Daring Bakers! And many thanks to this month's hosts Tony Tahhan and MeetaK, you really brought back memories :)

Pierre Hermé’s Chocolate Éclairs
(from Chocolate Desserts by Pierre Hermé)


Assembling the éclairs:
20-24 éclairs
Chocolate glaze
Chocolate pastry cream

Slice the éclairs horizontally, using a serrated knife and a gently sawing motion. Set aside the bottoms and place the tops on a rack over a piece of parchment paper.

The glaze should be barely warm to the touch (between 95 – 104 degrees F or 35 – 40 degrees C, as measured on an instant read thermometer). Spread the glaze over the tops of the éclairs using a metal icing spatula. Allow the tops to set and in the meantime fill the bottoms with the pastry cream.

Pipe or spoon the pastry cream into the bottoms of the éclairs. Make sure you fill the bottomswith enough cream to mound above the pastry. Place the glazed tops onto the pastry creamand wriggle gently to settle them.

Notes: If you have chilled your chocolate glaze, reheat by placing it in a bowl over simmering water, stirring it gently with a wooden spoon. Do not stir too vigorously as you do not want to create bubbles.

The éclairs should be served as soon as they have been filled.

Pierre Hermé’s Cream Puff Dough

Ingredients:
½ cup (125g) whole milk
½ cup (125g) water
1 stick (4 ounces; 115g) unsalted butter, cut into 8 pieces
¼ teaspoon sugar
¼ teaspoon salt
1 cup (140g) all-purpose flour
5 large eggs, at room temperature

In a heavy bottomed medium saucepan, bring the milk, water, butter, sugar and salt to theboil.

Once the mixture is at a rolling boil, add all of the flour at once, reduce the heat to medium and start to stir the mixture vigorously with a wooden spoon. The dough comes together very quickly. Do not worry if a slight crust forms at the bottom of the pan, it’s supposed to. You need to carry on stirring for a further 2-3 minutes to dry the dough. After this time the dough will be very soft and smooth.

Transfer the dough into a bowl of a mixer fitted with the paddle attachment, or using your hand mixer or if you still have the energy, continue by hand. Add the eggs one at a time, beating after each egg has been added to incorporate it into the dough. You will notice that after you have added the first egg, the dough will separate, once again do not worry. As you keep working the dough, it will come back all together again by the time you have added the third egg. In the end the dough should be thick and shiny and when lifted it should fall back into the bowl in a ribbon.

The dough should be still warm. It is now ready to be used for the éclairs as directed above.

Notes: Once the dough is made you need to shape it immediately.

You can pipe the dough and the freeze it. Simply pipe the dough onto parchment-lined baking sheets and slide the sheets into the freezer. Once the dough is completely frozen, transfer the piped shapes into freezer bags. They can be kept in the freezer for up to a month.

Preheat your oven to 375 degrees F (190 degrees C). Divide the oven into thirds by positioning the racks in the upper and lower half of the oven. Line two baking sheets with waxed or parchment paper.

Fill a large pastry bag fitted with a 2/3 (2cm) plain tip nozzle with the warm cream puff dough. Pipe the dough onto the baking sheets in long, 4 to 41/2 inches (about 11 cm) chubby fingers. Leave about 2 inches (5 cm) space in between each dough strip to allow them room to puff. The dough should give you enough to pipe 20-24 éclairs.

Slide both the baking sheets into the oven and bake for 7 minutes. After the 7 minutes, slip thehandle of a wooden spoon into the door to keep in ajar. When the éclairs have been in theoven for a total of 12 minutes, rotate the sheets top to bottom and front to back. Continue baking for a further 8 minutes or until the éclairs are puffed, golden and firm. The total bakingtime should be approximately 20 minutes.

Notes: The éclairs can be kept in a cool, dry place for several hours before filling.

Chocolate Pastry Cream Recipe

Ingredients:
2 cups (500g) whole milk
4 large egg yolks
6 tbsp (75g) sugar
3 tablespoons cornstarch, sifted
7 oz (200g) bittersweet chocolate, preferably Velrhona Guanaja, melted
2½ tbsp (1¼ oz: 40g) unsalted butter, at room temperature

In a small saucepan, bring the milk to a boil. In the meantime, combine the yolks, sugar and cornstarch together and whisk in a heavy‐bottomed saucepan.

Once the milk has reached a boil, temper the yolks by whisking a couple spoonfuls of the hot milk into the yolk mixture. Continue whisking and slowly pour the rest of the milk into the tempered yolk mixture.

Strain the mixture back into the saucepan to remove any egg that may have scrambled. Place the pan over medium heat and whisk vigorously (without stop) until the mixture returns to a boil. Keep whisking vigorously for 1 to 2 more minutes (still over medium heat). Stir in the melted chocolate and then remove the pan from the heat.

Scrape the pastry cream into a small bowl and set it in an ice‐water bath to stop the cooking process. Make sure to continue stirring the mixture at this point so that it remains smooth.

Once the cream has reached a temperature of 140 F remove from the ice‐water bath and stir in the butter in three or four installments. Return the cream to the ice‐water bath to continue cooling, stirring occasionally, until it has completely cooled. The cream is now ready to use or store in the fridge.

Notes: The pastry cream can be made 2‐3 days in advance and stored in the refrigerator.

In order to avoid a skin forming on the pastry cream, cover with plastic wrap pressed onto the cream.

Tempering the eggs raises the temperature of the eggs slowly so that they do not scramble.

Chocolate Glaze Recipe

Ingredients:
1/3 cup (80g) heavy cream
3½ oz (100g) bittersweet chocolate, finely chopped
4 tsp (20 g) unsalted butter, cut into 4 pieces, at room temperature
7 tbsp (110 g) Chocolate Sauce (recipe below), warm or at room temperature

In a small saucepan, bring the heavy cream to a boil. Remove from the heat and slowly begin to add the chocolate, stirring with a wooden spoon or spatula.

Stirring gently, stir in the butter, piece by piece followed by the chocolate sauce.

Notes: If the chocolate glaze is too cool (i.e. not liquid enough) you may heat it briefly in the microwave or over a double boiler. A double boiler is basically a bowl sitting over (not touching) simmering water. It is best to glaze the eclairs after the glaze is made, but if you are pressed for time, you can make the glaze a couple days ahead of time, store it in the fridge and bring it up to the proper temperature (95 to 104 F) when ready to glaze.

Chocolate Sauce Recipe

Ingredients:
4½ oz (130 g) bittersweet chocolate, finely chopped
1 cup (250 g) water
½ cup (125 g) crème fraîche, or heavy cream
1/3 cup (70 g) sugar

Place all the ingredients into a heavy‐bottomed saucepan and bring to a boil, making sure to stir constantly. Then reduce the heat to low and continue stirring with a wooden spoon until the sauce thickens.

It may take 10‐15 minutes for the sauce to thicken, but you will know when it is done when it coats the back of your spoon.

29 August 2008

Happy Labor Day Weekend!

I have a busy weekend ahead, so Mahni has graciously offered to once again write a post for the blog. Have a safe and wonderful Labor Day weekend!


What I Did On My Summer Vacation
A pictorial by Mahni, Sous Chef

Enjoyed the fruits of the season (namely, ice cream).

Played on the swings with Grandpa Peedoh.


Saw the countryside from my bike.

Took long walks with Aunt Jeannie.

Went swinging some more.

Learned the art of properly handling fireworks.

Participated in squirt gun stand-offs.

More swinging. With my brother Dyl.

Took in the sights from my dad's sweet ride (while my dad walked the bike, of course).


Swinging. Again.


Worked on my Paris Hilton impression.


Researched different ways to do this swinging thing.


And my most favorite summer activity of them all: eating cold fried chicken for breakfast.


See you Sunday :)


28 August 2008

Salmon Rotini with Roasted Garlic and Lemon


Oh, for the love of garlic. This recipe was loaded with the stuff, so if you're not a fan, no need to read on.


What I love about this pasta is the sheer amount of garlic - not only roasted, smashed, and dissolved into the sauce - no, it also has chunks of that sweet, roasted bulb throughout as well.


Roasted garlic is such a different animal from its raw counterpoint - it is mellow and sweet, slightly caramelized, and adds such a fantastic buttery flavor to a dish. This recipe uses 2 heads of roasted garlic, so it is full of that toasted, warm flavor that is so much more subtle than raw garlic. The lemon gives a nice contrast, and the salmon plays second fiddle to the other flavors going on.

Salmon Rotini with Roasted Garlic and Lemon
(from Everyday Pasta, 2007)


Ingredients:
2 whole heads of garlic
2 Tbsp. olive oil
Salt and pepper
1 lb. rotini
1/2 c. Marsala or white wine
1 c. chicken broth
1 lb. salmon, cut into 1-in. cubes
1 Tbsp. minced fresh rosemary
2 Tbsp. olive oil
2 Tbsp. drained capers

Preheat oven to 400 F.

Cut the heads of garlic in half crosswise and place on a sheet of foil. Drizzle with the olive oil and season with salt and pepper. Fold the foil up and around the garlic, making sure it stays flat, and fold the edges to seal into a tight packet. Roast until soft, about 60 minutes. Let the garlic cool slightly, then squeeze the cloves out of the skin. Mash half of the roasted garlic cloves into a paste with the back of a knife. Set aside.

Bring a large pot of salted water to a boil over high heat. Add the pasta and cook until tender but still al dente, stirring occasionally, 8-10 minutes. Drain.

Meanwhile, combine the wine and chicken broth in a large, heavy skillet and bring to a simmer. Add the mashed roasted garlic and stir to dissolve. Simmer uncovered for 4 minutes, then add the salmon, cover, and simmer for 4 minutes longer. Remove from the heat and add the remaining whole roasted garlic cloves, the lemon zest and juice, rosemary, and cooked pasta. Stir to combine; add the olive oil, capers, 1/2 tsp. salt, and 1/2 tsp. pepper. Stir once more. Serve immediately.

26 August 2008

Pulled Pork


What is summer without a BBQ recipe, may I ask?

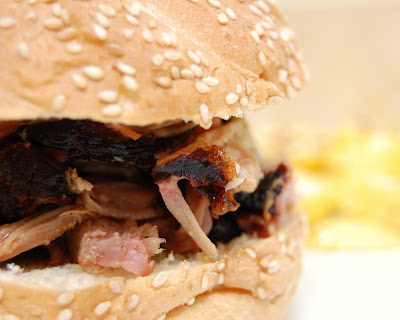
Hubs and I love us some good BBQ. Oh yes, this Wisconsinite has grown to love - and dare I say, crave? - a good smoked meat from time to time. Pulled pork is my favorite: smoked at a low heat for several hours, there is a nice deep smoke flavor to the moist meat that cannot be duplicated in any other way. I am partial to slathering it in vinegar-based sauces (yes, take away my KC-BBQ cred now, that's completely Carolina of me), but it is good topped with absolutely anything.


The Beer-Nerd-Formerly-Known-As-Hubs made this pork, I admit. I had nothing to do with the creation of it. He grabbed the recipe from his beloved copy of Beer Advocate, and while it took him all day, it was worth every second. Succulent and falling apart before we could even shred it properly, the pork rendered its fat to make a slightly crispy crust with soft, smoky meat inside. While messy (and really, what good BBQ isn't?), it was Bliss on a Bun with a nice cold cole slaw and some grilled veg.

Porter-brined Pork Shoulder
(from Beer Advocate, Vol. II(IV) )


Ingredients:
For the brine:
1 c. kosher salt
½ c. dry malt extract (DME; can be found at your local home-brewing shop)
¼ c. black strap molasses
2 Tbsp. black peppercorns, whole
8 garlic cloves, peeled and minced
5 bay leaves, torn
3 carrots, peeled and chopped
2 celery stalks, chopped
1 yellow onion, peeled and chopped
5 c. Porter-style beer
3 c. water
2 qts. ice

To finish:
6 lbs. pork shoulder or butt, bone-in or boneless
Charcoal
Firewood (apple, oak, or almond)
Wood chips, preferably apple, cherry, and pecan
Liquid smoke (optional)

Brining:
In a large pot over medium heat, add the salt, DME, molasses, peppercorns, garlic, bay, carrots, celery, onion, Porter, and water. Stir occasionally until the mixture comes to a boil, then simmer for 15 minutes. Turn off the heat and let the mixture sit for 10 minutes to infuse the flavors.

Add ice to chill the brine to approximately 40 F. Transfer the cooled brine to a large container that will hold both the brine and the displacement of liquid from the pork, placeing a plate or some other heavy waterproof item atop the shoulder, weighing it down so that it is completely submerged in the brine. Refrigerate for 48-72 hours. The general rule of thumb is to brine 12 hours per 1 pound of pork.

Remove the pork from the brine at least 12-24 hours before cooking, still keeping it cool in the refrigerator. This will help the meat form a pellicle, which helps the smoke stick to its surface. Remove the pork shoulder from the refrigerator once you start prepping the coals.

Smoking:
If you have a wood fire smoker, start with 2 lbs. of charcoal in the coal box. In separate medium-size bowls, add ¾ lb. of each type of wood chip, adding enough water to cover the chips. Let them soak for 30-45 minutes.

Once the coals start to show a light layer of white ash on the outside, place a medium-size log of firewood onto the coals and seal the hotbox. Place a water pan under the grill rack and the pork on top. This will help keep a moist environment for the pork. Adjust your air intake and the amount of coal to keep the temperature between 250-275F. Check the coals, adding more firewood periodically, usually every 45 minutes. The pork will cook for 8-10 hours at this temperature.

After 6 hours, it is time to start layering the smoke flavors. Start by adding the apple wood soaked chips, a small handful at a time, every 20 minutes for an hour. Next, add the cherry wood chips in the same fashion at the apple wood chips. Finally, add the pecan wood chips, following the same procedure. The cooking time should be about 9 hours at this point. Thereafter, any remaining wood chips can be mixed together and added every 20 minutes as before.

This technique adds extra layers of smoke, creating a “smoke ring”. Just under the skin, a true sign of good barbeque. The pork should be dark, almost black in color, and should nearly fall apart at the touch of a fork or knife. Remove the pork from the smoker and transfer it to a platter, letting it sit wrapped in foil for 20-30 minutes to redistribute the juices.

Serving:
Once the meat has cooked, rested, and curiosity and hunger have outweighed the idea of waiting any longer: pull the pork apart into thin strips. Serve in a large bowl. The pork may be served as is, or mixed with barbeque sauce. Some prefer to chope the meat into small chunks, others slice the meat like a roast. Whatever approach you use, do not trim the smoky crust that holds most of the smoke flavor. Mixing it into the pulled meat brings the flavor of barbeque to the dish.

24 August 2008

Strawberry and Cream Bars


Usually I don't like to start a recipe from a mix, but I make an exception sometimes. This was one of those times. It was a late evening. I had a few glasses of wine and a very filling dinner. A movie was in the DVD player and Hubs was sprawled across our club chair. We were absolutely in for the evening. And I found this most interesting strawberry bar recipe, plus had (just by coincidence!) sugar cookie mix and a quart of strawberries begging to be used.

I am never one to sit still for a movie, not ever. Even if I have been dying to see it. We rarely go to the theater to see a movie, and that's because I can't just sit and watch. I need to be doing SOMETHING, whether self-pedicure-ing or idly flipping a magazine or reorganizing my closet (a favorite of mine, by the way).


Baking is my favorite movie activity, so baking I did. I couldn't resist. Plus: we were doing some Royals Gaming and tailgating the next day, with a great group of friends. Who would be happy to have some dessert to munch, right?

Yes, there was a pre-packaged mix involved. And these bars were fabulous, I loved them. Sweet and sturdy and bright red, a great way to highlight those summer strawberries. Hubs and I ate them (much hung over) the next day for breakfast as well as lunch. They travel well, and come together quickly. What more can you ask for??

Strawberry and Cream Bars


Ingredients:
1 pouch Betty Crocker® sugar cookie mix
1/2 c. butter, softened
1 egg
1 c. white vanilla baking chips (6 oz)
1 pkg. (8 oz) cream cheese, softened
4 c. sliced fresh strawberries
1/2 c. sugar
2 Tbsp. cornstarch
1/3 c. water
10 to 12 drops red food color, if desired

Heat oven to 350 F. Spray bottom only of 15x10x1- or 13x9-inch pan with cooking spray. In large bowl, stir cookie mix, butter and egg until soft dough forms. Press evenly in bottom of pan. Bake 20 to 25 minutes or until light golden brown. Cool completely, about 30 minutes.

In small microwavable bowl, microwave baking chips uncovered on High 45 to 60 seconds or until chips are melted and can be stirred smooth. In medium bowl, beat cream cheese with electric mixer on medium speed until smooth. Stir in melted chips until blended. Spread mixture over crust. Refrigerate while making topping.

In small bowl, crush 1 cup of the strawberries. In 2-quart saucepan, mix sugar and cornstarch. Stir in crushed strawberries and 1/3 cup water. Cook over medium heat, stirring constantly, until mixture boils and thickens. Stir in food color. Cool 10 minutes. Gently stir in remaining 3 cups strawberries. Spoon topping over filling. Refrigerate 1 hour or until set; serve within 4 hours. Store covered in refrigerator.

22 August 2008

Italian White Bean, Pancetta, and Tortellini Soup


I have been kicking this post around for awhile. There have been so many other lovely little sweets and treats I've made, that the soup just seemed too boring. There this post sat, started but not finished, a recipe and a few pictures just waiting for me to finally describe it and get it up. So guess what, soup - today is your lucky day.

It was nice and brothy (so not too filling), but the cheese tortellinis made it hefty enough to satisfy. The Swiss chard ROCKED, not usually a fan but it's a great flavor in this soup. Not to mention, this recipe is terribly easy, and for being a soup recipe - it really didn't heat up the kitchen like I thought it would on a sticky, humid August day. So delicious too, it's almost a shame it's so easy to throw together!

Yay, soup post done! I have many more treats in store in the coming days, they are a bit more easy to blog about ;)


Italian White Bean, Pancetta, and Tortellini Soup
(from Everyday Pasta, 2007)


Ingredients:
3 Tbsp. olive oil
1/4 lb. pancetta, chopped (thick-cut bacon also works)
3 shallots (or, 1 small yellow onion), chopped
1 carrot, peeled and chopped
3 garlic cloves, chopped
1 (15 oz) can cannellini beans, rinsed and drained
1 bunch of Swiss chard, chopped
8 c. chicken broth
4 c. water
1/2 lb. fresh or frozen cheese tortellini
Salt and pepper

In a large soup pot, heat the olive oil over medium-high heat. Add the pancetta, shallots/onion, and carrot and cook until the vegetables are soft and the pancetta is crisp, about 15 minutes. Add the garlic, beans, chicken broth and water and bring up to a boil over high heat. Toss in the Swiss chard and let it wilt, about 3 minutes.

Add the tortellini and reduce the heat to a simmer. Cook until the tortellini are tender (about 4 minutes for fresh, 8 minutes for frozen). Taste for seasoning and add salt and pepper if needed.

20 August 2008

Bittersweet Cupcakes with Cocoa Cream Cheese Frosting


When I was a little girl, all I wanted was a pet. A bunny, to be exact. Only, my mother had 11 kids and 5 fish in a tank so that was more than enough to care for, thank you very much. I wanted more, though.

Then when I was 10 years old, I discovered a family a few blocks down had bunnies. I stopped every day to visit these bunny rabbits, all fluffy and white and A TON of them all living in the same pen. One day, the lady of the house came outside to talk to me while I was stooped down in their front yard, admiring the bunnies. She told me I could have one if I wanted (and now I look back and laugh; she probably started with 2 cute rabbits who quickly multiplied). It was at that moment that I decided come hell or high water: I was getting a pet bunny. So I devised a plan to make a rabbit hutch myself, using some odd pieces of wood and chicken wire I found in our garage, then secretly keep a pet bunny, all my own.

It took my mom One Measly Day to discover the raggedy hutch I built behind the garage. She was very angry with me, oh definitely, but she couldn't turn the sweet defenseless rabbit away. And so Patty the Rabbit became a member of the family and lived in our house. She was the best pet ever, would hop around and willingly let me dress her up; she loved fresh parsley, and would sit on our feet, to keep our tootsies warm. Even my mom loved that bunny to bits.

The sad thing about rabbits is that they get nervous easily. When we moved to Kansas, the change was too much for my dear little rabbit, and one day she was gone. To this day, even though my family has had several more cats (even a dog!) as pets, my mom and I still have a deep love for those darn bunnies. Of course I have tons of bunny things, including these cute chocolate transfers that I used to make small bittersweet squares.

Er, where were we again? Oh, yeah. The food blog. So. The cupcakes were really good, not sweet but nice and rich. The frosting is plenty sweet, and added just what was needed (thanks Natalie for the cupcake recipe!). The bunny chocolates made the cupcakes spectacular though, obviously.

And Hubs said I can totally get a pet rabbit now that we have a house. Only on one condition, that I name him Stuart (that would be Stu for short, or rabbit stu/stew, to be exact). Smart ass.

Bittersweet Cupcakes
(adapted from Food & Wine)


Ingredients:
4 Tbsp. unsalted butter, at room temperature
1/4 c. vegetable oil
1/4 c. water
4 oz. bittersweet chocolate
1 c. all-purpose flour
1 c. granulated sugar
3/4 tsp. baking soda
1/8 tsp. salt
1 large egg
1/4 c. buttermilk
1 tsp. pure vanilla extract

Preheat the oven to 350 F. Line a 12-cup muffin tin with paper or foil liners.

In a medium saucepan, melt the butter with the vegetable oil, water, and bittersweet chocolate over low heat.

In a large bowl, sift the flour with the sugar, baking soda, and salt. Add the melted butter mixture and beat with a handheld mixer at low speed until smooth. Add the egg and beat until incorporated, then add the buttermilk and vanilla and beat until smooth, scraping the bottom and side of the bowl. Pour the batter into the lined muffin tins, filling them about three-fourths full.

Bake the cupcakes in the center of the oven for about 25 minutes, until springy and a toothpick inserted in the center comes out clean. Let the cupcakes cool slightly, then transfer them to a rack to cool completely. Frost and top the cupcakes as desired.

Cocoa Cream Cheese Frosting
(adapted from Ina Garten)

Ingredients:
16 oz. cream cheese (room temperature)
2 1/2 sticks unsalted butter (room temperature)
2/3 lb. confectioners' sugar, sifted
1/3 c. cocoa powder (unsweetened, not Dutch processed)
1 tsp. pure vanilla extract

Combine the butter, cream cheese, sugar, cocoa, and vanilla in the bowl of an electric mixer fitted with the paddle attachment, mixing just until smooth.

17 August 2008

Strawberry Cupcakes with Cream Cheese Frosting


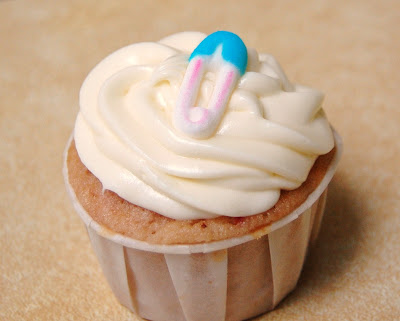
If you haven't already guessed, I made these sweet little cupcakes for a baby shower. It is mind-boggling how many pregnant women I know at this moment, but sadly the only time I've been invited to provide the dessert for any of the lucky ladies would be for my two darling coworkers, A. and D. I didn't want to let them down, so searched the Interweb far and wide for a recipe that would be just like them: understated, elegant, and sweet as can be. Enter: Martha (and aren't we all just on a first name basis with the old gal, honestly?).

I changed Martha's recipe a bit, doubling the strawberries and adding a touch of honey to sweeten them up before adding to the batter. While the cupcakes still only had the faintest hint of a pink color, the flavor was sublime. I loved these little cupcakes, not too coyingly sweet and yet the strawberry flavor really came through. Plus, they were super moist. I can only imagine how good they would also be if you substituted the strawberries for fresh peaches, or raspberries, or blueberries, or lime...

Strawberry Cupcakes
(adapted from Martha Stewart)


Ingredients:
1 1/3 c. whole fresh or frozen strawberries, thawed
1 Tbsp. honey
1 1/2 c. all-purpose flour, sifted
1 tsp. baking powder
1/4 tsp. coarse salt
1/4 c. whole milk, room temperature
1 tsp. pure vanilla extract
1/2 c. (1 stick) unsalted butter, room temperature
1 c.sugar
1 large egg, room temperature
2 large egg whites, room temperature

Preheat oven to 350 F. Line a 12-cup muffin tin with cupcake liners; set aside.

Place strawberries and honey in a small food processor; process until pureed. You should have about 2/3 cup of puree, add a few more strawberries if necessary or save any extra puree for frosting; set aside.

In a medium bowl, whisk together flour, baking powder, and salt; set aside. In a small bowl, mix together milk, vanilla, and strawberry puree; set aside.

In the bowl of an electric mixer fitted with the paddle attachment, cream butter on medium-high speed, until light and fluffy. Gradually add sugar and continue to beat until well combined and fluffy. Reduce the mixer speed to medium and slowly add egg and egg whites until just blended.

With the mixer on low, slowly add half the flour mixture; mix until just blended. Add the milk mixture; mix until just blended. Slowly add remaining flour mixture, scraping down sides of the bowl with a spatula, as necessary, until just blended.

Divide batter evenly among prepared muffin cups. Transfer muffin tin to oven and bake until tops are just dry to the touch, 22 to 25 minutes. Transfer muffin tin to a wire rack and let cupcakes cool completely in tin before icing.

Cream Cheese Frosting
(from Ina Garten)

Ingredients:
2 pkgs. (16 oz. total) cream cheese, at room temperature
2 1/2 sticks unsalted butter, at room temperature
2/3 lb. powdered sugar, sifted
1 tsp. vanilla

Combine cream cheese and butter thoroughly. Add sifted powdered sugar, and beat until combined. Beat in vanilla.

13 August 2008

Deep Chocolate and Peanut Butter Ice Cream


I met my husband at an ice cream store.

To be more exact, I met my husband during college, when we both worked at a local ice cream store. While I am more than happy to keep the husband I found while working there, I am sad to admit I lost any craving for ice cream. When you drag your tired body home to your teeny college apartment late every night, covered up to the elbows in dried ice cream and smelling slightly of sour milk, you kinda lose your taste for the stuff.

Even though it has been several years since my time spent scooping ice cream for a living, I still can only eat it a few times a year (my addiction to Sylas and Maddy's notwithstanding). My dear husband, though? He could eat it all the live long day. And his absolute favorite is "anything with chocolate and peanut butter".


I decided this summer, after experiencing the first of probably many long hot, sweltering summers in my kitchen, that ice cream is something that might be worth making at home (love ya, kitchen, but man between the stove and skylight it gets mad-hot). The first recipe I gave a shot, in honor of that dear man of mine, is this rich chocolate and peanut butter concoction.

I mixed things up a bit with David Lebovitz' original recipe, and really like how it turned out. Deeply rich chocolate and peanut butter, studded with bits of nuts from the peanut butter. Mmmm. While I'm not a huge fan, if all homemade ice cream is this creamy and rich, I might just come back around to the stuff.

Deep Chocolate and Peanut Butter Ice Cream
(adapted from The Perfect Scoop, 2007)


Ingredients:
2 c. heavy cream
3 Tbsp. unsweetened Dutch-process cocoa powder
5 oz. bittersweet chocolate
1/3 c. creamy peanut butter
1 c. whole milk
3/4 c. sugar
Pinch of salt
5 large egg yolks
1/2 tsp. vanilla extract
1/3 c. chunky peanut butter (for end of freezing)

Warm 1 c. of the cream with the cocoa powder in a medium saucepan, whisking to thoroughly blend the cocoa. Bring to a boil, then reduce the heat and simmer at a very low boil for 30 seconds, whisking constantly. Remove from the heat and add the chopped chocolate and peanut butter, stirring until smooth. Then stir in the remaining 1 c. of cream. Pour the mixture into a large bowl, scraping the saucepan as thoroughly as possible, and set a mesh strainer on top of the bowl.

Warm the milk, sugar, and salt int he same saucepan. In a separate medium bowl, whisk together the egg yolks. Slowly pour the warm milk into the egg yolks, whisking constantly, then scrape the warmed egg yolks back into the saucepan.

Stir the mixture constantly over medium heat with a heatproof spatula, scraping the bottom as you stir, until the mixture thickens and coats the spatula. Pour the custard through the strainer and stir it into the chocolate mixture until smooth, then stir in the vanilla. Stir until cool over an ice bath.

Chill the mixture thoroughly in the refrigerator, then freeze it in your ice cream maker according to instructions. During the final few minutes of churning in the ice cream maker, add the remaining chunky peanut butter.

11 August 2008

Saffron Orzo with Shrimp


This dish seems a bit decedent, given the sheer amount of saffron in it. But: I had a small container of the stuff that was getting a bit long in the tooth, so using it up all at once wasn't an issue. It sounded so good, and I was on an orzo kick, so it was a perfect choice for a weekday meal.


My orzo was thick, for some reason the liquid I boiled the orzo in boiled down quickly, so that when the actual orzo was cooked there was a risotto-like texture to it. I loved the way it came out, though.

To me, the taste of saffron is one that is hard to describe; instead I'll try to just say how this overall dish came out: thick and creamy, slightly tart, fresh-tasting from the parsley, with a very heavy essence of saffron. Helpful, yeah. How would you describe that saffron flavor, anyway? Almost like licorice, sorta like rosewater, but musky. Maybe I should just say it tastes like the 70s, but in a good way ;) At any rate, this is a great little dish. Give it a shot.


Saffron Orzo with Shrimp

(from Everyday Pasta, 2007)


Ingredients:
4 c. reduced-sodium chicken broth
1 tsp. saffron threads
1 lb. orzo
6 Tbsp. olive oil
1/4 c. chopped fresh flat-leaf parsley
Juice of 1 lemon
3 tsp. salt
2 tsp. black pepper
1 lb. large shrimp, peeled and deveined

In a large pot, bring the chicken broth to a boil over high heat. Reduce the heat to low, bringing the broth to a simmer. Add the saffron, stir, and simmer until the saffron has bloomed, about 5 minutes.

Return the heat to medium and bring the stock to a boil, then add the orzo and cook until tender but still firm to the bite, stirring occasionally, 8 to 10 minutes. Drain the orzo and transfer to a large bowl. Add 3 Tbsp. olive oil, the parsley, half the lemon juice, 2 tsp. salt, and 1 tsp. pepper. Combine thoroughly.

In a bowl, toss the shrimp with 1 tsp. salt, 1 tsp. pepper, and the remaining lemon juice. Heat the 3 Tbsp. olive oil in a medium skillet over medium-high heat. Add the shrimp in a single layer and cook until the shrimp are just turning pink, about 2 minutes per side. Add the shrimp to the bowl with the orzo. Toss to combine and serve.

09 August 2008

Southwestern Quiche


I have a soft spot for the Southwest, that food in New Mexico is just fabulous. Chiles so abundant that the entire upper third of your body feels on fire, and your eyes start watering. And yet, the dishes still have so much flavor. Every once in awhile, I just crave something chock-full of chiles.

When this craving hits, I tend to turn to a cookbook my parents bought for me on their last trip to Albuquerque. This time, I wanted to try something a bit different, rather than the usual tamales and rellenos. This cookbook has a TON of breakfast dishes that sound good, so I finally settled on the Southwestern Quiche.


I made a few slight changes to the recipe (why waste good sirloin when I have some lovely chorizo sitting around?), it still turned out great. Heat comes from the spices and green chile, and the chorizo. But the egg mixture, cheeses, and a healthy dollop of sour cream help to mellow things out quite a bit (so this recipe is still great for small kids). So, no “nose running” this time, but still a lovely dish.

Cravings finally subdued for another day. Next time perhaps I’ll try the carne adovada…

Southwestern Quiche
(from Simply Simpatico)


Ingredients:
1 unbaked 9" pie shell
1 egg white, lightly beaten
1 Tbsp. oil
8 oz. chorizo
1 1/2 tsp. paprika
1/4 tsp. chili powder
1 larg onion, chopped
1 large garlic clove, crushed
1 1/2 c. grated Monterey Jack cheese
1 c. sour cream
3/4 c. chopped green onion
1 (4-oz) can chopped green chiles
3 eggs, beaten
1 tsp. salt
1/4 tsp. pepper
Sour cream, sliced avocado, salsa (for garnish)

Preheat oven to 400 F. Brush pastry shell with egg white and bake 5 minutes. Cool. Turn oven down to 325 F.

Heat oil in large skillet over medium-high heat. Add chorizo, paprika, chili powder, onion, and garlic to skillet and brown well. Remove from heat and cool down slightly.

Combine meat mixture, cheese, sour cream, green onion, chiles, eggs, salt, and pepper and mix well. Turn into pastry shell and spread evenly. Bake 60 minutes or until filling is set and crust is nicely browned.

Cool slightly, then slice and serve. Top with a dollop of sour cream and salsa, and avocado slices.

07 August 2008

Blueberry Snickerdoodles

I have a confession to make. While I think snickerdoodles are a very pretty cookie, I rarely make them. First off, cinnamon is fine but I am not IN LOVE with it. Fine for Christmas things and with raisins and all of that, but otherwise I don’t feel the need to add it to things.

Secondly, snickerdoodles always seem so… well, for lack of a better term, plain. Sure the cookie dough base is a classic, allowing the vanilla and butter flavors to really come through, but still. Snickerdoodles are not what I immediately think of when I want a cookie. In fact, they are usually at the bottom of the list. I need a little more pizzazz, something interesting.


One weekend, I decided to finally make snickerdoodles, but also wanted to change things up a bit. What to do, what to do. I idly poked through the cabinets trying to find the answer… Then I came upon the package of Trader Joes dried blueberries that my sis Anne had sent me. I had been saving them for something special (we don’t have a Trader Joes here, sadly). Well, if spicing up a boring cookie isn’t special enough, I don’t know what is.
It was such a simple change, and yet it made such a huge difference. The soft, chewy little blueberries burst in your mouth, and work so well with the cinnamon. It’s like your favorite blueberry cobbler in cookie form! I gave most of the cookies away (as per my usual procedure), but kept about half a dozen at the house. They are perfect for a quick breakfast in the mornings. : )


Blueberry Snickerdoodles
(adapted from Capree's recipe)


Ingredients:
1 c. butter, softened
1 1/2 c. white sugar
2 eggs
2 tsp. vanilla extract
2 3/4 c. all-purpose flour
2 tsp. cream of tartar
1 tsp. baking soda
1/4 tsp. salt
1/4 tsp. cinnamon
2 c. dried blueberries
2 Tbsp. white sugar
2 tsp. ground cinnamon

Preheat oven to 400 F.

Cream together butter and 1 1/2 c. sugar until pale and fluffly. Add the eggs, one at a time, until well mixed, then add the vanilla. Sift together the flour, cream of tartar, soda, salt, and 1/4 tsp. cinnamon. Add to dry ingredients, then stir in dried blueberries. Shape dough by rounded spoonfuls into balls.

Mix the 2 Tbsp. sugar and 2 tsp. cinnamon. Roll balls of dough in mixture. Place 2 inches apart on ungreased baking sheets.

Bake 8 to 10 minutes, or until set but not too hard. Remove immediately from baking sheets.

03 August 2008

Chocolate Chip Zucchini Cake


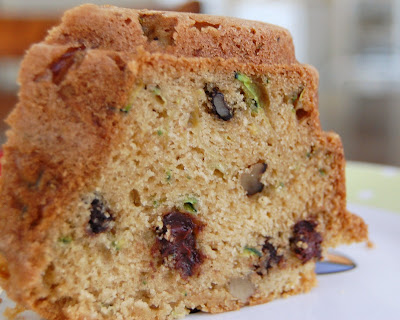
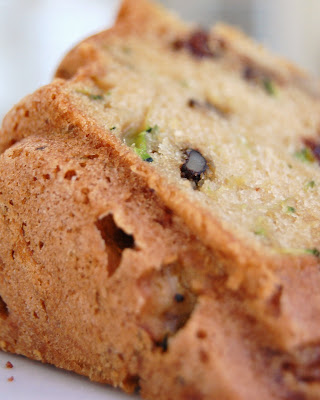
This is my sister Beah’s zucchini cake recipe, and it’s the best. She gave the recipe to me once, years ago, but of course like the moronic little sister that I am, I lost it. She was nice enough to offer me a new copy, though, so I was able to whip this up just in time for her birthday.


Beah is one year older than me. From the time I could toddle around with her, we played, ate, and schemed together. She talked me into eating green strawberries until I made myself sick. We were partners in crime, and got ourselves in trouble constantly - like the time we were little and stripped down naked, doused ourselves in baby oil, and went outside to “sun bathe”. Yeah, in the front yard. And then our mother came sprinting out to get us and spank us. And we ran around the yard, my mom grabbing at our limbs, and us slipping away like greased pigs.

We also carefully planned and then ran away from home together, to live under the neighbor’s willow tree, because it was always dry under there. Beah was the one who taught me how to write my name, and broke the news that Santa wasn't real, and hid in the bathroom with me when our new little siblings cried too loud and freaked us out.

When I had to stay in the hospital when I was 3 or 4 years old, my parents (one at the hospital with me, one at home with the other kids) put Beah and I on the phone with one another, and all we did was sob and wail out each others’ name every once in awhile. For us, it was no picnic to be away from our sister.


Of course, it wasn’t all blissful sisterly love. We did the other usual sister things: argued, called each other names, pulled each others hair. We always shared a room and found plenty of ways to constantly invade each others personal space. I especially liked to rile her up by borrowing her clothes (without asking, of course). What can I say though? The girl had good taste.

There were a few Big Fights that will go down in family history, including one incident moments before she walked out the door for her high school graduation ceremony. Little did anyone know, she sat through her graduation with head held high and gigantic holes torn in her panty hose, while I sat with my parents with a raging headache from all the hair pulling. But when it was over we sat in the family room and inspected the very sad state of her panty hose, snickering. All hard feelings forgotten. That’s how it usually went.


Once past that painful high school age, we fell right back into being friends again. In college we discussed boyfriends and cleaning techniques, favorite TV shows, complained about roommates, whatever. Got each other through our ex-boyfriends, our wedding days; I stayed with her for awhile when she had her babies. And even though I spend my time sipping cocktails with my husband at swanky restaurants while her life is all sippy cups and potty training, we are closer than ever. We have too much shared life between us to be otherwise.


So for Beah: I baked your own cake for you. Which, you know, you can obviously make yourself and in fact tastes better when you make it. But anyways. Happy Birthday, and see you soon. Love you bunches you butt face.

Chocolate Chip Zucchini Cake
(from Beah)


Ingredients:
2 1/2 c. all-purpose flour plus additional for dusting
1 tsp. baking soda
1/2 tsp. baking powder
1/2 tsp. salt
2 sticks unsalted butter, softened
1 c. packed light brown sugar
1 tsp. vanilla
3 large eggs at room temperature
2 c. coarsely grated zucchini (8 oz)
1 c. semisweet chocolate chips
1/2 c. walnuts, toasted and chopped

Preheat oven to 350 F. Butter bundt pan well and dust with some flour, knocking out excess.
Sift together 2 1/2 cups flour, baking soda, baking powder, and salt into a bowl. Beat together butter and brown sugar in a large bowl with an electric mixer at high speed until pale and fluffy, about 3 minutes, then beat in vanilla. Reduce speed to medium and add eggs 1 at a time, beating well after each addition and scraping down side of bowl occasionally, then beat until very smooth and fluffy, about 2 minutes more.

Reduce speed to low and add all but 1/2 cup flour mixture, mixing until just combined.
Toss zucchini, chocolate chips, and walnuts with remaining 1/2 cup flour mixture and add to batter, then mix batter with a rubber spatula (batter will be thick).

Spoon batter into bundt pan, smoothing top. Bake in middle of oven, rotating pan halfway through baking, until side begins to pull away from pan and a tester comes out clean, 45 to 50 minutes total.

Cool cake in pan on a rack 30 minutes, then run a thin knife around outer and inner edges. Invert rack over pan, then invert cake onto rack. Cool completely.